

Google Search Console (formerly Google Webmaster Tools) is the most underused SEO tool available to website owners today. This free tool provided by Google allows site owners to connect their website content DIRECTLY to Google’s search engine.
Not only does Google Search Console help you supply Google with the best information regarding your website, it also provides insights into how your site is performing in Google searches. These insights are coming DIRECTLY from Google and are very easy to understand and provide a great foundation for making decisions for your SEO and SEM strategies moving forward.
There are two reasons why Google Search Console is so underused. The first reason is that many website owners simply do not know about it. The second reason is that it may be confusing for someone unfamiliar with website tools like Search Console to actually submit their site and successfully verify ownership.
In this tutorial, you will be guided step-by-step how to create a Google Search Console account, successfully verify ownership of your domain, and submit your website’s sitemap directly to Google to ensure your website is correctly indexed and it’s pages are available for Google to display in search results.
Step 1 — Login to Google Search Console
Visit the Google Webmasters website and click the green “Search Console” button.

If you are not logged in you will be redirected to a second page and need to click the “Start Now” button to be brought to the sign in screen. Click the blue “Start Now” button to be redirected.

Step 2 — Add Your Website to Google Search Console and Verify Ownership
After logging into Google Search Console, if you’ve never added a site before you will be met with a welcome screen, “Welcome to Google Search Console. To start, select property type.”
In order for your website to benefit from the tools in Google Search Console you need to verify that you own the domain. If you have access to your domain DNS settings, in almost all circumstances you will want to use the “Domain” option which will register all your property variations at one time. If you do not have access to edit your domain DNS settings, you can prove site ownership using the URL Prefix option which provides several methods for authenticating ownership.
Use the “Domain” option and type in your website URL “campaigndonut.com” and click continue. Your next step will be to take the text provided by Google Search Console and add create a new DNS record in your settings — a TXT file that places the record into the value field. Once you add the record, you’ll save your results and return to the “Verify domain ownership” screen.

It will take a few minutes (and even up to 24 hours) for your domain record to be visible to Google. Click the “Verify” button and if it doesn’t verify right away, wait 10-20 minutes and try again.
Once you have added your record and the site has been successfully verified, Google will display the “Ownership verified” message and you can click “Go To Property” to move forward.

Step 3 — Submit Your Sitemap for Indexing In Search Console
Most website include a sitemap which is a dynamic file that serves as a map for everything located on your domain. Providing Google with your sitemap allows Google to index all of your website content — not just the content its robots are able to find and scrape.
In addition, the sitemap provides structured data that Google’s algorithms can use to better interpret your content and make it available for the most appropriate searches.
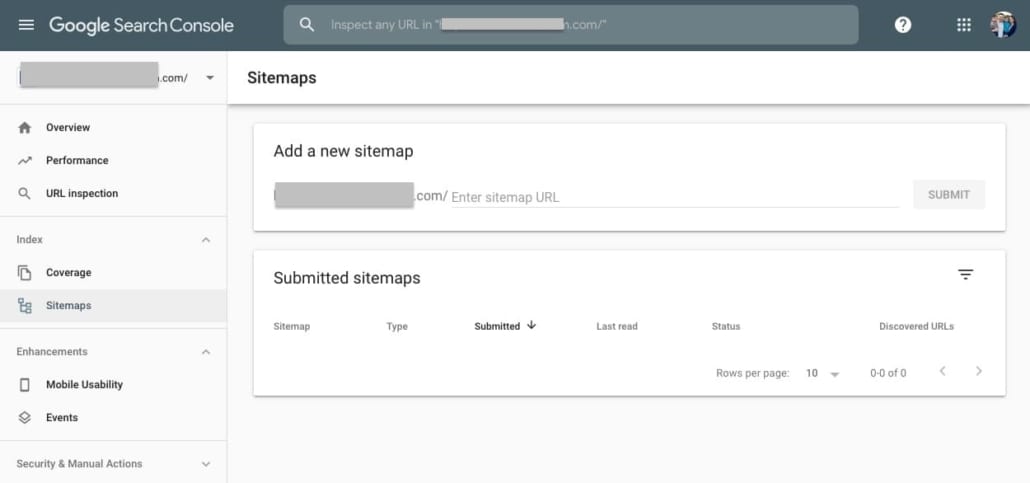
Click the hamburger menu in the left hand corner of the screen to reveal the menu and select “Sitemaps” several items down from the top.

When the screen loads you’ll be prompted with a view saying “Add a new sitemap”, and an empty text field to the left of your domain name. This is where you will place the sitemap url and click the “Submit” button.
- Find your sitemap on Squarespace
- Find your sitemap on WordPress (use Yoast SEO Plugin)
- Find your sitemap on Wix
- Find your sitemap on Weebly
- Find your sitemap on Webflow
After clicking submit, if the file appears correct, you will receive the message, “Sitemap submitted successfully. Google with periodically process it and look for changes. You will be notified if anything goes wrong with it in the future.”
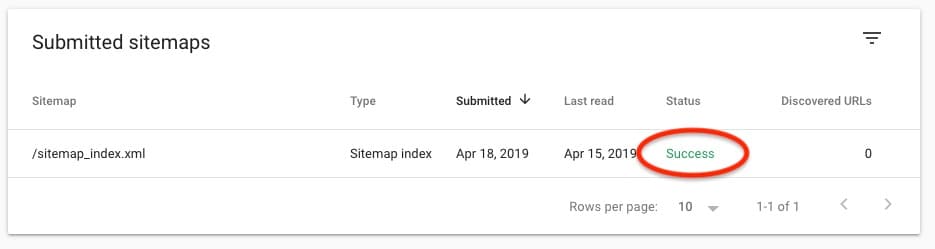
Depending on the amount of content you have published on your website, the sitemap could process in a matter of moments, all the way up to hours. Once it’s been successfully processed, you’ll see a green “Success” message in the status column. Once successfully submitted, your site context will be submitted for indexing for Google search results.
This is not a guarantee that your website will start showing up in Google search results. This is simply telling Google that your site exists and informing them what content is on your site and where it is located.
Step 4 — Troubleshoot Any Errors
One of the best things about Google Search Console is that it will reveal errors that might be occurring when attempting to index your site. Some of these errors not only mean certain pages on your site cannot be indexed, but can actually adversely impact your site’s overall ranking. In some instances you may see items being reported as errors in Google Search Console when in reality it is not an error. For instance, if you have certain directories on your website which you wish to block from index and prevent from showing up in searches, these can show as errors.
It is very important to resolve errors and in the cases where non-errors are being reported (i.e., blocked files) it is important to be aware of which are actual errors and which are not.

Questions?
If you have any question about adding your website to Google Search Console, submitting your sitemap to Google for indexing, or troubleshooting errors, send us a message or leave a comment below. In some cases we may be able to provide a quick solution, in other cases we may redirect you to either Google support or another resource.
At the end of the day we want you to feel empowered to create great digital marketing content, so let us know if we can help!