Appy Pie : How to get Client ID, Transaction Key, and API Login ID from Authorize.net Payment Gateway?
Follow steps below to easily get Client ID, Transaction Key, and API Login ID from Authorize.net Payment Gateway -
Step 1 : Go to Authorize.Net
Step 2 : If you are an Authorize.Net user, Sign In else, click the pricing menu and signup for an account.
Step 3 : On clicking Sign In, a dropdown menu will open. Select Merchants

Step 4 : Enter your credentials and Log In

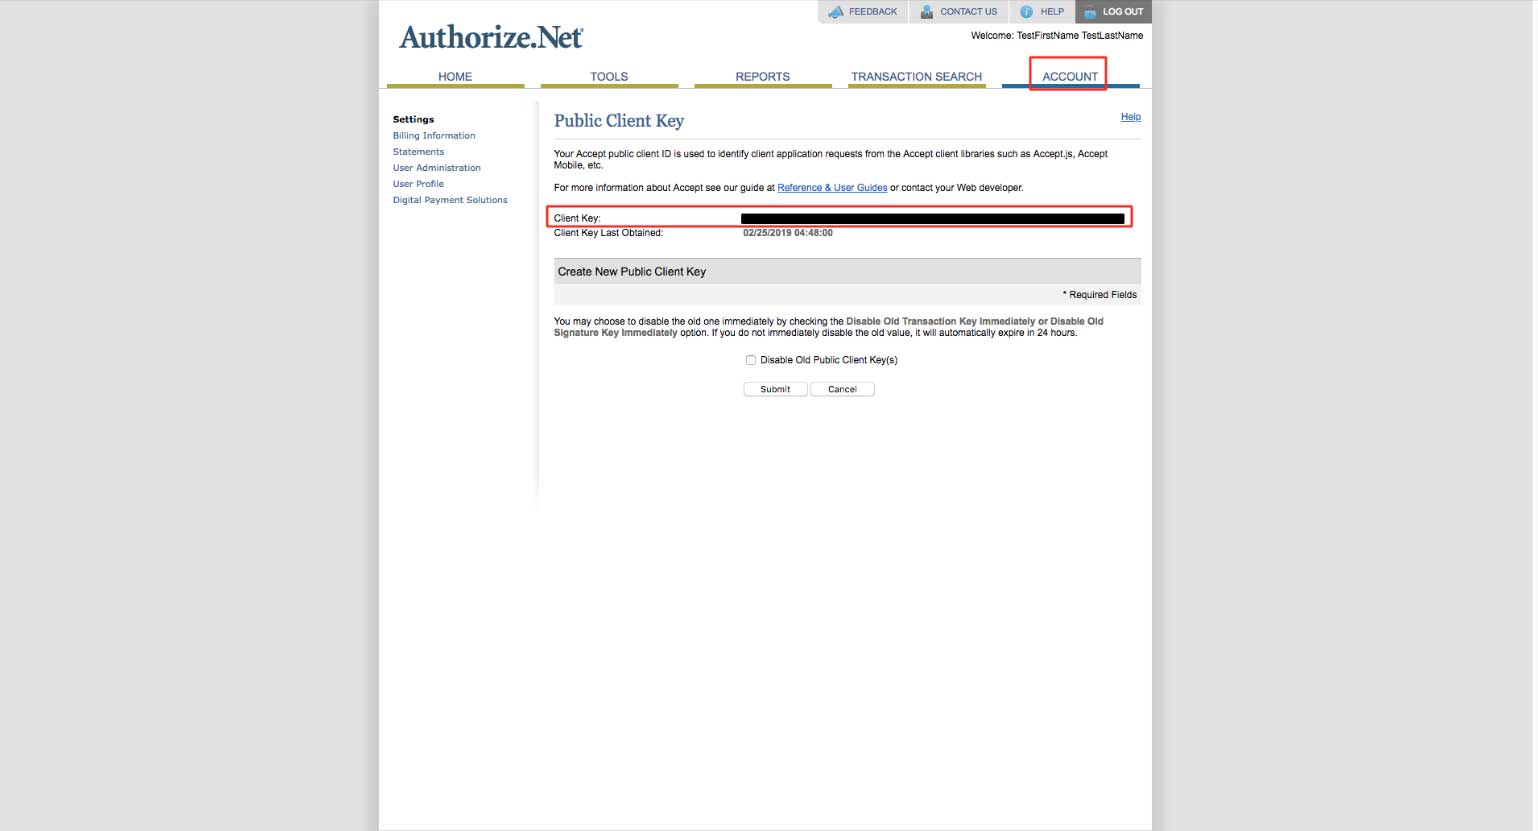
Step 5 : Click on Account tab

Step 6 : Click on Manage Public Client Key

Step 7 : Here is your Client Key, copy it
Step 8 : Click on API Credentials & Keys

Step 9 : Here is your API Login ID, copy it too. Now select New Transaction Key

Step 10 : Click on Submit

Step 11 : A popup window asking you to verify your identity will open. Check your email address and click on Request Pin

Step 12 : Copy and paste the received pin here

Step 13 : Click on Verify Pin

Step 14 : Click on Continue

Step 15 : Here is your Transaction Key. Copy it too

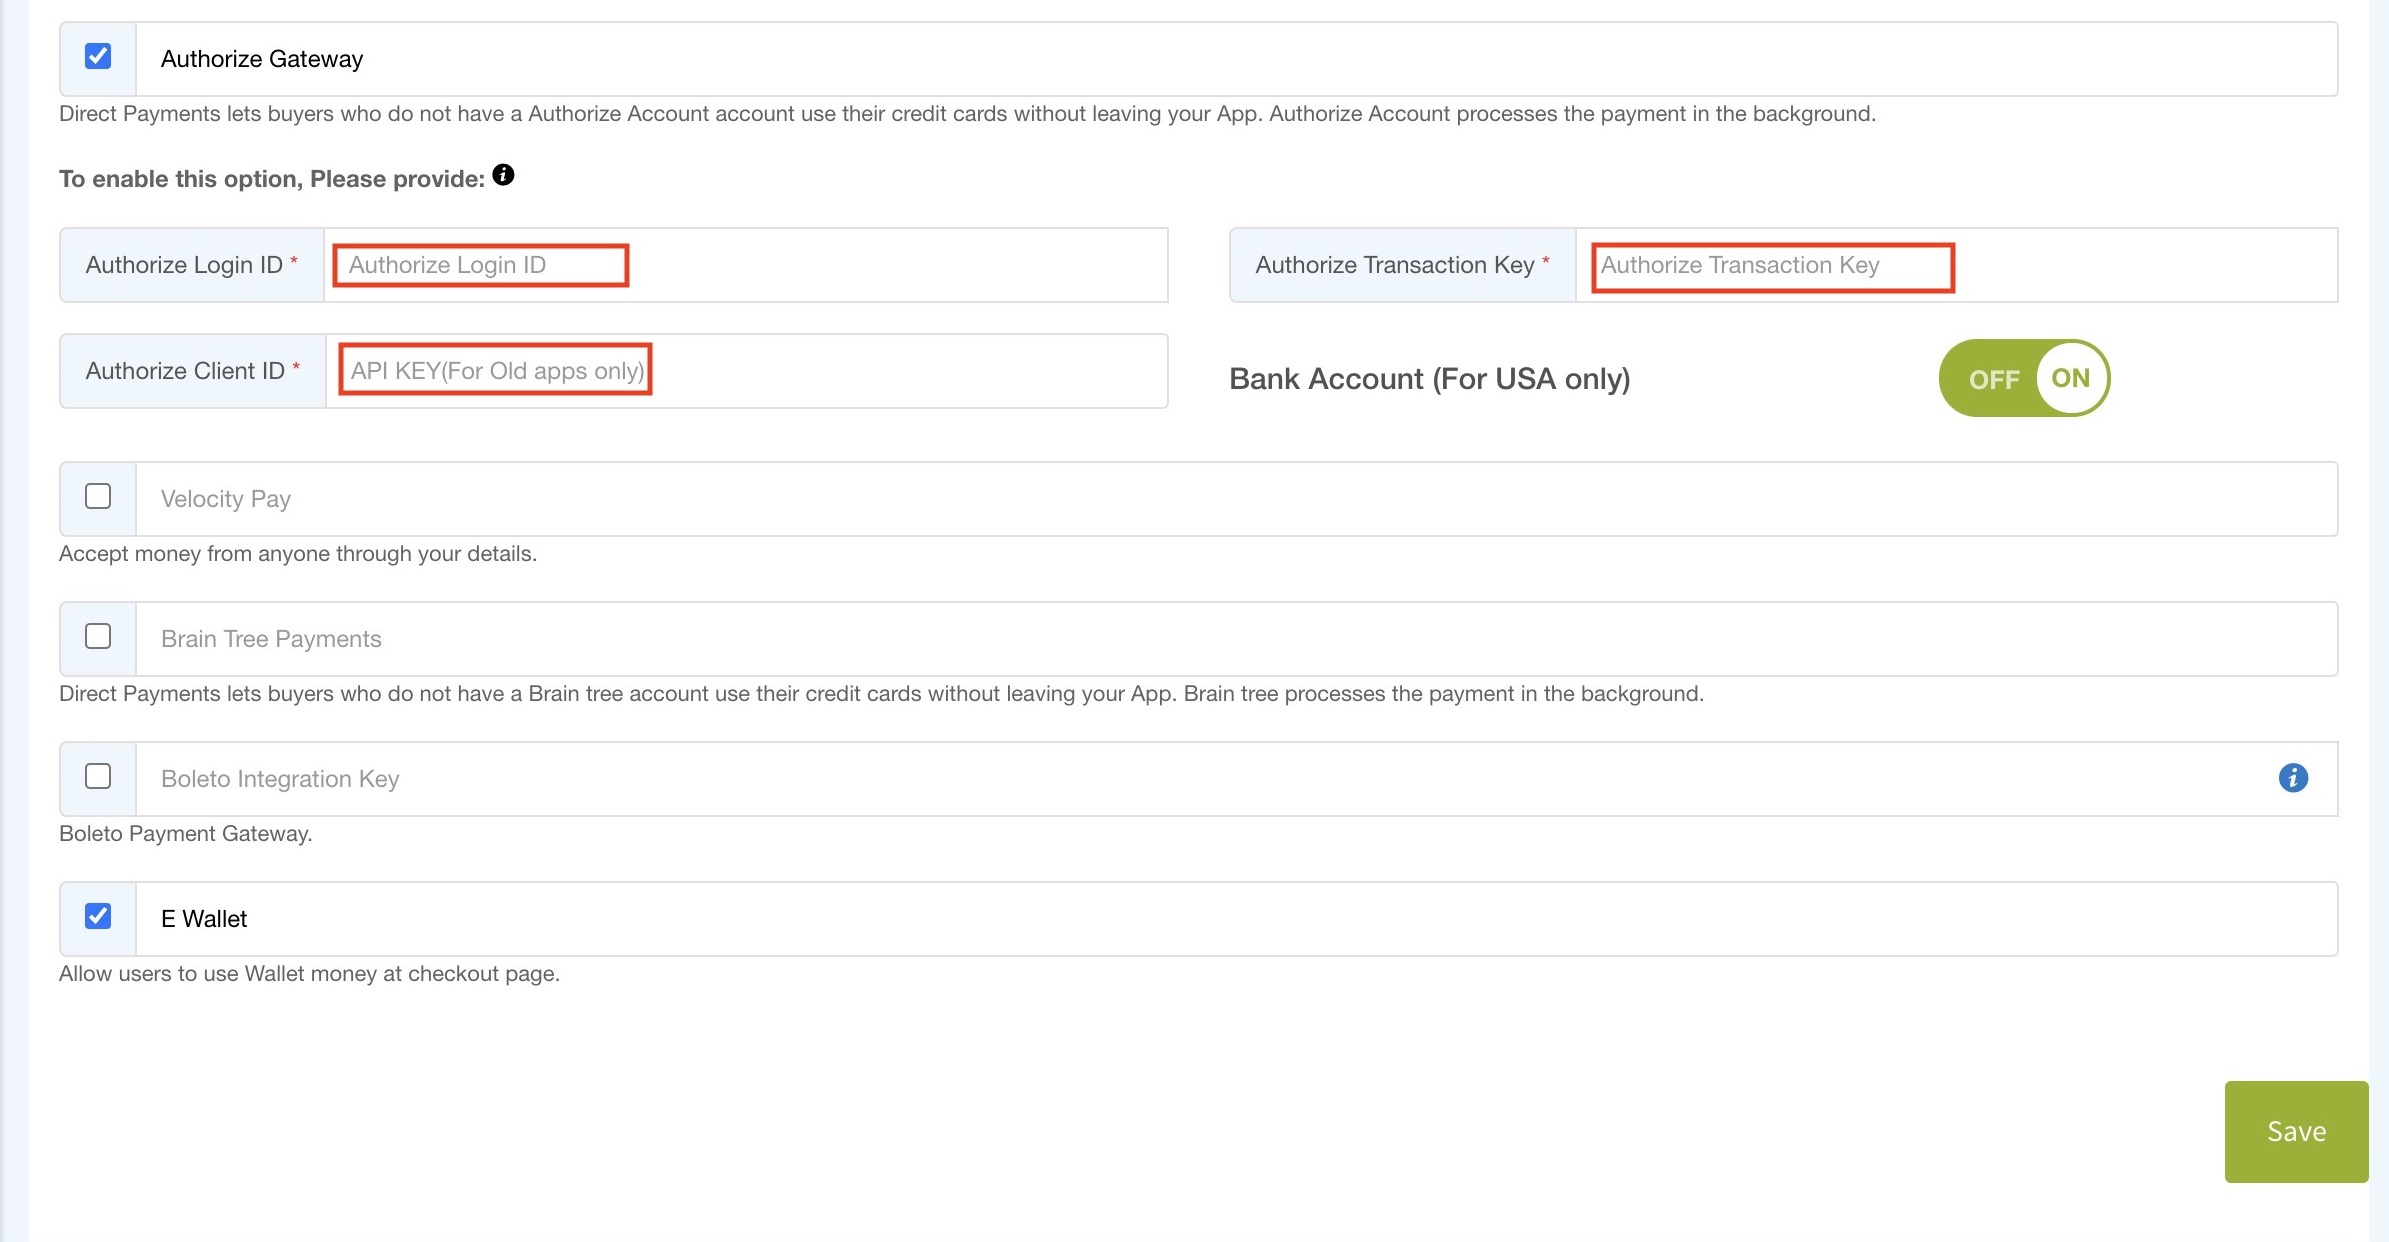
Step 16 : Now paste all the copied keys, Client ID, API Login ID, and Transaction Key in their respective fields on the creator software
Step 17 : Go back to the Account section of your merchant account. Click on Settings and then, click on Silent Post URL under the Transaction Format Settings section.
Note: The following steps serve the purpose to receive transaction updates.

Step 18 : In the URL text field, paste the below URL and click on Submit.
https://api.appexecutable.com/V2AWS/webservices/CommonPaymentGateway/authorizenet/response.php
Step 19 : On the confirmation page, you can check that your Silent Post URL has been successfully applied.Go back to the Account section
Step 20 : Click on Webhooks under Business Settings.
Step 21 : Click on Add Endpoint.
Step 22 : Provide the following information:
- Name
- Endpoint URL. In the Endpoint URL field, paste the below URL: https://api.appexecutable.com/V2AWS/webservices/CommonPaymentGateway/authorizenet/response.php
- Status (Active or Inactive)- Select Active from the dropdown menu.
- Note: Only active status endpoints will receive notifications, however, you can test the inactive endpoints.
- Event Preferences- Select All Events from the options.

Step 23: Once done, click on Save.