
SHOWBIE
THE HEART OF THE DIGITAL CLASSROOM
-
TITLE PAGE
2 -
INTRODUCTION TO SHOWBIE
4 -
CREATING A CLASS IN SHOWBIE
5 -
CREATING YOUR FIRST ASSIGNMENT
6 -
UPLOADING FILES
7 -
USING THE SHARED FOLDER
8 -
SIGNING UP AS A STUDENT
9 -
ACCESS SHOWBIE FROM YOUR DESKTOP
10 -
SUPPORTIVE RESOURCES
11 -
CREDITS
12
Showbie is an app used by teachers to assign, collect, and review student work.
Showbie keeps student work organized by classes and assignments. At a glance, students can see their upcoming assignments and due dates so they can prioritize their work.

- Once logged in, tap the edit menu (wrench)
- Then tap the +
- Next, give your class a name by tapping the white box
Class Settings Details
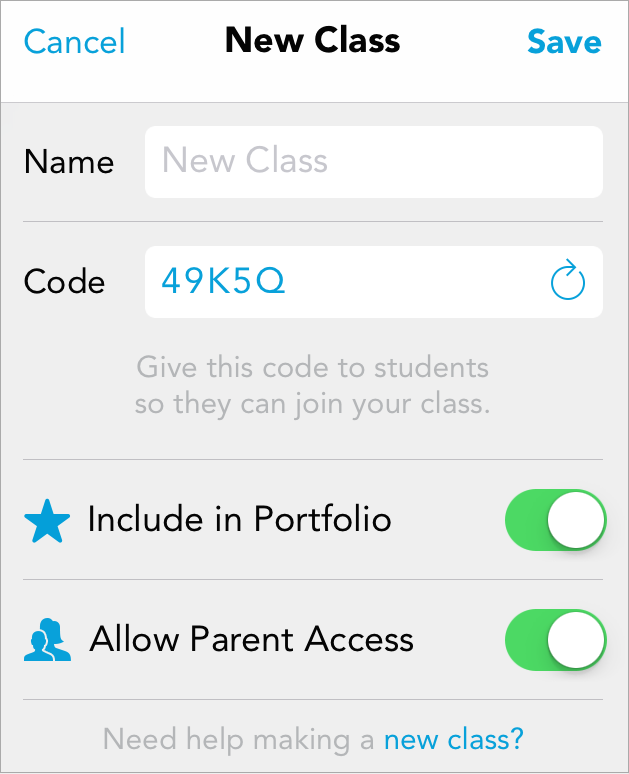
Name
Type the name of your class here – there’s no character restrictions so you can even include emojis!
Code
Students will be able to use class codes to join your class in Showbie. Tap on the refresh arrow to generate a new class code. You’ll receive an email of your class code but you can retrieve it in Showbie at any time. Learn more
Include in Portfolio
Let students select work in this class to include in their portfolio. Teachers will be able to curate student portfolios regardless of this setting. Learn more
Allow Parent Access
Parents will be able to see their child’s folder in this class. Otherwise, parents will only be able to see their child’s work in this class if it is included in their child’s portfolio. Learn more
Congratulations, you’ve created your first class in Showbie! Your students will need the class code to join your class, so feel free to make note of it now. The class code can be accessed later, so don’t fret if you forget what it is!
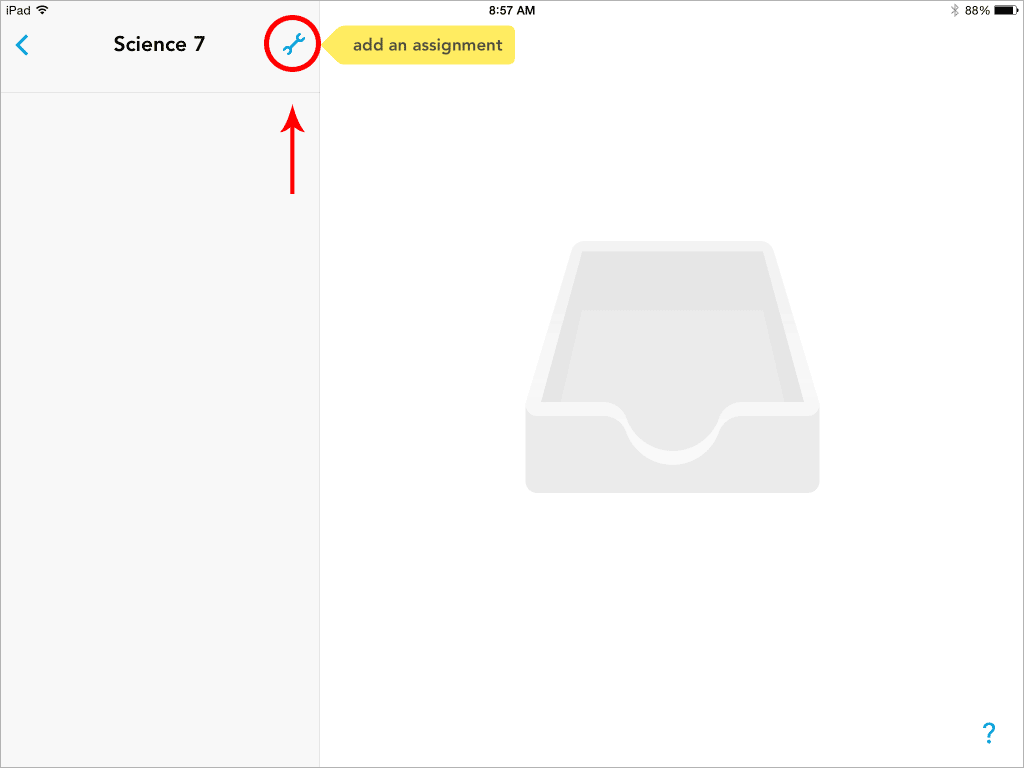
You’ve created a class and your class code is ready to go – now it’s time to set up an assignment!
Tap on your class, and then tap the edit menu (wrench):
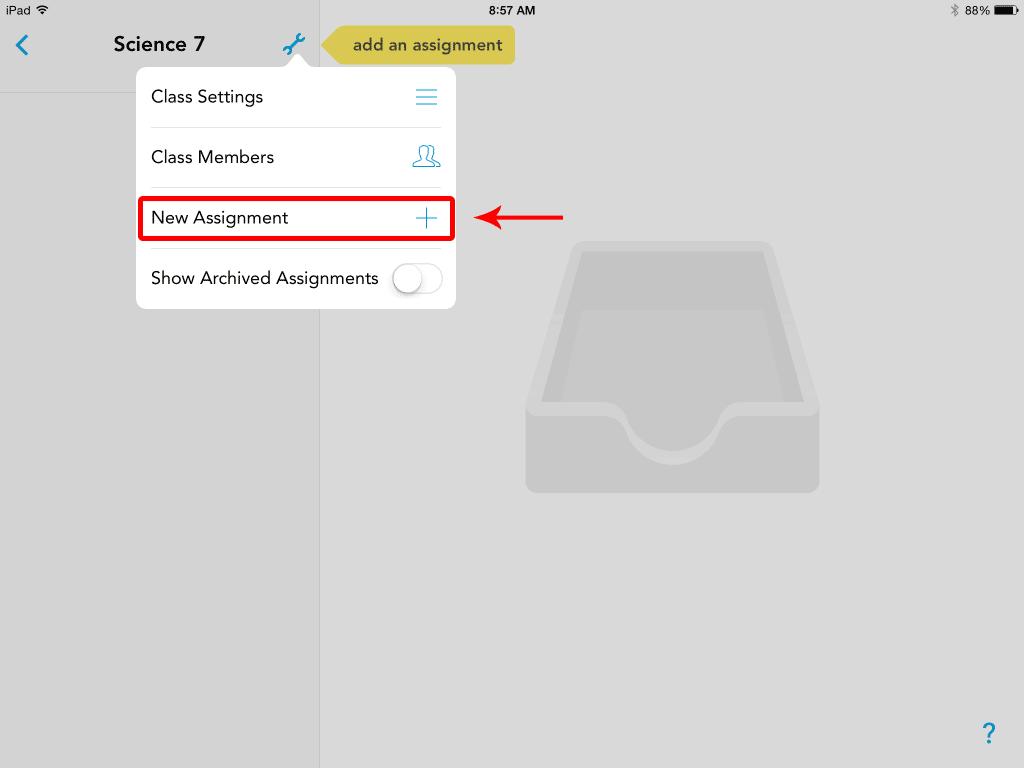
Tap New Assignment:
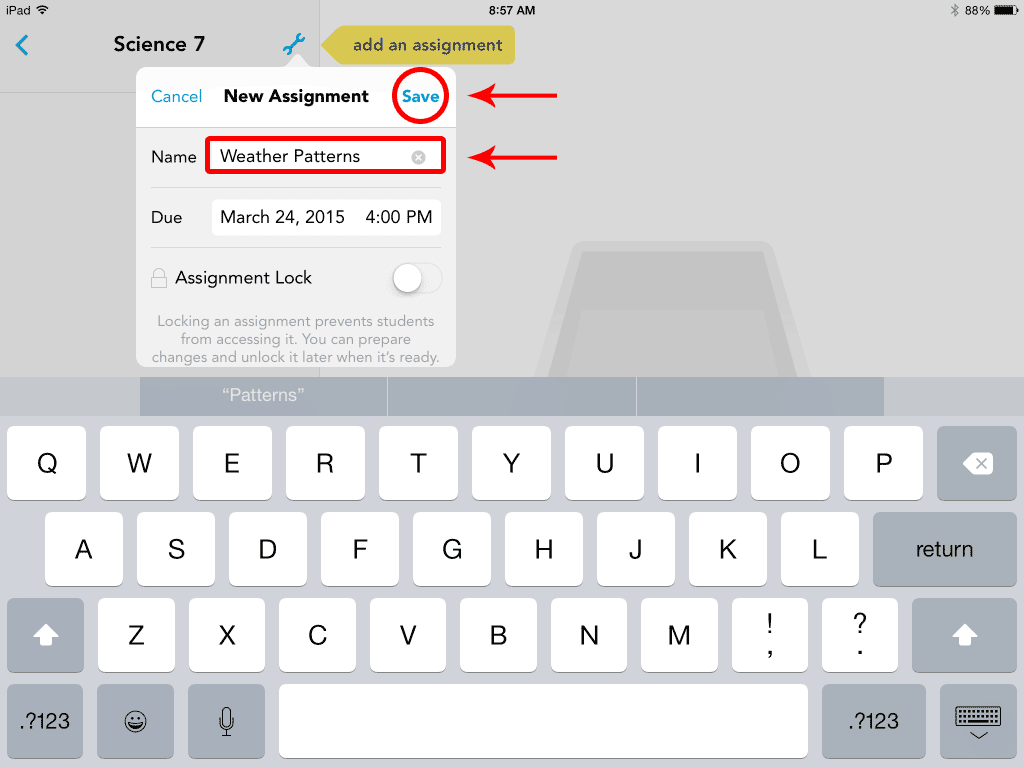
Type in your assignment’s title, set a due date and tap Save:
 Wonderful! You’re well on your way to an awesome workflow with Showbie!
You’ve created a class and an assignment, and your class code is ready to go – now it’s time to upload some files! There are many apps that work with Showbie to ensure that your workflow is nice and smooth. In this tutorial, we will look at some different ways to upload files to Showbie.
iPad
- Taking a picture
- Using the photo library
- Leaving a comment
- Creating a voice note
- Uploading a file from Google Drive/online cloud storage
- Uploading from another app
Web
Uploading from the Photo Library
- Tap the +:
- Tap Camera if you’d like to take a picture, or Photo Library if the image you need is already saved to your camera roll:
- Tap on the image you would like to upload:
- Make adjustments to the image if desired, then tap Done:
- The image will upload and be available for your students!
- Change the title of your document by swiping to the left:
- Create a new title by tapping the white box. Tap Done and your new new title will appear:
Uploading an Image or Document With the Web App
- Click the add file button
- Find the file you’d like to upload and click Open
- Confirm the name of your file and then click Post to finish the process
Wonderful! You’re well on your way to an awesome workflow with Showbie!
Now that you have created a class, it’s time to begin uploading assignments! The shared folder acts as a container where you can store resources that are seen by all students. With a few taps or clicks, all of your students can receive their work at the same time.
Begin by tapping on your class:
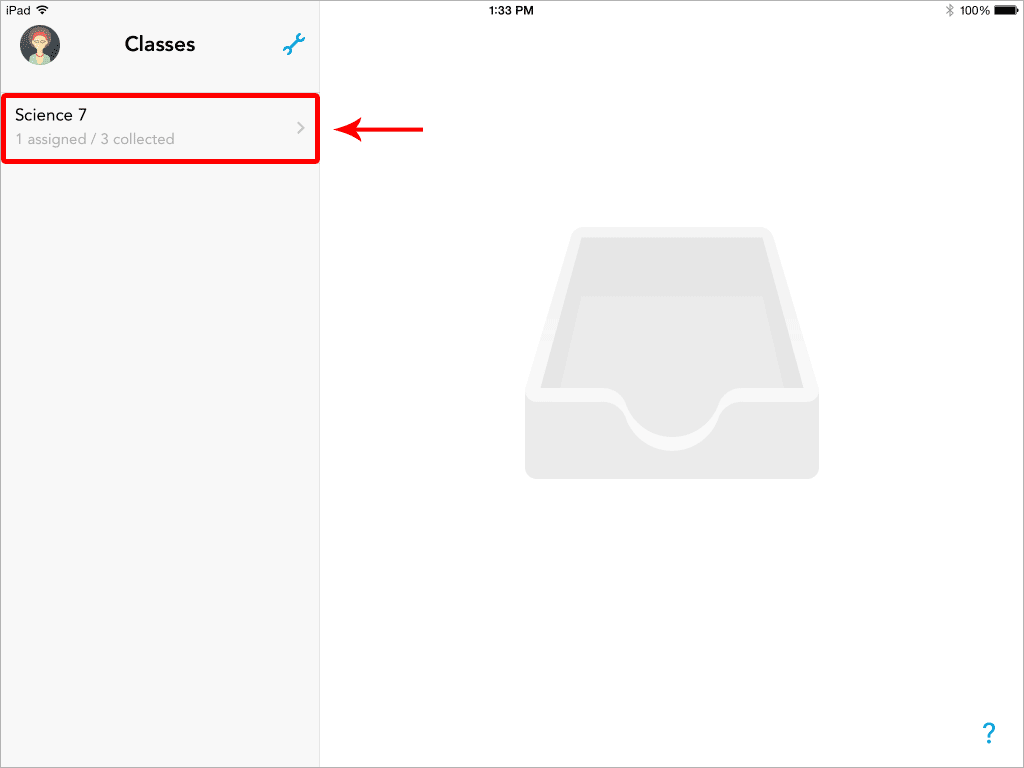
The shared folder appears at the very top of your student list, right below the class title:
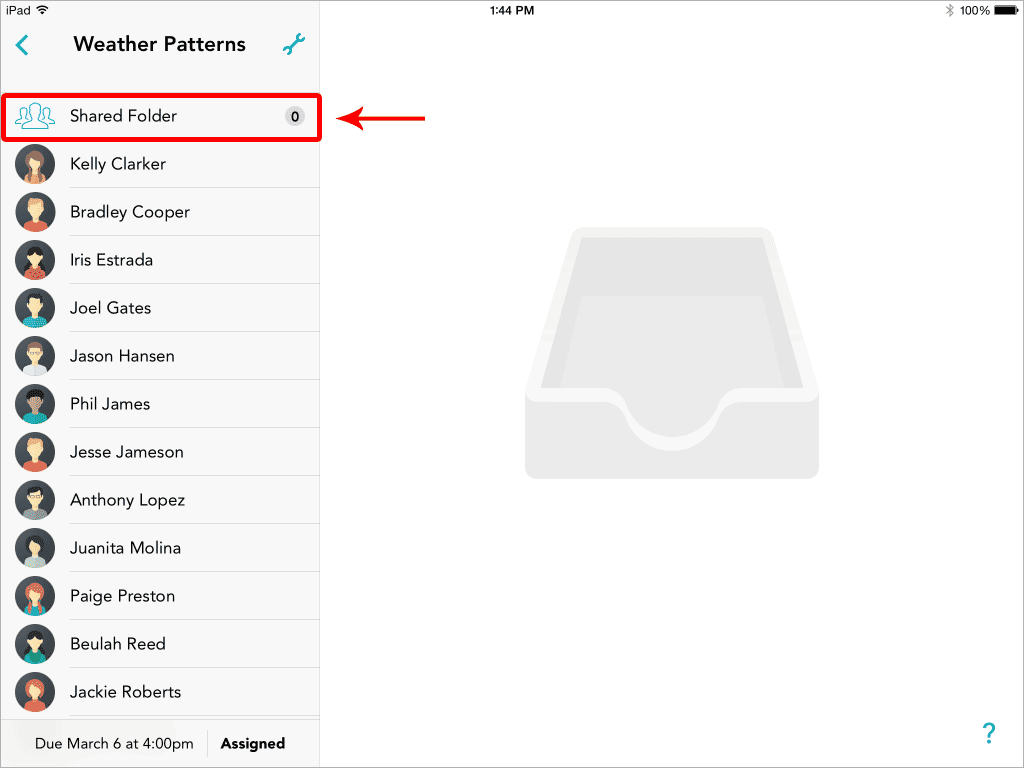
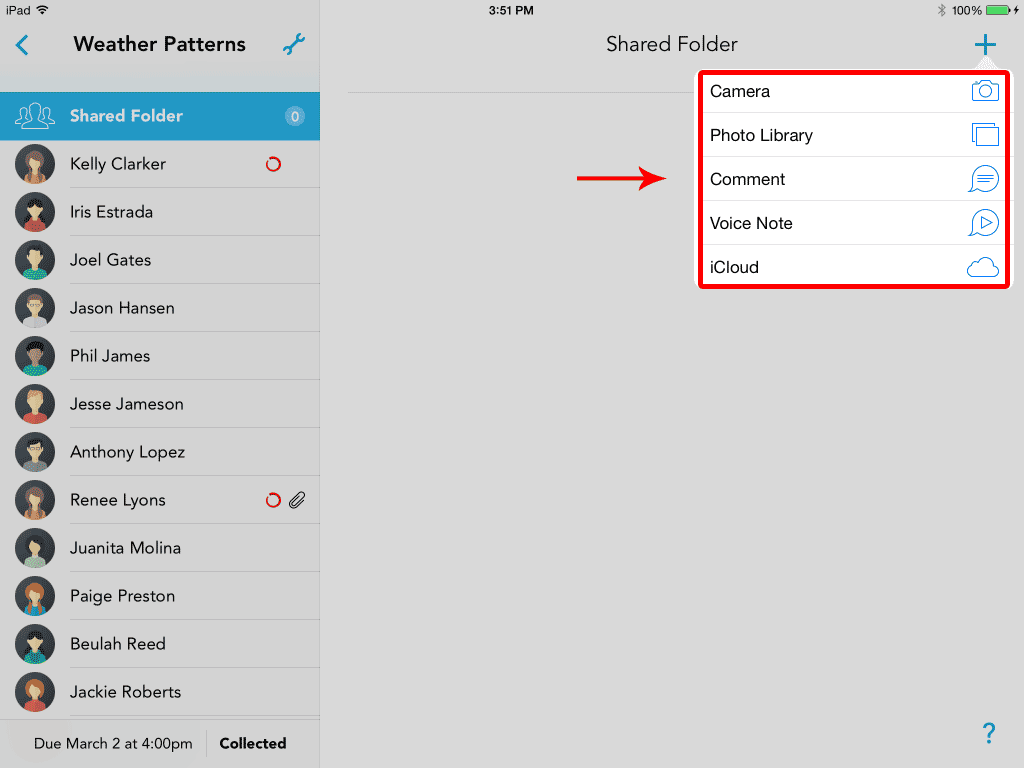
Click the +:
![]()
Choose an option:
Signing Up for a Free Student Showbie account is super easy, and can be accomplished on either an iPad, iPhone, iPod Touch or through your computer. Follow these steps to set up your account.
Via iOS
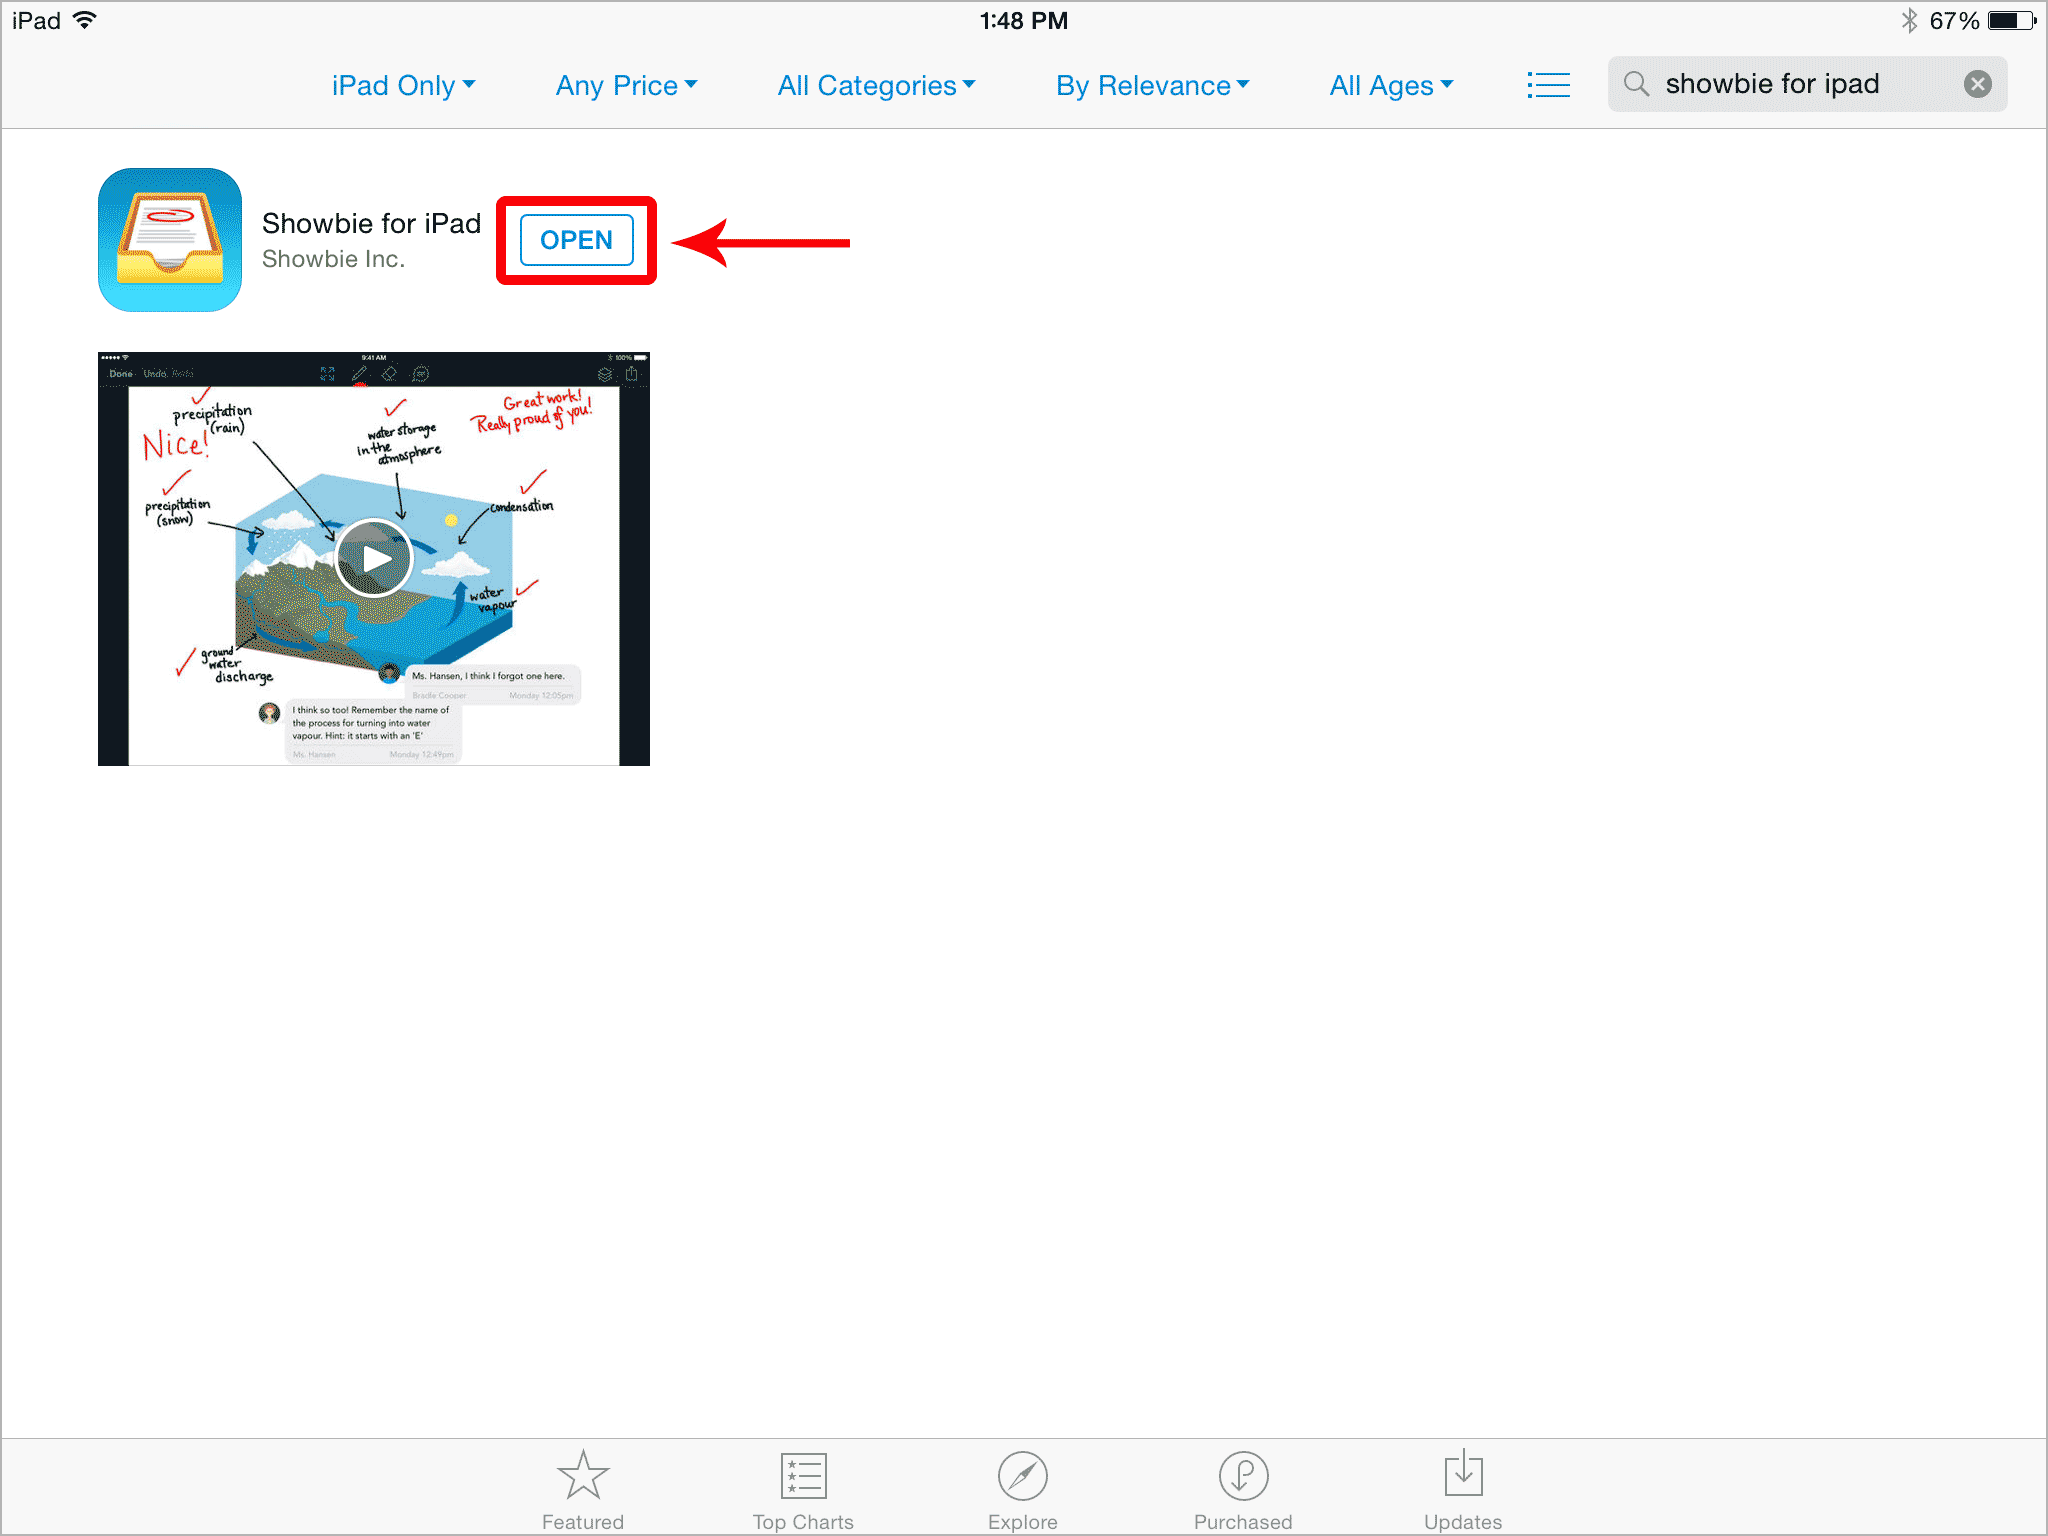
From your iPad, iPhone, or iPod Touch, download Showbie for free from the App Store and tap Open:
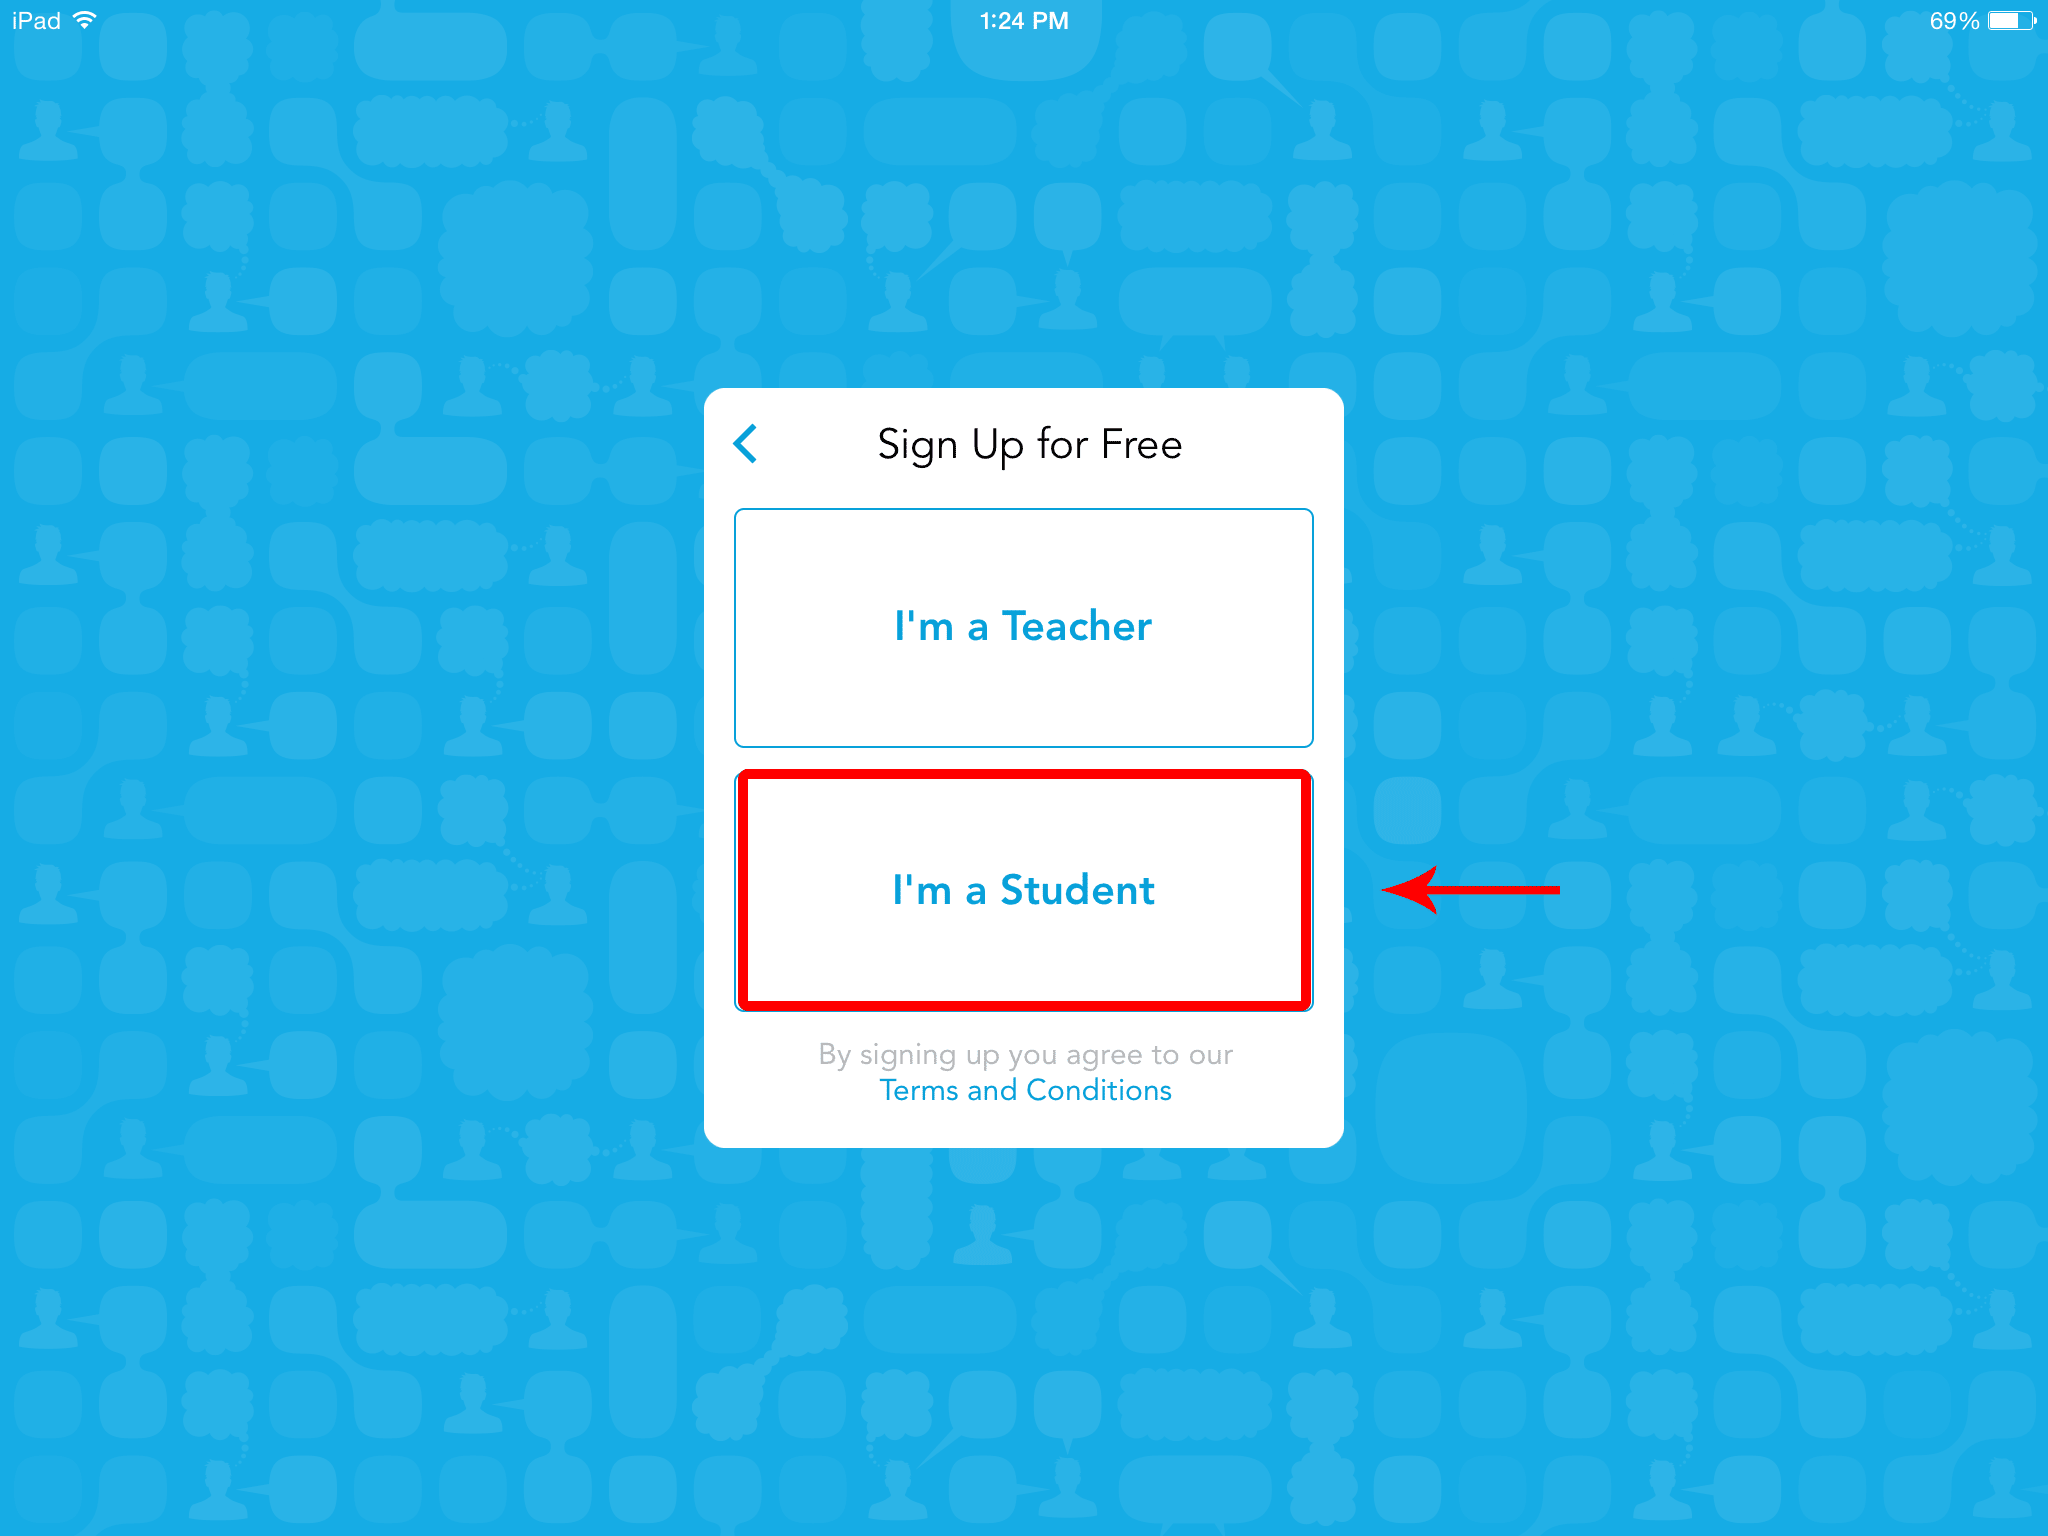
Tap Sign Up for Free and then tap I’m a Student:
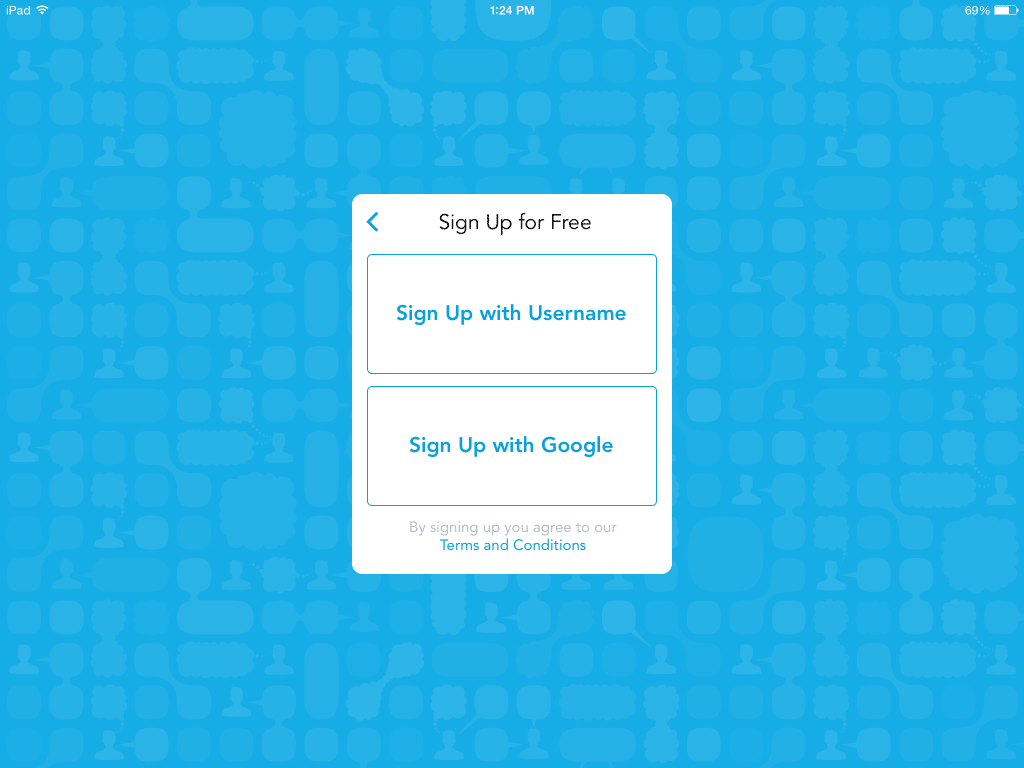
You can now create a new and unique username, or you can sign up with your Google account:
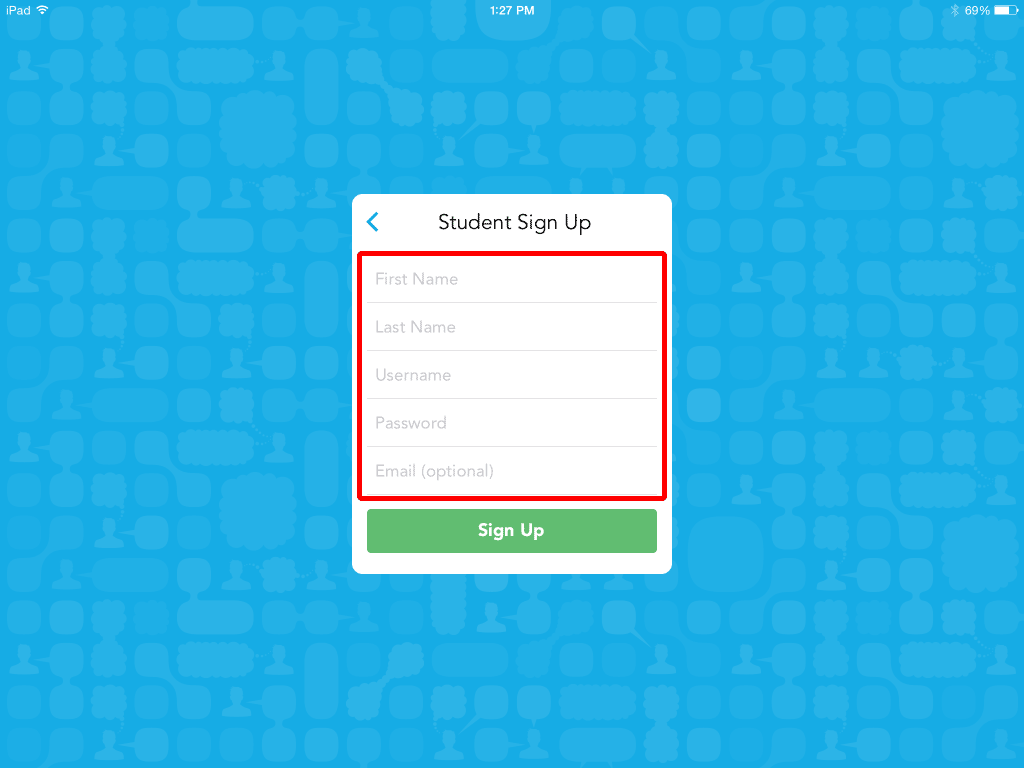
Provide the information required for the account. Email is optional and not required!
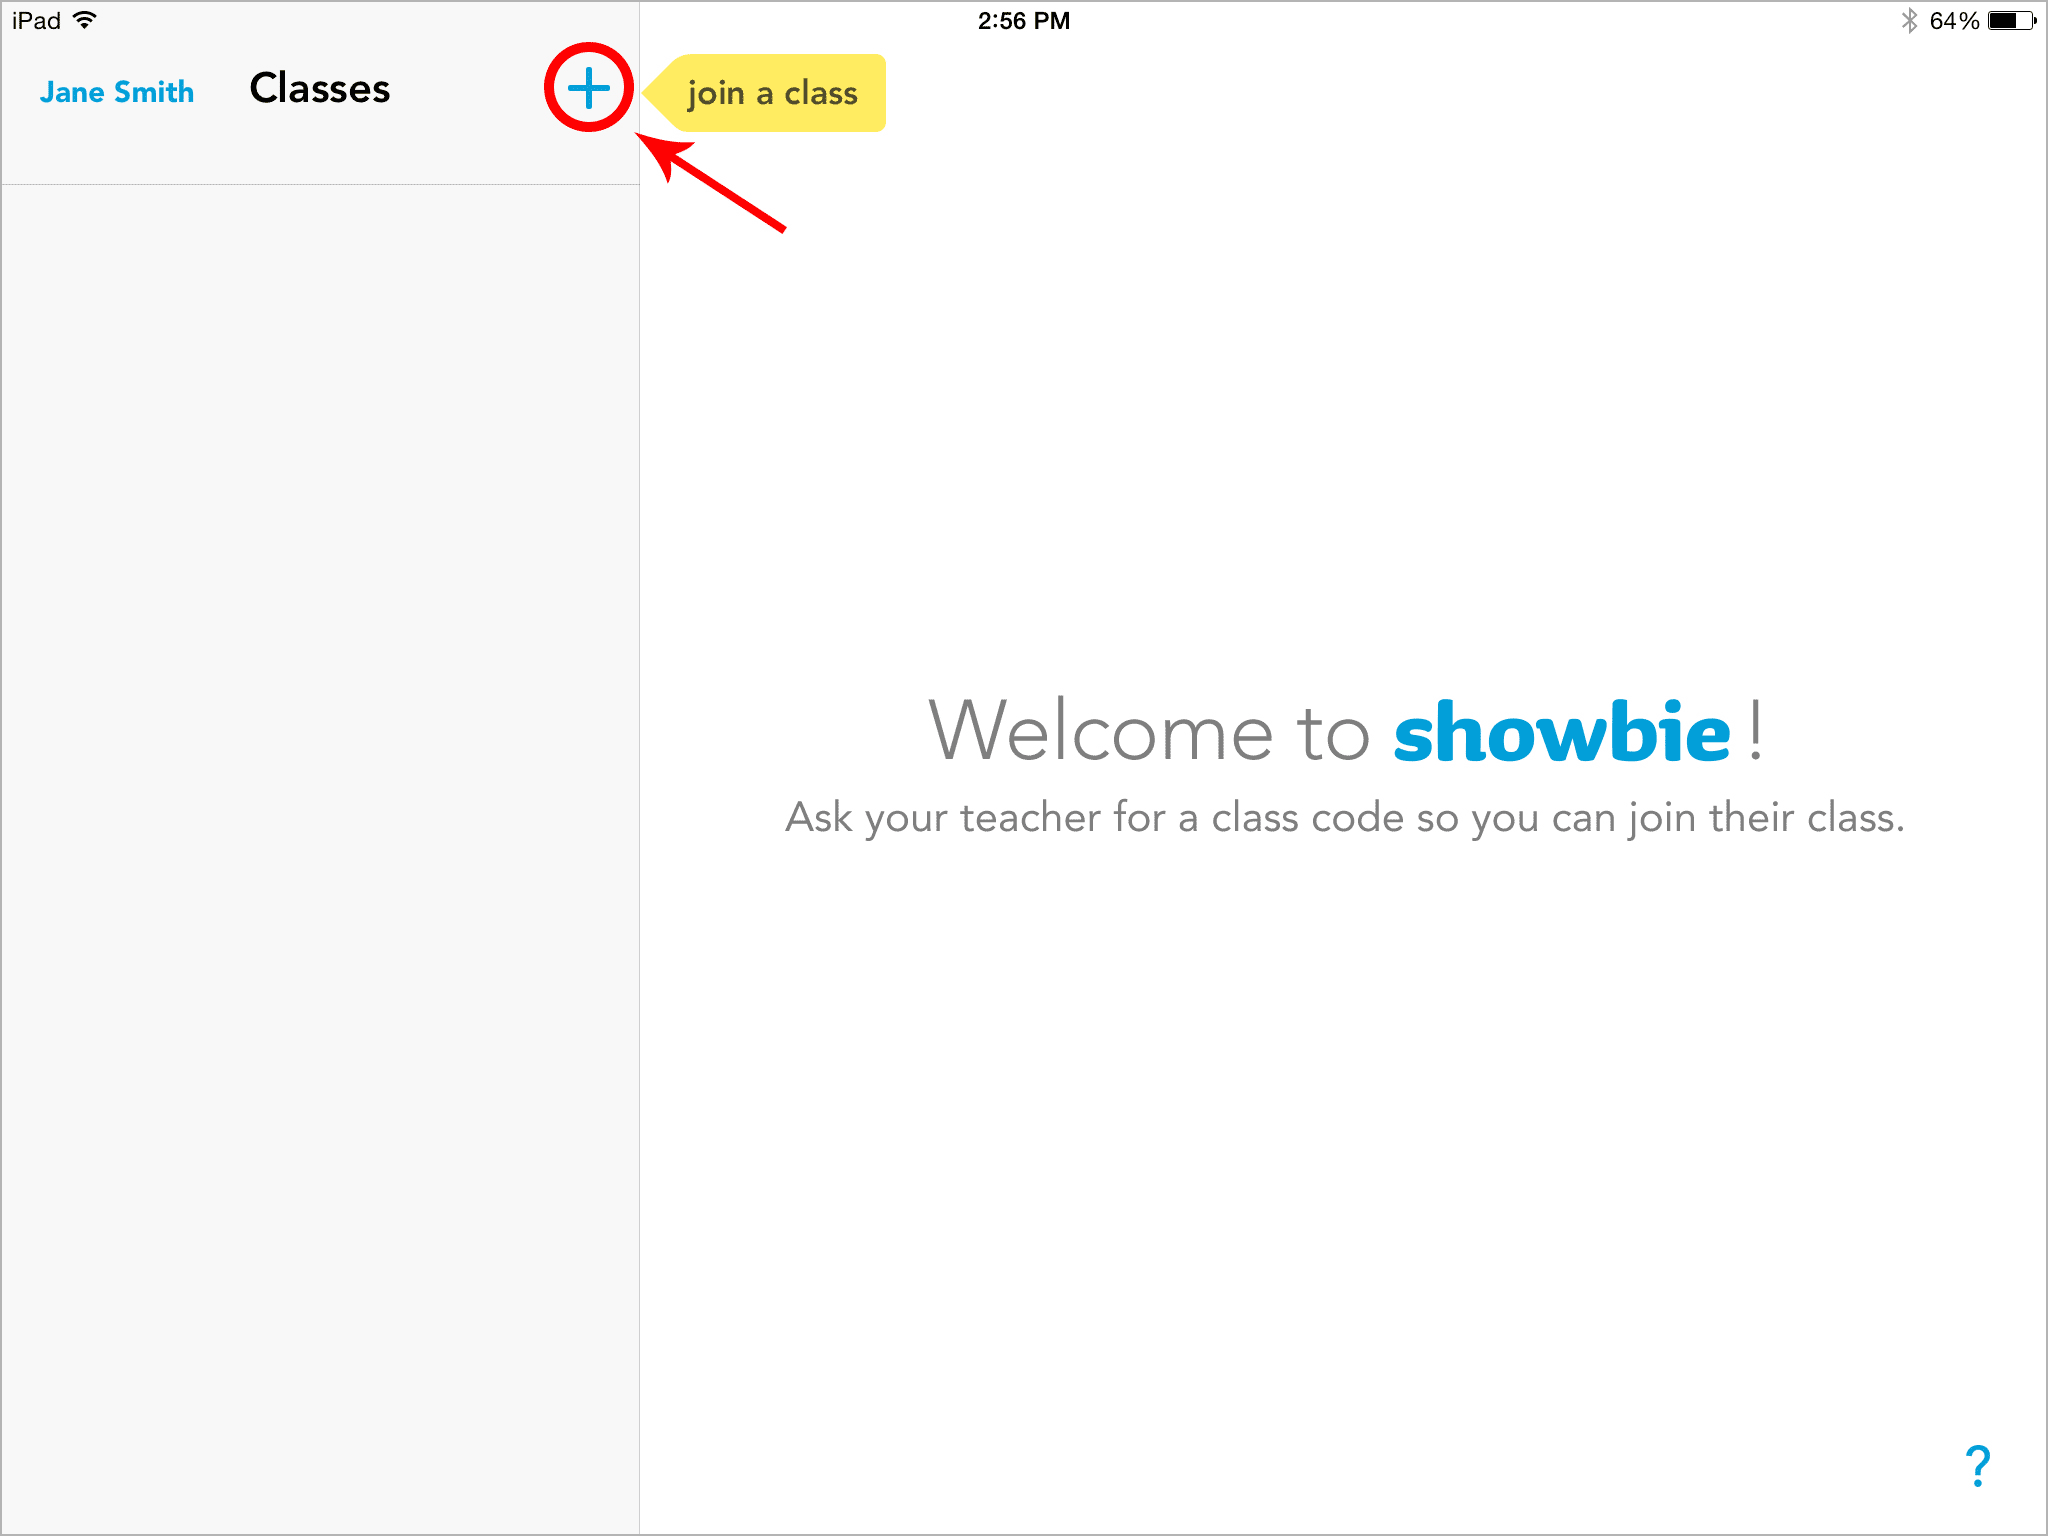
Once your account has been created, your next step will be to join your first class! Teachers will often write the class code on the board at the front of your classroom.
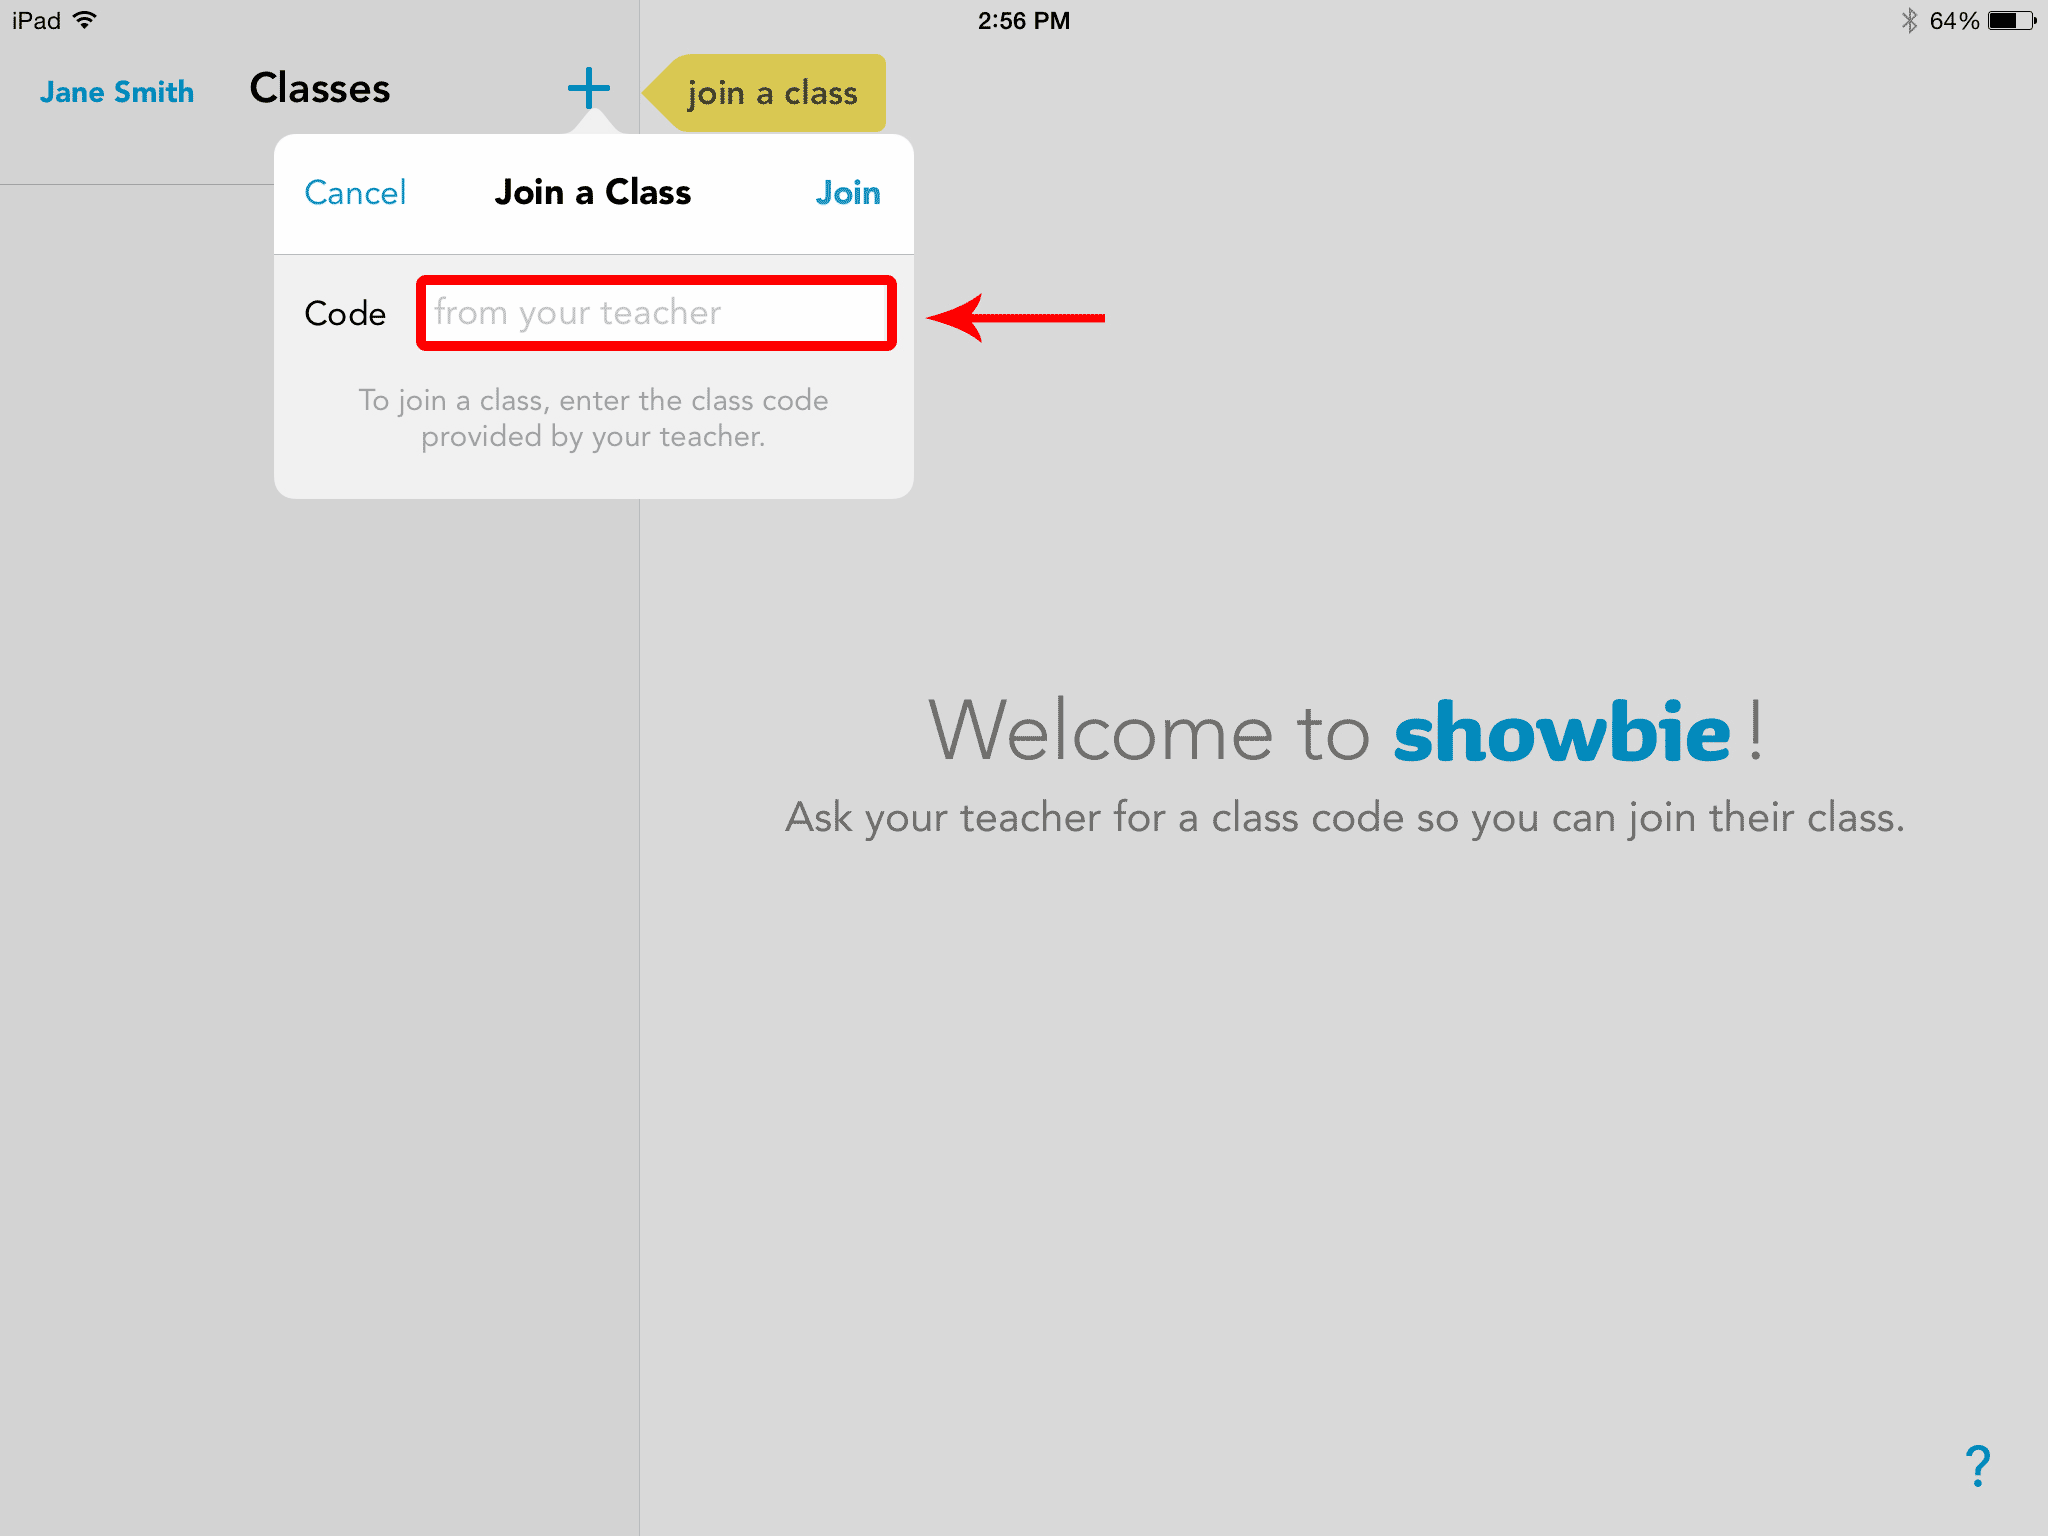
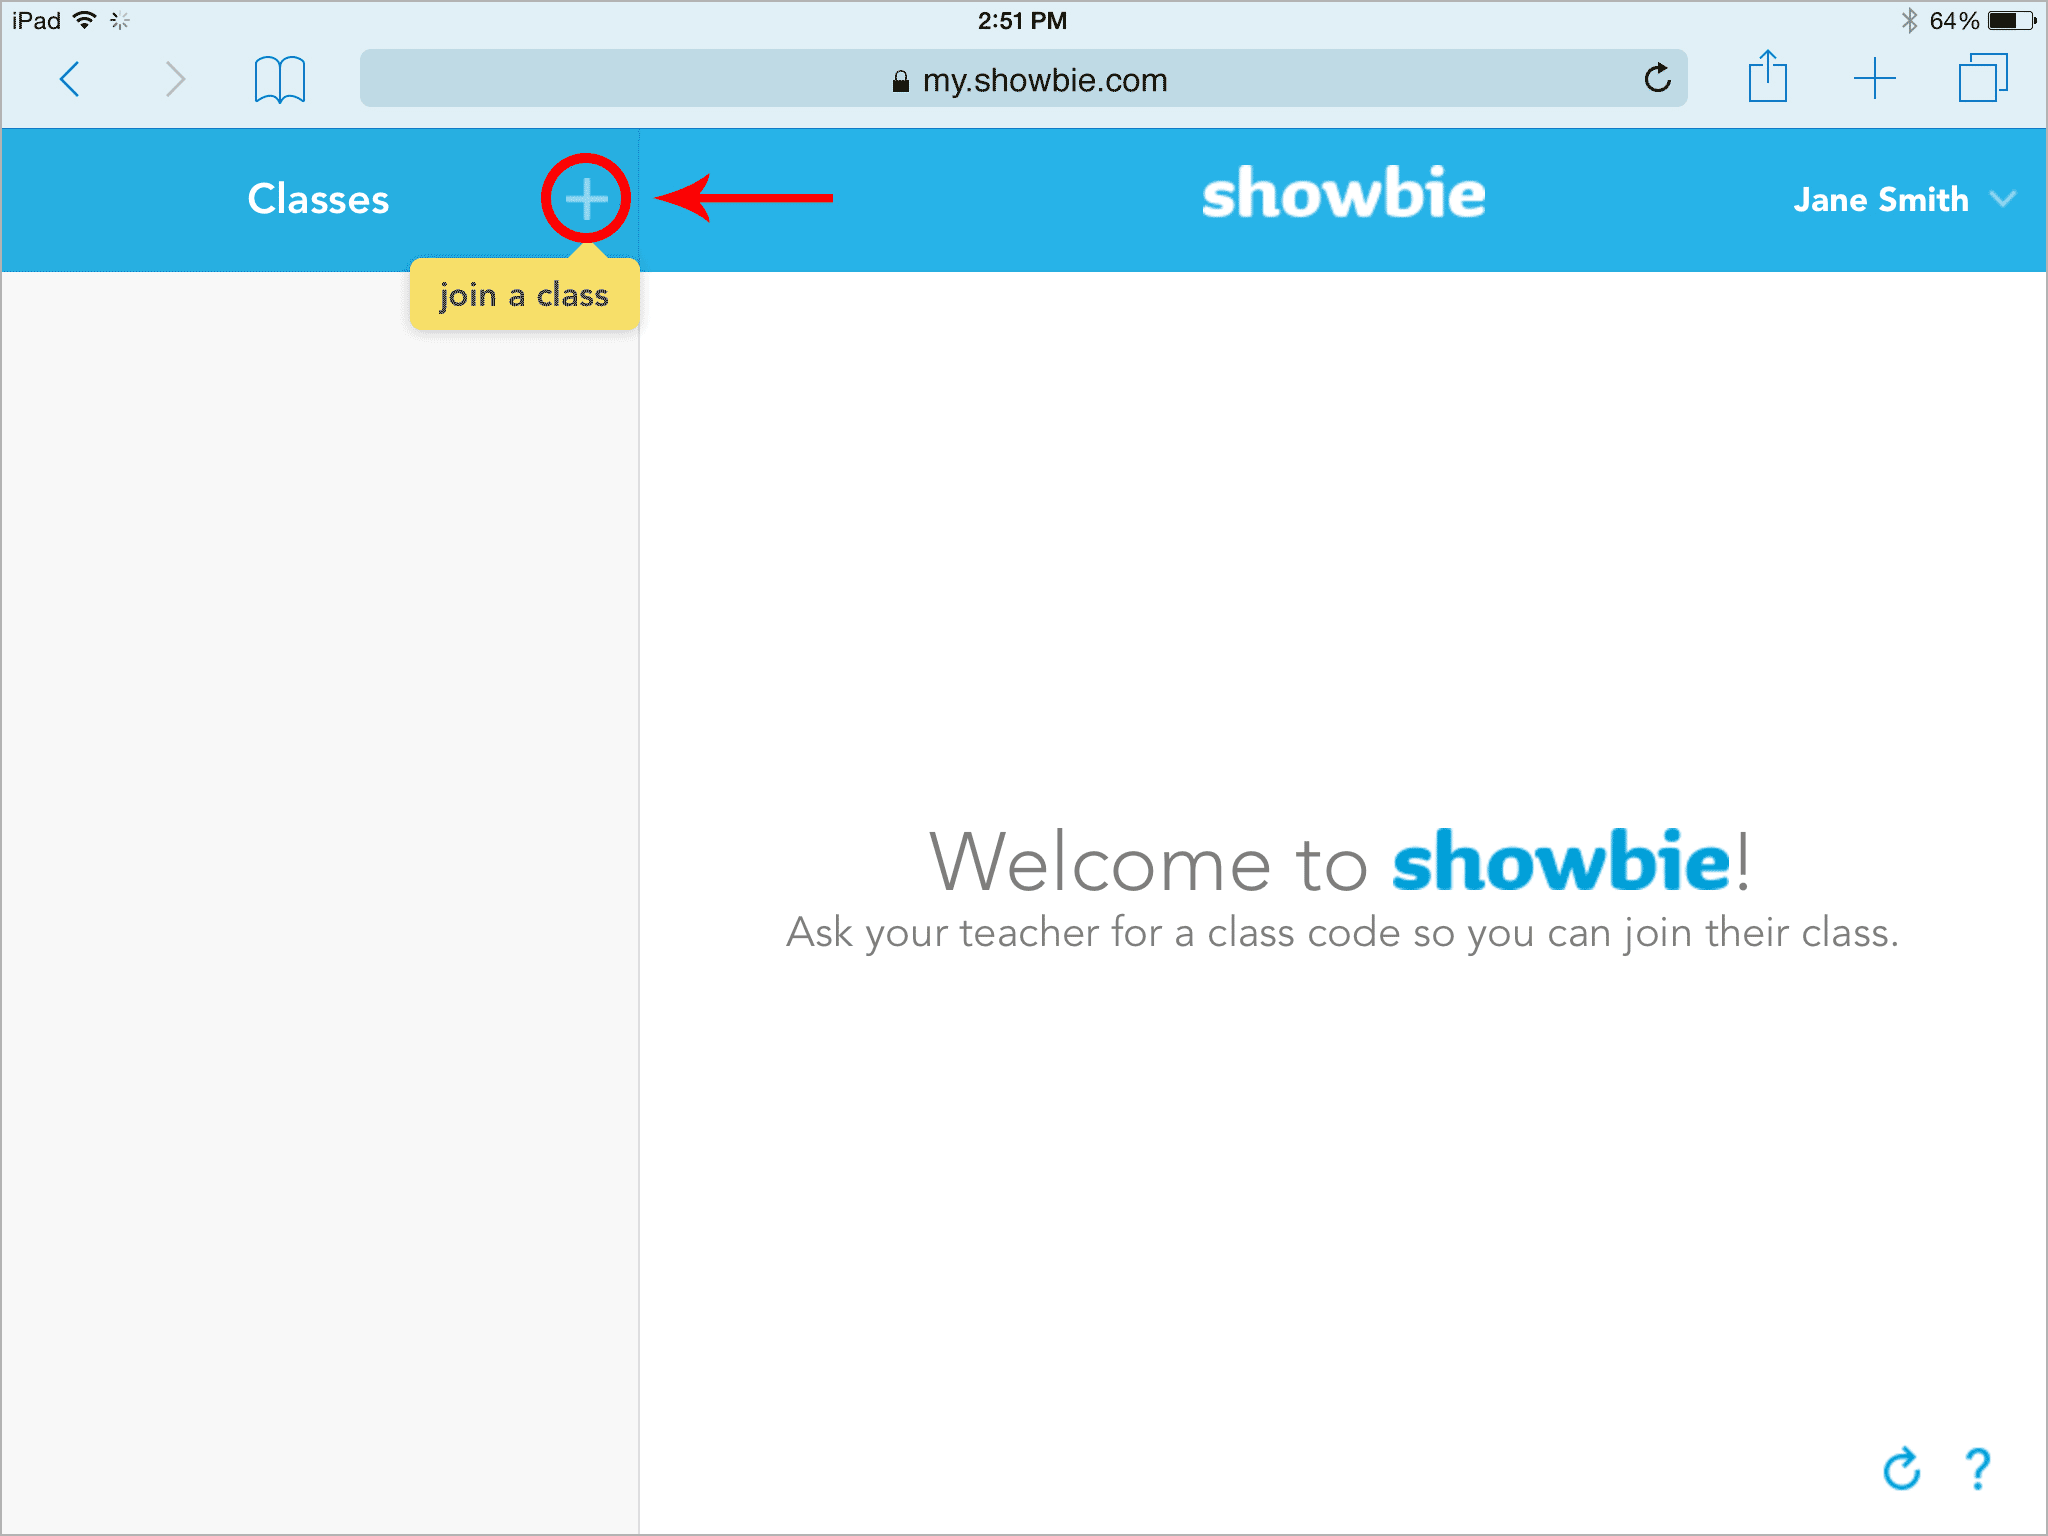
Log into Showbie and tap on the +:
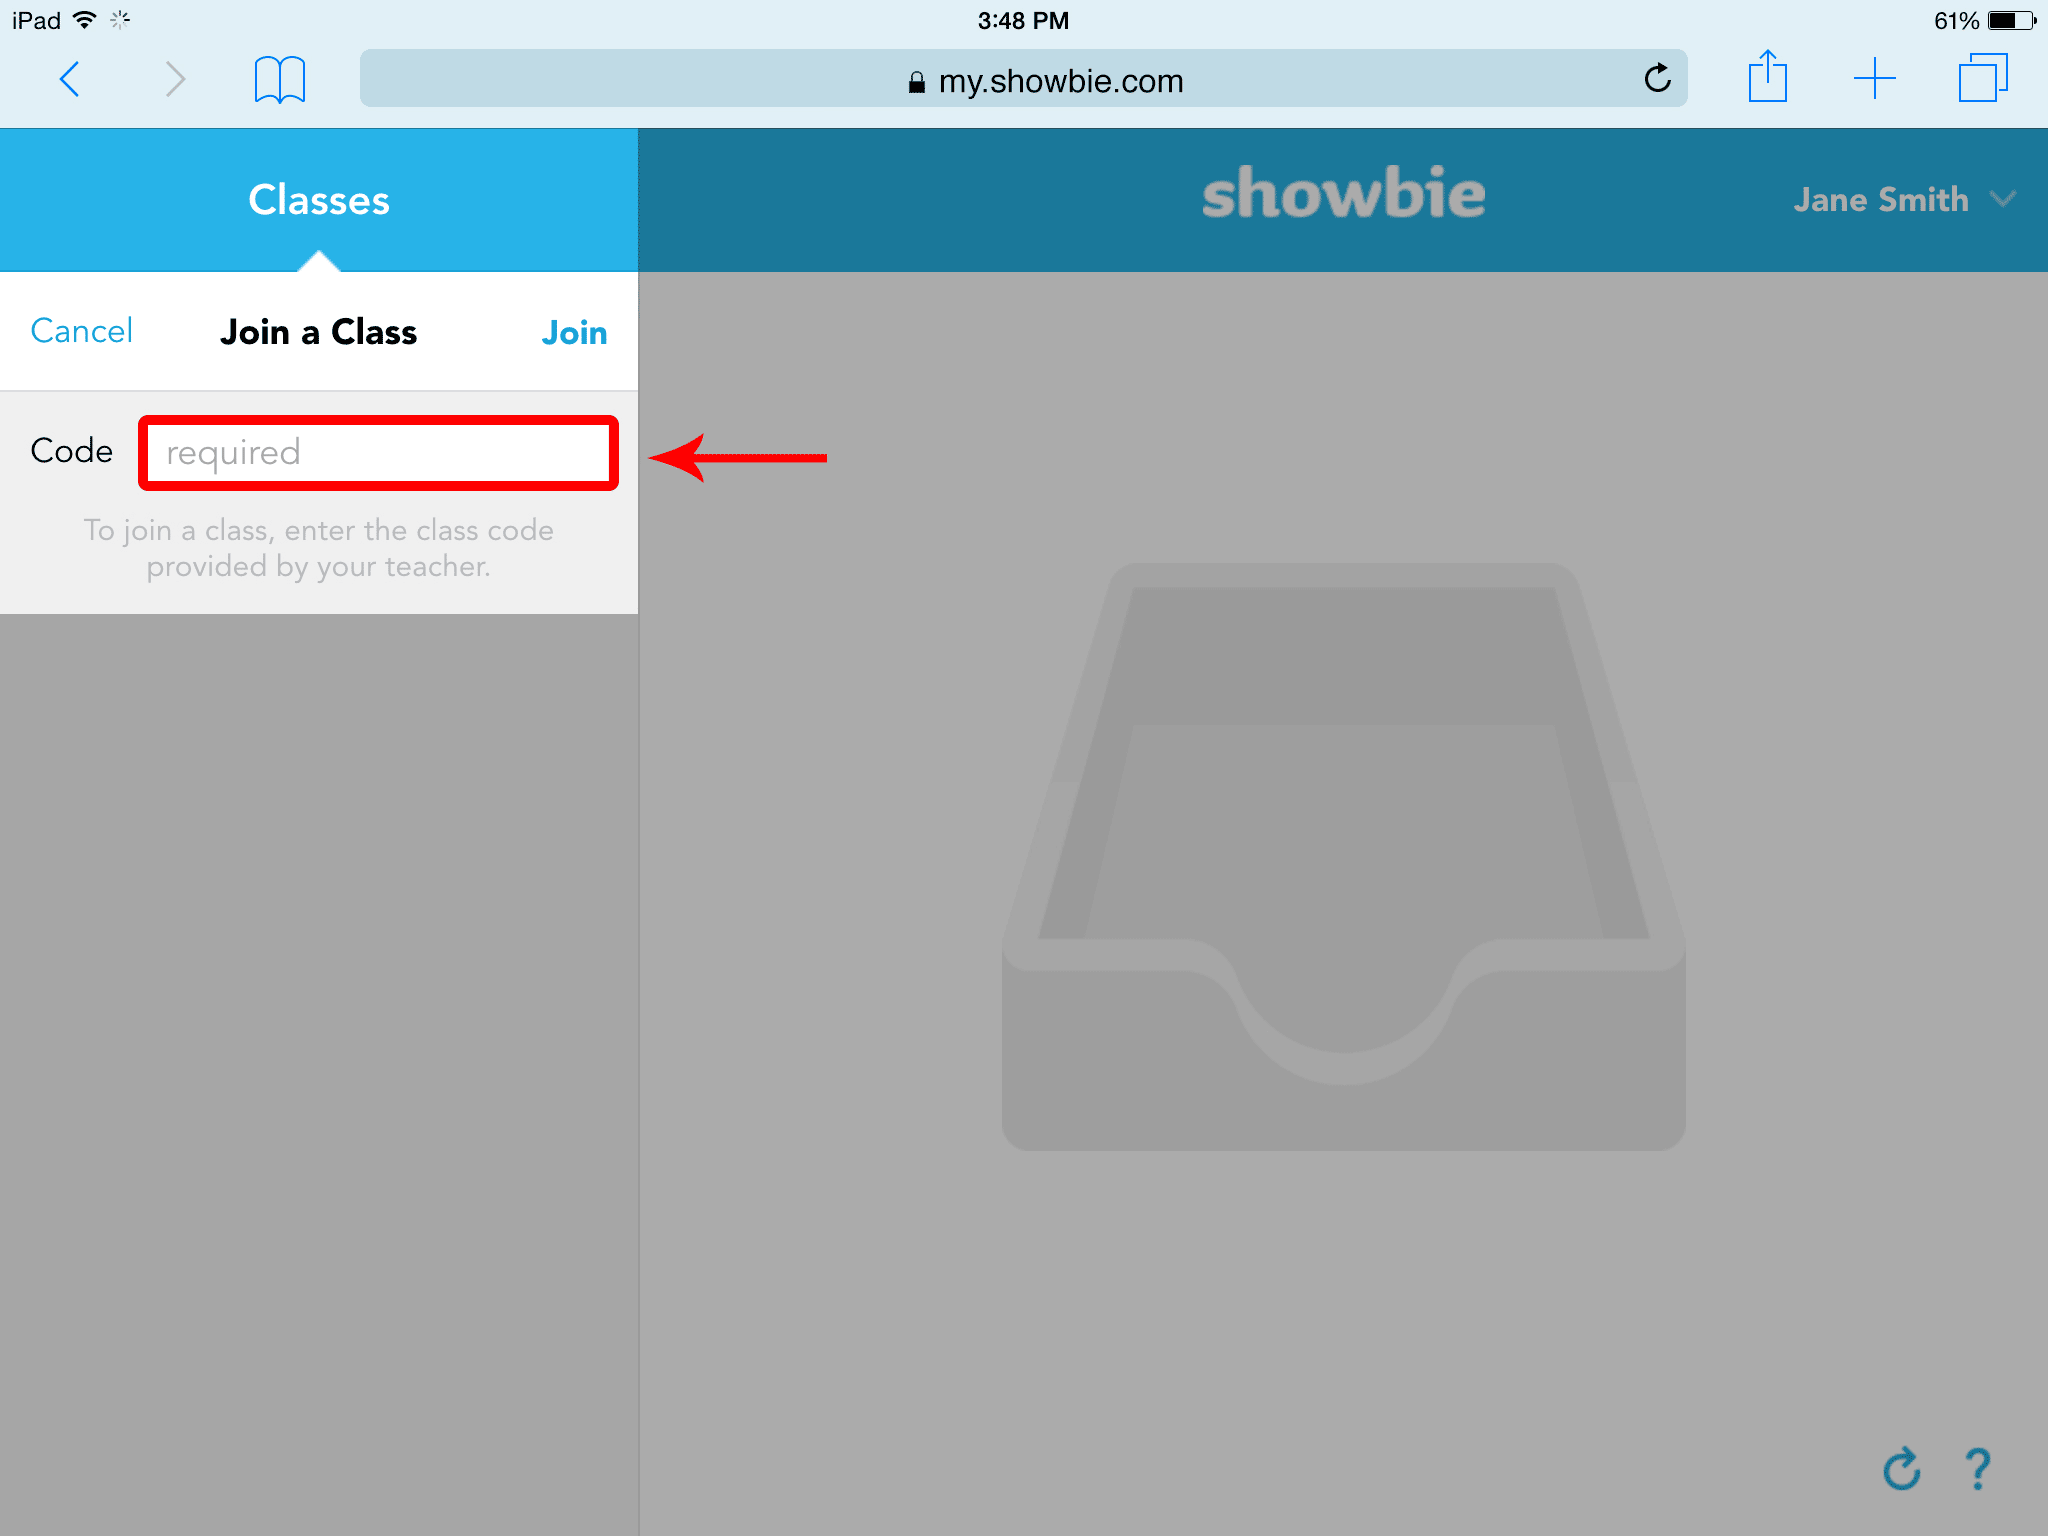
Enter the class code provided by your teacher, then tap Join:
Once you’ve joined the class you’ll be able to access notes, instructions, and assignments:
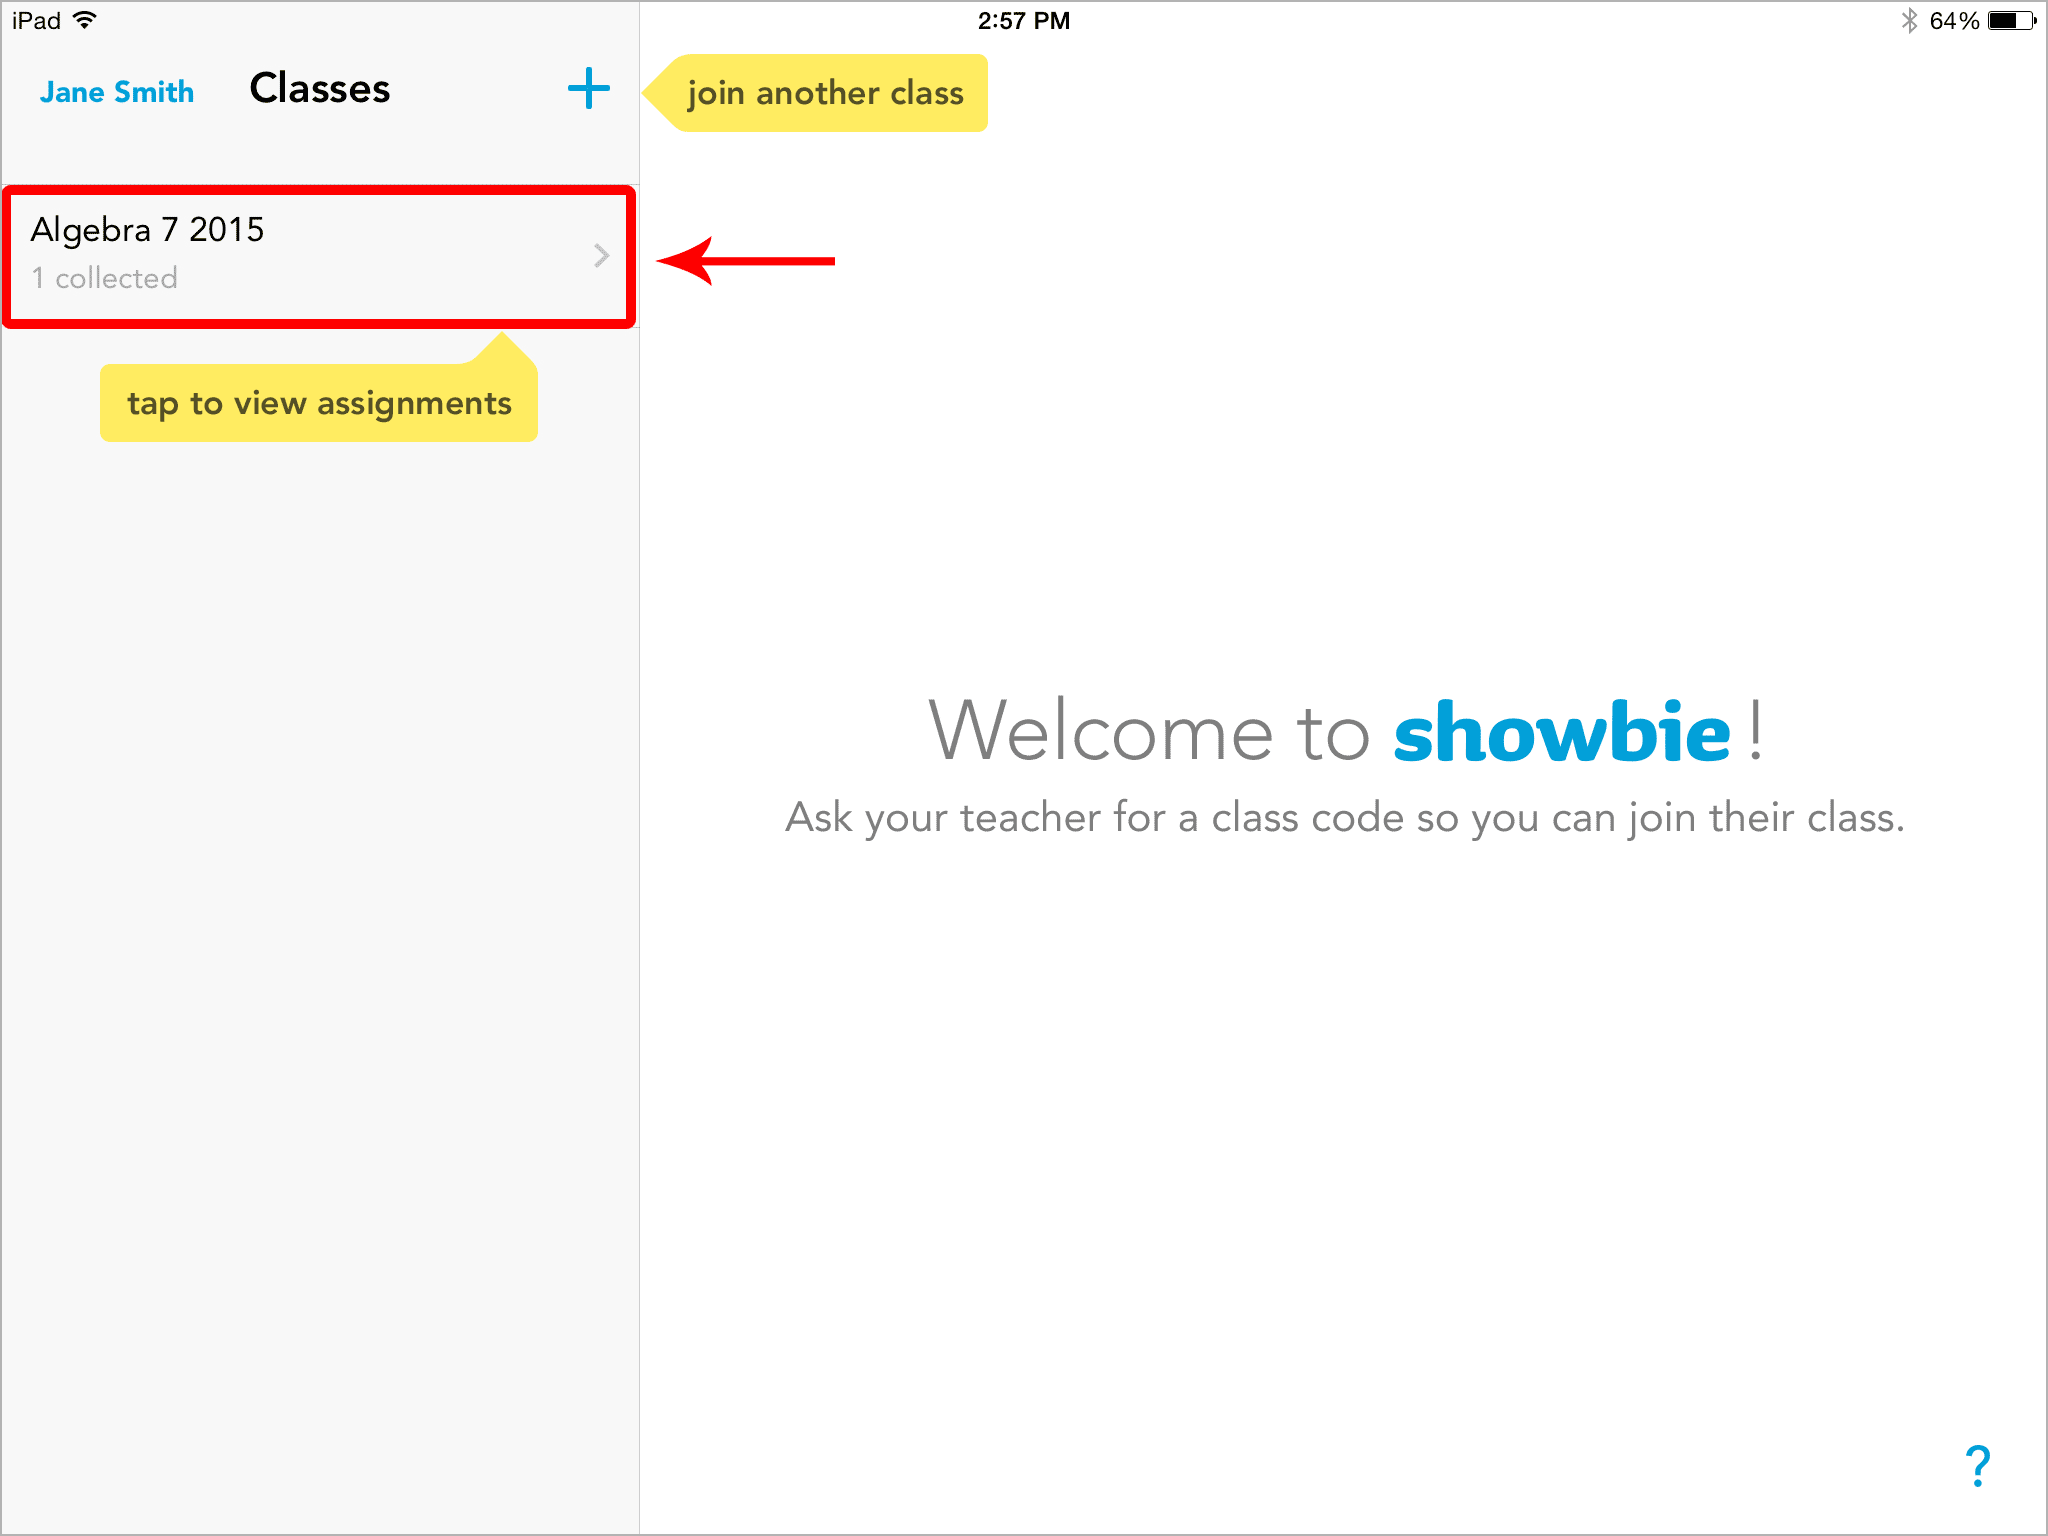
Learn how you can join another class using a class code.
Via Web
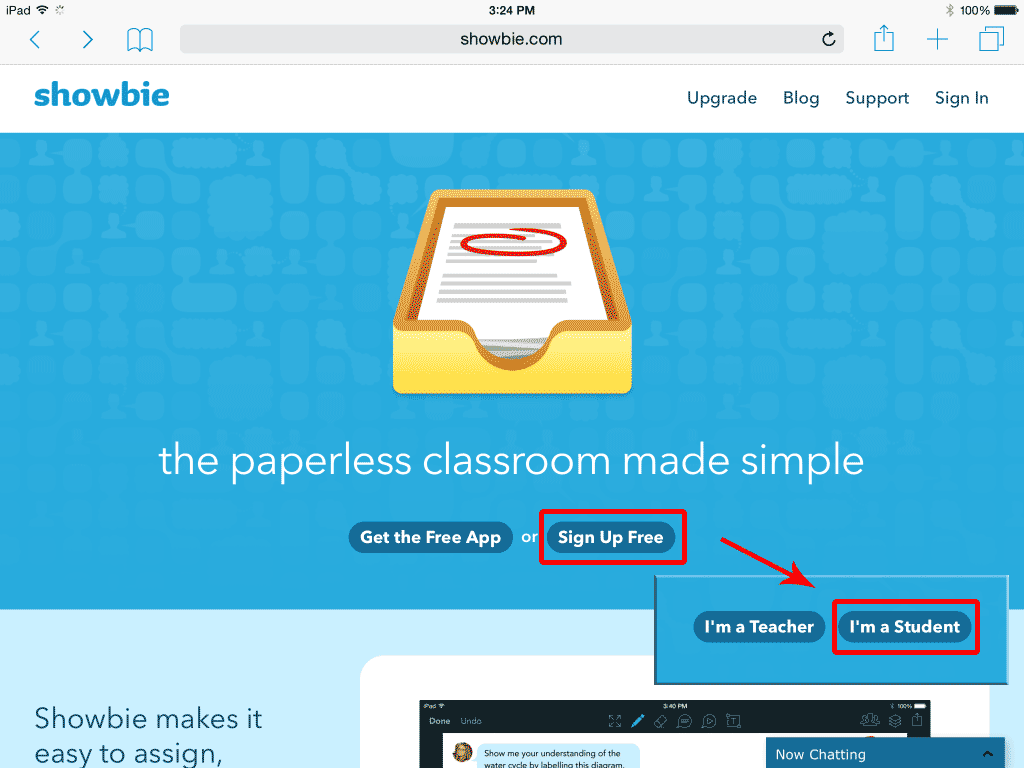
First, visit showbie.com, click Sign Up Free, and then click I’m a Student:
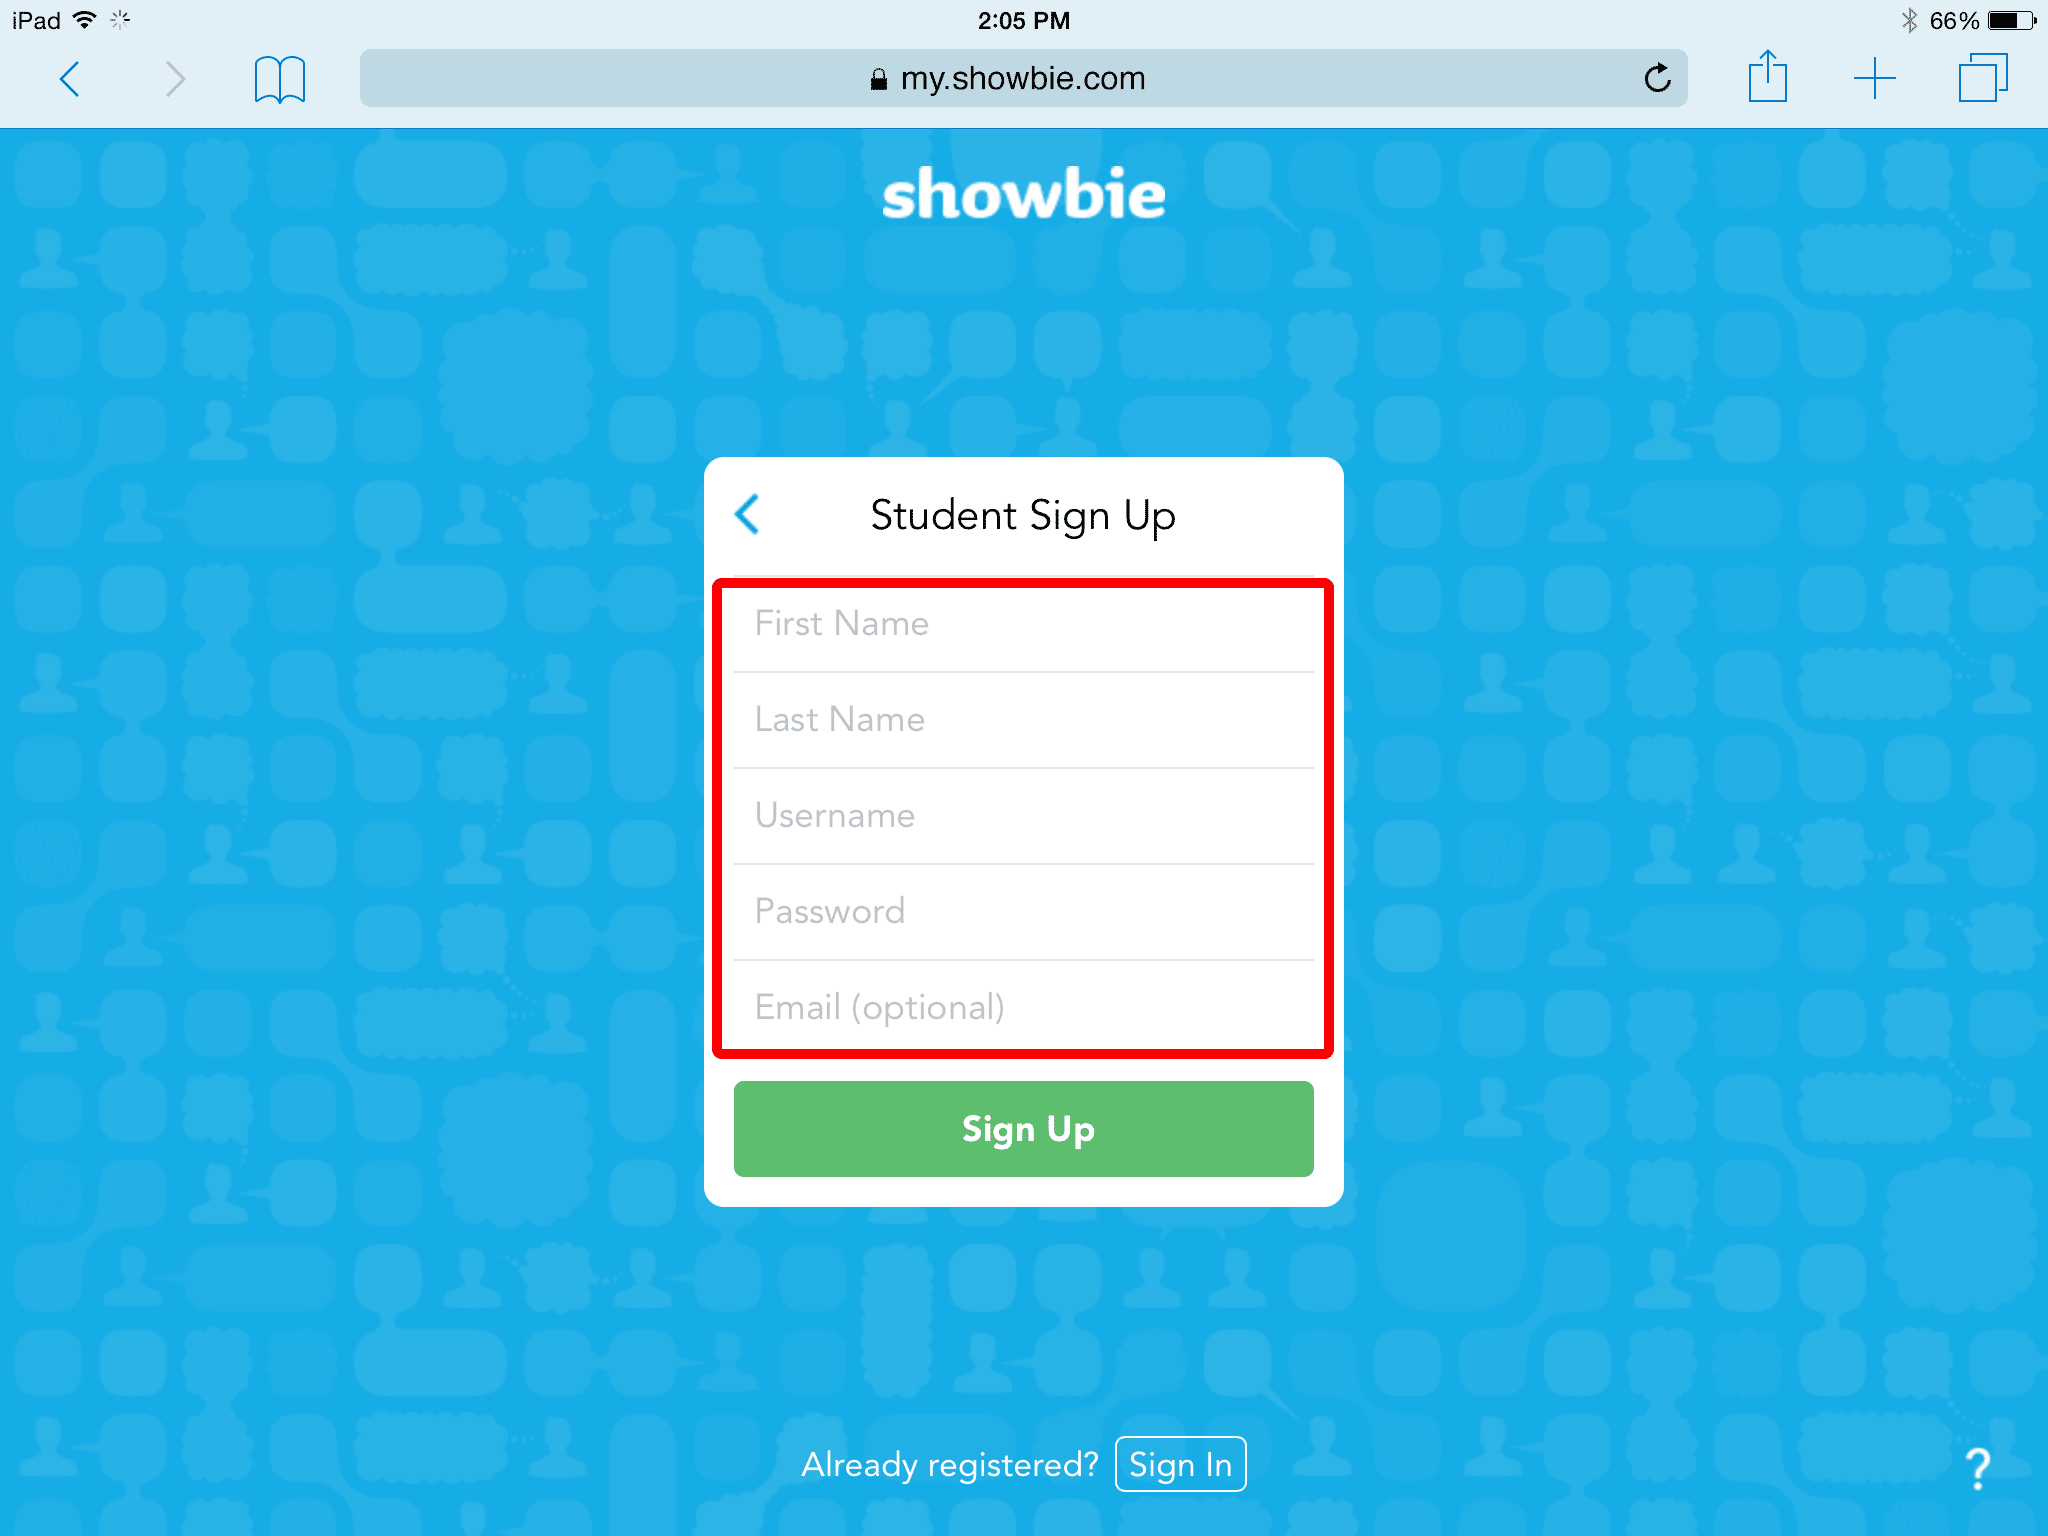
You can sign up by creating a username, or you can use your existing Google account:

If you sign up with a Google account, just use your existing Google login. If you sign up with a username, fill in the information required for the account. Email is optional and not required!
Once your account has been created, your next step will be to join your first class! Teachers will often write the class code on the board at the front of your classroom.
Log in to Showbie at my.showbie.com. From Classes, click on the +:
Enter the class code provided by your teacher and click Join:
Once you’ve joined the class you’ll be able to access notes, instructions, and assignments.
Showbie is not restricted to the iPad application. You can also access and manage all your classes from a browser. In fact, some options (such as deleting files) are only available from the browser-based version of Showbie.
Simply type https://app.showbie.com in the address bar and log in.
https://www.youtube.com/watch?v=2MJRgHZwN8U
https://www.youtube.com/watch?v=5odBqTJ6kQ8
https://www.youtube.com/watch?v=iHVnsnekHVI
ALL INFORMATION, TUTORIALS AND RESOURCES WERE OBTAINED DIRECTLY FROM SHOWBIE.COM