
Do you use Facebook for your business? If so, Facebook Business Manager is one tool that you need to add to your arsenal.
If you’re not using it already, that is. It helps you keep all of your business’ Facebook assets safe, secure, and in a centralized location.
Maybe you haven’t set up Business Manager yet because you think it’s just one more thing to deal with, or you don’t know how to use Facebook Business Manager.
No matter which stage you’re at, our comprehensive guide will tell you how to master Facebook Business Manager and harness the full potential for your business.
Understanding What Facebook Business Manager Is
Before we dig into how to use Facebook Business Manager and its benefits, you should understand what it is. Facebook describes it as:
“A one-stop-shop to manage business tools, business assets, and employee access to these assets.”
The Manager is a central location from which to manage all of your Facebook advertising and marketing activities. You can also control user access to business resources, such as product catalogs or your Instagram account.

Note: Facebook Business Manager is now known as Meta Business Manager following the launch of the new umbrella company brand, Meta.
Several key features include:
- Anyone with access to the page doesn’t see your personal Facebook information. Instead, they see your work email, name, ad accounts, and pages.
- Partners, vendors, and other agencies gain direct access to your ads and pages without ownership privileges.
- It’s a centralized location to track your Facebook ads. It includes detailed reports that show how each ad performs.
- Keep your personal profile and your business activities separate, so there’s no need to worry about getting distracted or posting in the wrong place.
Benefits of having a Facebook business manager
#1 Security boosted
Using Meta Business Manager adds an extra layer of security to your Facebook account. Keep your advertising ecosystem secure by setting up login approvals or turning on two-factor authentication.

You can, for example, deactivate access for employees who have left the company. Access can be easily removed (or added) from the People section of Facebook Business Manager without having to sort it individually for everyone. Your BM will be protected without guesswork, hassle, or concerns that someone unauthorized will breach it.
#2 All organized
Changing assets can be time-consuming, and it increases the likelihood of errors. Business Manager keeps everything neat and orderly by securely storing your social media resources in one place, handy whenever you need them.

#3 Collaboration improved
Facebook Business Manager simplifies collaboration between partners and employees. With it, you can add people from inside and outside of your organization to your ad accounts, Pages, and apps to help you manage them.
What’s more, with Business Manager, you can assign roles without the user ever seeing your personal profile or vice versa. It functions as a separate ecosystem from Facebook – some advertising agencies call it a Grey Facebook.
#4 Peace of mind achieved
Keeping your personal and business Facebook accounts separate is easy with Facebook Business Manager. All data is accessible in one place, so being unorganized shouldn’t be a concern.

It allows you to access your Creator Studio, Ads Manager, billing information, pages, and any other business-related assets without showing you your personal notifications or news feed.
#5 Access to insights
Facebook Business Manager is also a powerful analytics tool that provides data on your Page Likes, reach, engagement, and more. Therefore, you can gain a better understanding of your pages’ performance and enhance it in the future.

#6 Improved Ad Management
Facebook Business Manager makes it easier to manage your Facebook ads. You can modify, duplicate, and draft marketing campaigns on the spot thanks to Ads Manager being an integrated part of Meta Business Manager.
Now that you know what Business Manager is and the benefits of using it, we’ll outline several things you can do with this hub.
Setting up your account begins by clicking here ➡️ Meta Business Manager
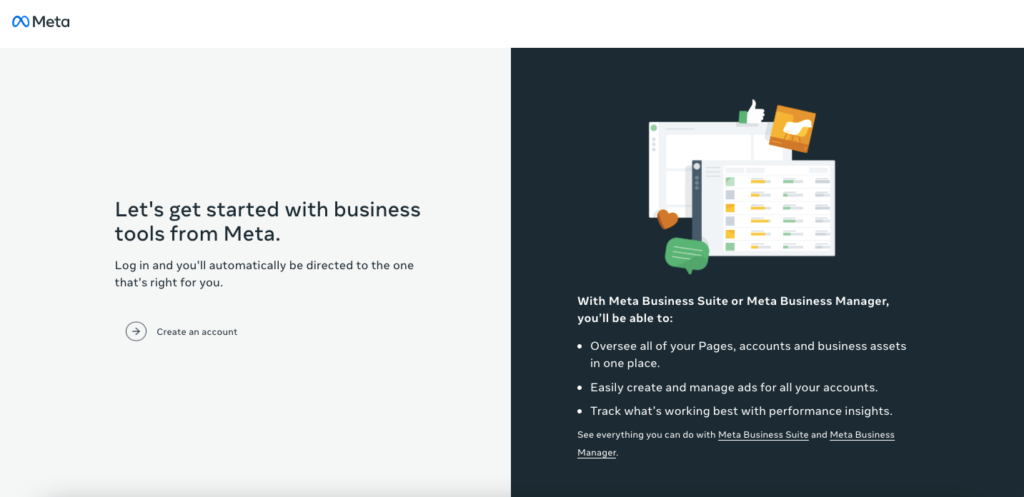
Step 1 – Create Your Account
Creating an account is the first step. Your personal Facebook log-in portal will confirm your identity, but no one will be able to access your personal information.
Once you enter Meta Business Manager, you’ll see the “Create Account” button. Click this and you will be prompted to input your business/account name, your name, and whatever business email you want to use to manage the account.
The information you enter here will be used to form your Meta Business Manager login.
Click “Submit”.
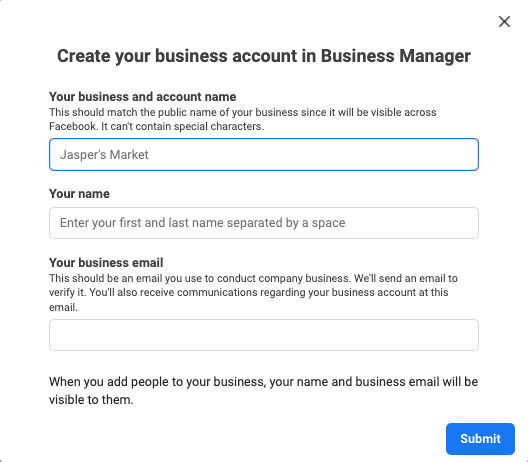
Note: Facebook will send confirmation to your chosen email address. Click the link when it appears to confirm your new account with Facebook.
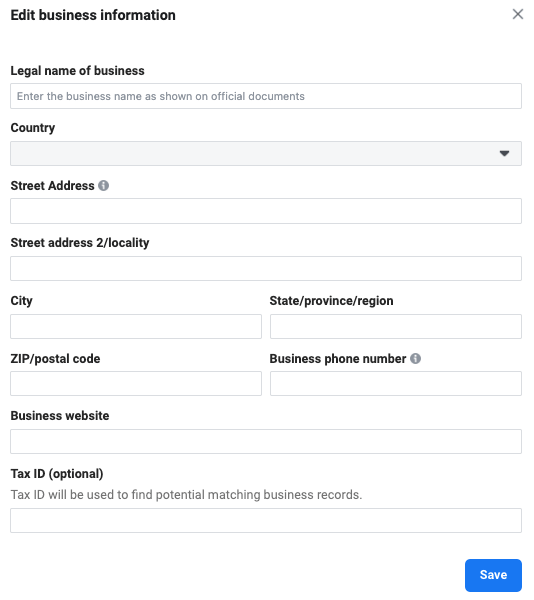
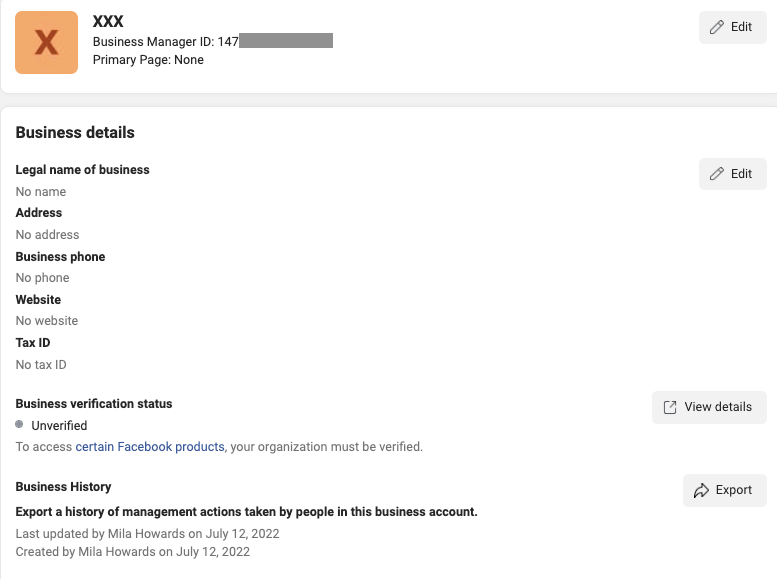
Step 2 – Enter Your Business Info
On the left side of the screen, you will see the menu. Select “Business info” and complete your business details by clicking “Edit”.

Enter your legal name of business, country, address information, business phone number (the one available for customers), and business website. Input all of the requested information and click on the “Save” button.
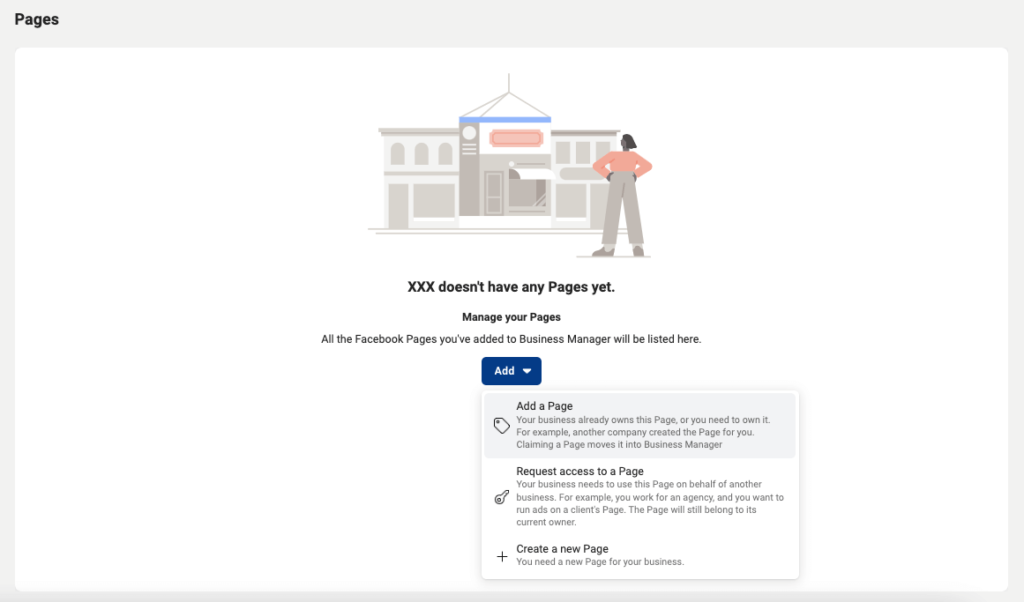
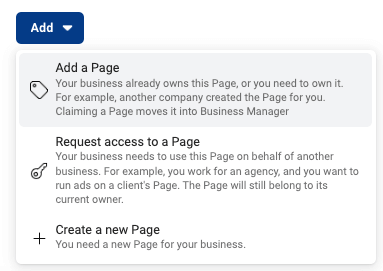
Step 3 – Claim Your Accounts
This step offers different options, and it’s important to be very careful when managing which accounts you claim and which ones you request access to.
You can create a new Facebook business page or add an existing one. However, you can only request access to someone else’s page if you manage Facebook pages for that client.
Note: Only add assets that you personally own to Meta Business Manager because each asset will only link to one account. So, if you were to accidentally claim a client’s Facebook page instead of requesting access, the client wouldn’t be able to claim it and this would restrict their access.
You can remove pages from Facebook Business Manager if you make a mistake, but you can’t remove ad accounts.
To keep it simple, we’ll assume that you want to manage your own business assets. We’ll also assume you’ve already set up a Facebook page for your business.
To add a page to Business Manager, go to “Accounts” and select “Pages”. Click on the “Add Page” button.
When you start typing the name of your page, it should automatically fill in so that you can click on it.
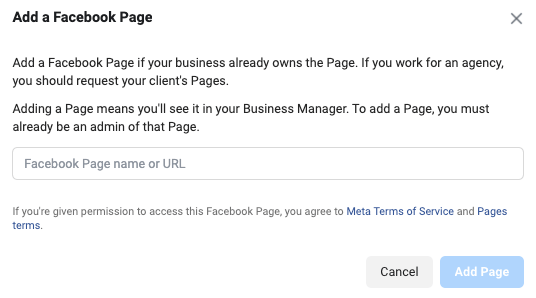
As long as you’re an administrator on this page, it’ll automatically approve. Repeat the steps for any other Facebook pages you want to add.
Look on the left side of the screen, and find the “Accounts” menu. Add all your assets: Pages, Apps, Instagram, and WhatsApp accounts – they should appear immediately in Facebook Business Manager.
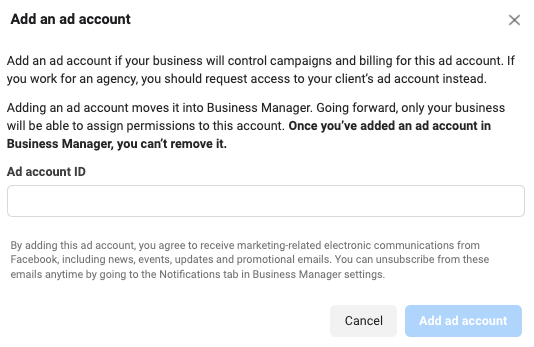
Step 4 – Add Your Ad Accounts
Remember to only request access to your client’s ad accounts and to add your own to Facebook Business Manager.
Choose “Ad accounts” from the left-side menu and click the “Add” button. Find the ad account ID in your ads manager and input this.
If you haven’t set up an ad account for your business yet, choose “Create a new ad account“. It’ll ask you to input your account details before you click the next button. You need to add your account name, time zone, and currency.
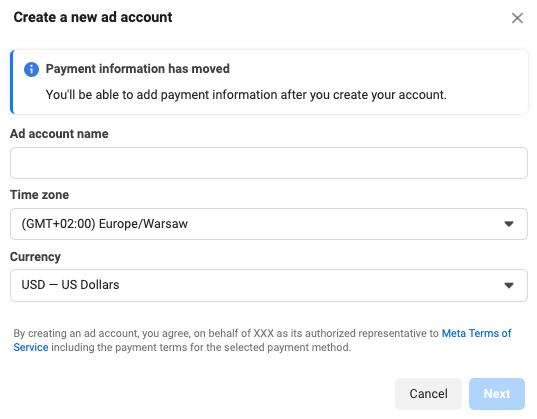
Then, you must choose for whom you’ll be using this account – your own business or a client.
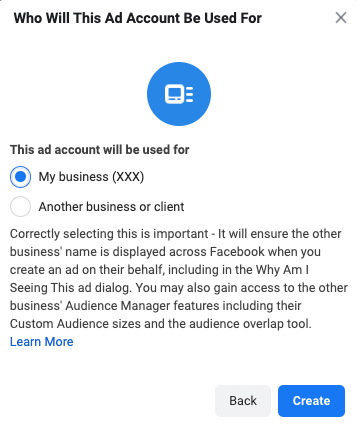
Note: Facebook allows each business to create one ad account right away. As you spend money on this first account, you’ll be able to set up more accounts. It is not possible to request a second one directly.
Step 5 – Add Data Sources
Data sources track the actions that people take on your website, mobile app, or in your store. For example, views and CTA button clicks. Data sources include a tool, connection, piece of code, or other object.
Two of them deserve special attention:
Pixels
You can easily add Facebook pixel to your Facebook Business Manager account.
Note: You can only attach one pixel to each Facebook ad account.
Choose how you want to install the pixel – you can add code using a Partner Integration (e.g. WordPress, Shopify), manually add pixel code to the website, or send instructions and documentation to your technical support team.

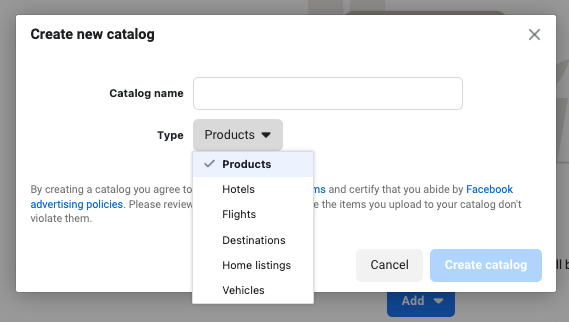
Product Catalogs
Facebook allows you to create product catalogs for your business, e.g. hotels, home listings, flights, or products. You can manage existing ones or create new ones in Facebook Business Manager. Once you open a specific product catalog, you can assign partners, add people, associate sources, add a product, and delete any of these elements as needed.
When you create and claim your business assets, Facebook Business Manager gives you a centralized location in which to manage them – Meta Business Suite. You’ll see an overview for every asset when you log in. You have the option to reply to messages, create and schedule posts, review insights, see notifications, or even set up goals.
Step 6 – Add People to Help You Manage Your Assets
When you provide access to your business assets – such as ad accounts or pages – you can choose either to add people or assign partners.
To assign people, locate “Users” in the menu and click “People”. Add the person’s email address on the next screen and choose whether they will be an admin or employee. You can also choose additional roles such as Finance analyst, Finance editor, or Developer.
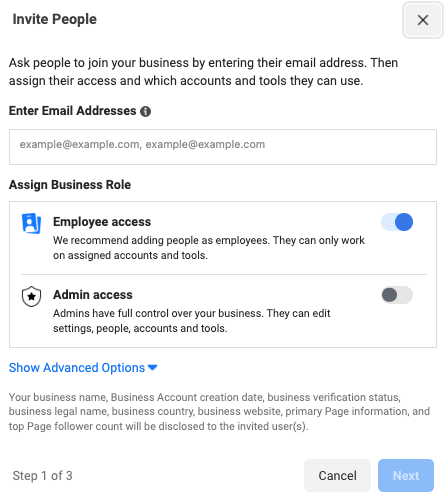
A screen will prompt you to check boxes next to the ad accounts, pages, and any other assets you’d like the person to manage. To assign specific roles, go to the “People” section. You’ll assign assets, view history, cancel invitations, and remove people from there.
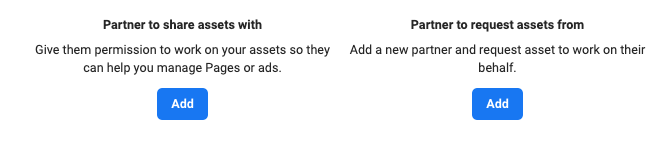
If you’d like to assign partners, go to the “Partners” tab. Enter the partner’s Business Manager ID and specify which role you’d like them to take on.
You also have a separate tab for setting up System users, who identify servers or software that make API calls to assets.
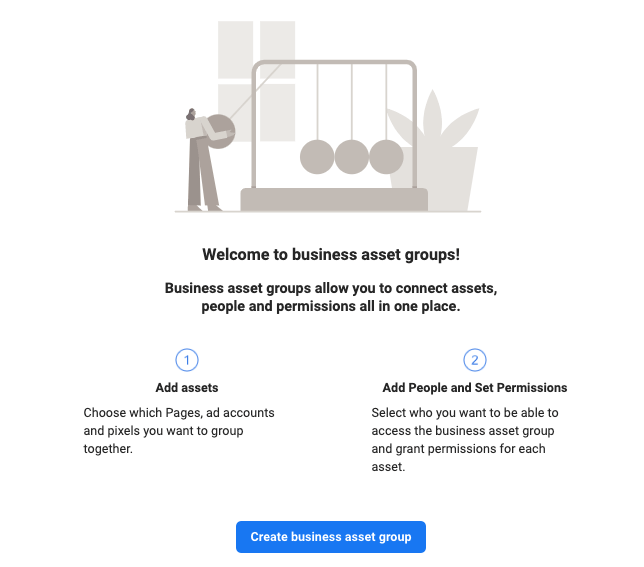
Step 7 – Organize Your Business Assets with Business Assets Groups
If you want a slightly more rigid organizational structure, try creating Business Assets Groups.
Choose “Business asset groups”, which you can find under the “Accounts” tab. Click it, and then click on “Create business asset group“.
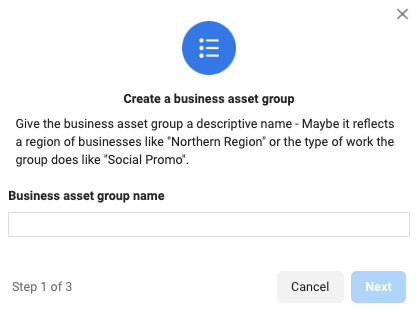
Decide whether you want to organize your assets based on their region, brand, agency, or another category, and then click to confirm.

Come up with a name for your group and pick which assets you want to add.
You can add ad accounts, pages, pixels, and Instagram accounts. Additionally, the group has room for apps, catalogs, offline events, and custom conversions.
Once you’re happy with the group, click “Next“. Now you’ll need to pick the people you want to add, choose their access levels, and click “create” to make the group.
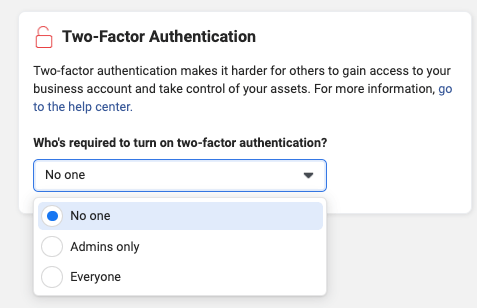
Step 8 – Double-Check Your Account Security
Facebook Business Manager offers additional layers of security for all of your business assets. If you want to increase your security coverage, go to “Security Center” in the left-hand menu.
Setting up two-factor authentication as a requirement for everyone is the best practice. To log in, each person will have to input both their password and a passcode sent via text or an authenticator app.
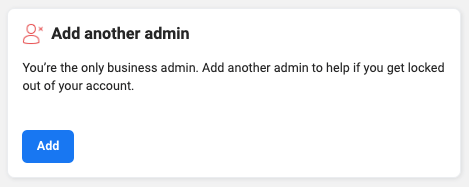
You can also add another admin to help if you get locked out of your account.
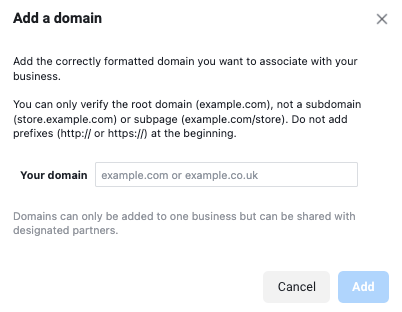
Don’t forget to add a domain that will be associated with your business. Go to Brand Safety > Domains, and add the URL there.
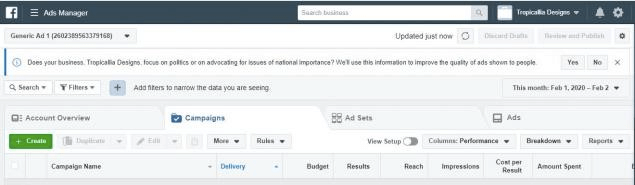
Step 9 – Create Your Ad Campaign
Now that you have set up and organized your Facebook Business Manager, you’re ready to create an ad campaign.
Go to the dashboard and click “Business Manager” in the top left of the screen. You’ll see an “Advertise” tab, under which is “Ads Manager”. Click this, and then click the green ”Create’’ button. Pick your ad campaign objective, set your budget, the Facebook ads target audiences, and pick your schedule.
Step 10 – Familiarize Yourself with Additional Options
It’s helpful to know about the numerous options available to you in Facebook Business Manager. A few notable features include:
Navigation Menu – look at the top left of your Business Manager. Click on your login to toggle between your business and your personal profile. You’ll also receive notifications for Business Manager in this toolbar, or use the search bar to search through your business assets.
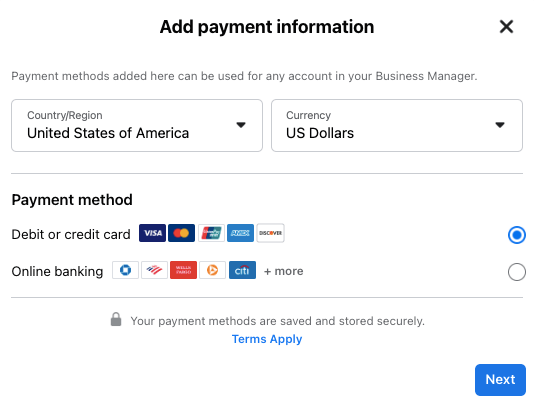
Payment Methods – look under the Business Settings menu and select the “Payment Methods” option. This allows you to add credit cards to fund specific ad accounts. You can swap out and update your payment methods here.

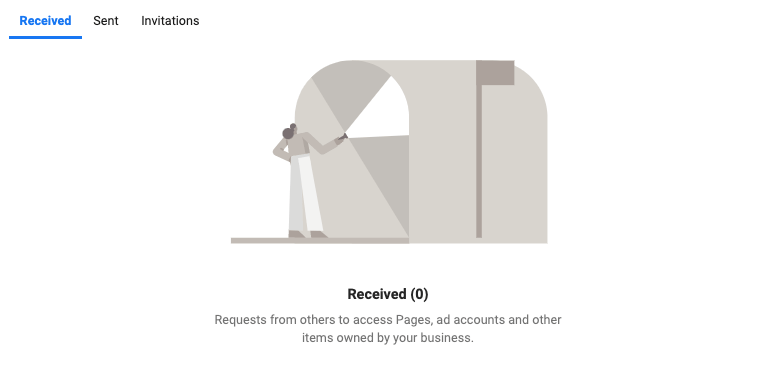
Requests – should someone request access to, or request to claim, one of your business assets, this will show up under the Business Settings menu in the Requests folder. You can manage all your invitations there.

Notifications – preferences settings let you set email notifications for specific events related to Facebook Business Manager. You can configure your notification preferences as needed under your “Notifications” tab.


Business Info – this tab allows you to edit your primary page selection, business name, and find your Business Manager ID. You can request security code access and configure a host of other settings here.

Use Facebook Business Manager to navigate your campaigns
So there you have it – our comprehensive guide to Meta Business Manager. It may change its official name, but its functionality and style remain the same, making it a powerful advertising dashboard for marketers.
In 2022, data is new gold. With Facebook Business Manager, you can make the most of it and turn numbers into insights for better campaign and management.
We hope this article was helpful and gave you a good overview of what Facebook Business Manager is – and how it can help streamline your account management. Learning how to use Facebook Business Manager may be bumpy at first, but you’ll soon see that it was worth it.Don’t forget to check out our other blog posts for more tips on Facebook marketing!


