advertisement

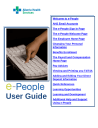
User Guide
Welcome to e-People
AHS Email Accounts
The e-People Sign In Page
The e-People Welcome Page
The Employee Home Page
Changing Your Personal
Information
Benefits Enrollment
The Payroll and Compensation
Home Page
Pay Advices
Viewing and Printing you T4/T4A
Adding and Editing Your Direct
Deposit Information
Quick References
Learning Opportunities
Learning and Development
Additional Help and Support
Using e-People
e-People User Guide HR Shared Services
Welcome to e-People!
This user guide provides instructions on how to use the e-People system; basic navigation information; and a brief overview of the personal information you can access.
What is e-People?
e-People is an internet-based human resources application for Alberta Health Services(AHS) employees. It allows management and maintenance of employment information and human resource interactions. The employee “self service” component of e-People provides the employee the ability to view and update their personal human resource information online, any time.
When can I access e-People?
Once you start your position and have access to the AHS network you can log in to e-People using your access network information (username and password). Follow the AHS Online Login instructions below.
Where to begin - First Login Directions
AHS Email Accounts
If you log in to the AHS network prior to your start date you should log in to your AHS Outlook Email account first.
All AHS employees are provided with an AHS email address for business email purposes only. Your AHS email will also be a regular channel for important e-People updates.
How to Access Your AHS Email Account Externally
AHS Online Login
1. Your new manager will send you your username and password. This password will be used for computer access for AHS email, e-People and MyLearningLink (the
AHS learning management system).
2. Open an Internet browser (preferably
Internet Explorer) from any computer with an Internet connection.
3. In the address bar, type my.ahs.ca
and
press the Enter key on the keyboard.
4. You will then see the AHS Web
Welcome screen where you can access your Outlook, e-People and Insite The
first time you log in to the AHS network you will be prompted to
change your password.
5. Click on the Email link, shown
6.
Enter the same Username and
Password in the Office Outlook Web
Access screen. Click the Log On button to open and send email.
AHS Outlook Web Access Log Off
1. When you are ready to log out, click Log Off on the upper right hand side of the Outlook Web Access page.
2. You will get a response that you have logged out. Click on the
Close Window button.
3. The AHS application page will still be open. Click Log Out on the upper right hand corner of the page.
Who do I contact if I have issues accessing my email account?
If you have problems using your existing email address or password, please call your zone IT Service Desk via the following path on Insite:
Home>OurTeams/Departments>InformationTechnology>ITTeams>
EndUserExperience>ServiceDesk
Last Updated: August 26, 2015 e-People User Guide
2
How to Navigate Around e-People
The e-People Sign In Page The e-People Welcome Page
1. Enter your username in the User ID field.
2. Enter your password in the Password field.
Your e-People access information will be the same as the one you will use to log in to the AHS network and to your AHS email account.
3. Click the Sign In button.
The Welcome to e-People message box on the right hand side provides important messages and updates related to the e-People system.
The Employee Home link located on the left hand side of the e-People home page provides access to personal information.
The first time you log in to e-People, you will be asked to provide:
•
The last 3 digits of your Social Insurance
Number
•
Your Month and Day of your Date of
Birth
You will also be prompted to change your password if you have not done so already. You may change your password as often as you feel is necessary.
Keep in mind, your password expires roughly every four months. You will receive a reminder when the deadline to change your password is approaching.
To change your password, please complete the following steps.
1. Enter your old password in the indicated field (this will change the password you were sent)
2. Enter your new password in the indicated field.
3. Re-enter your new password in the indicated field.
4. Press “OK.”
If no activity with e-People occurs for 20 minutes or more, e-People will automatically sign you out of the system. A “time out” message box will appear before it automatically signs you out. If e-People automatically “times out” you must sign in again to resume working in e-People. As a practice, it is recommended that when updating personal information using the Employee Self Service, employees save their changes before leaving to perform another task.
To have your e-People password reset, contact your zone IT Help Desk found on Insite via this path below:
Home>OurTeams/Departments>InformationTechnol ogy>ITTeams>EndUserExperience>ServiceDesks
The e-People Welcome Page Menu Bar:
The Home link always returns back to this e-People
Welcome page (the “Home” Page).
The Contact Us link directs to additional e-People support and resources posted on Insite. On this e-People
Resources internal web page contact information and step-by-step reference guides for e-People transactions can be found.
The Help link provides in-depth technical assistance related to e-People.
Always Sign Out!
•
Always click on the sign out link to sign out of e-People when finished.
•
After signing out of e-People the X at the top right corner on the window can be used to close the internet browser.
•
It is critical that you sign out before your click the X so that you sever the connection to e-People and to prevent unauthorized access to personal information.
Below is the e-People Welcome Page Top Menu Bar
Last Updated: August 26, 2015 e-People User Guide
3
How to Access Employee Information
The Employee Home Page
Access personal information by clicking on the following links on the e-People Employee Home page.
Self Service Documents:
•
Print various documents such as Employment
Verification, Alberta Blue Cross Confirmation
Letters and others
•
View nursing practice hours for current active
UNA employees
Benefits Home
:
•
View benefits information
Payroll and Compensation Home
:
•
View current and previous Pay Advice
•
View or edit direct deposit banking information
•
View hourly rate information
•
View compensation history
•
Print a paper copy of the Pay Advice
•
Request Bank Payout
•
Access T4 information
Education, Training/Development Home
:
•
Employees can add their external education information
Performance Management Home
:
•
Currently not applicable
Job Opportunities Home
:
•
View job opportunities available in AHS
•
Update your internal profile and attach a resume
•
Apply for jobs within Alberta Health Services
HR Contact Centre
:
Personal Information Home
: view, edit and add:
•
Name, address, phone number, marital status
•
Emergency contact information
•
Submit questions directly to the HR Contact
Centre
•
Review the FAQ’s
•
Initiate an inquiry and automatically obtain a reference ticket number
•
Review all previous inquiry tickets and responses
Last Updated: August 26, 2015 e-People User Guide
4
Verifying and Editing Personal Information
Changing Your Personal Information
Step By Step Instructions
All changes to your Personal Information are entered in the Employee Home page in e-People. To start, go to your Employee Home page, click the Personal and Job Information Home link to verify and edit the following personal information items:
To change your name:
1. Under Personal Information Summary, click the Name Change link.
2. The Name Change page appears. To make changes to your name, enter the date the name change will take effect in the Date
Name Change Will Take Effect: field using the yyyy/mm/dd format or click the calendar button to open the calendar to select the appropriate date.
3. In the New Name section, click the drop down arrow beside the Prefix field to select the appropriate prefix.
4. Type your first name in the *First Name field.
This is a required field.
5. Type your middle name in the Middle Name field.
6. Type your last name in the *Last Name field.
This is a *required field.
7. Click the drop down arrow beside the Suffix field to select the appropriate suffix.
8. Click Save to save changes. This is a required step.
9. Click OK to confirm the new name change.
10. The Name Change page appears displaying the Current Name and the New Name.
11. To exit the name change page, select the
Personal Information Home or the
Employee Home link.
12.
To exit e-People completely, click Sign Out in the upper right-hand corner of the screen.
Mailing Address
To add a new address:
1. Under Contact Information, click the
Home/Mailing Addresses link.
2. The Home and Mailing Address page appears. Your current address will display under the Addresses heading. To add a new address, select the correct address type by
clicking on the drop down menu. Click Add.
3. Type in the required information, including the country, address, city, province, postal code and date that the change will take effect.
4. Click Save to save the changes.
5. Click OK to confirm the changes.
To change your address:
1. To make changes to a current address, on the
Home and Mailing Address page click the
Edit button next to the address you wish to change.
2. Type in the required information, including the country, address, city, province, postal code and date that the change will take effect.
3. Click Save to save the changes.
4. Click OK to confirm the changes.
•
A name change does not show on your Pay Advice until the next pay is processed.
•
If only your home address is displayed under your Addresses tab, please ensure that it also serves as your mailing address. If your home and mailing addresses are different, ensure that you have 2 separate entries: one for home and one for mailing. This is important information to keep up-to-date for high priority mail-outs such as T4/T4As.
•
If you are moving, both current and future addresses will appear until the new address date is effective.
Last Updated: August 26, 2015 e-People User Guide
5
Verifying and Editing Personal Information Cont’d
Changing Your Personal Information
Step By Step Instructions
Changing Your Emergency Contact
Information
To update/add a name to your emergency contacts:
Changing Your Phone Number(s)
To add/update a business phone number:
1. Click the Phone Numbers link.
2. The Phone Numbers page appears. Your current phone numbers will display. To add/update a business phone number, click
Add/Update a Business Number.
This button will take you to the Alberta
Health Services directory to make your phone number changes.
3. After logging on, select "Personal/Phone
Info", make your phone number changes and click “Save Changes" when complete.
Your changes will be reflected in e-People within 24 hours or the next time you sign in.
Updating Region Business Phone Numbers is not available from kiosks at this time. If required, please update these numbers from a regional or home computer.
To add a personal phone number:
1. In the Phone Numbers page, click the Add
a Phone Number Button under the
Personal Phone Numbers heading.
2. Select the Phone Type by selecting the correct type from the drop down menu.
Enter in the phone number (including the area code).
3. Click Save to save the changes.
To update a personal phone number:
1. Type the correct number directly in the
Telephone field.
2. Click Save to save the changes.
Personal numbers can be removed by clicking the
Delete button next to the phone number you wish to remove.
1. Click the Emergency Contacts link.
2. The Emergency Contact page appears. Your current emergency contacts will display.
3. To add a new emergency contact, click the
Add an Emergency Contact button. The
Emergency Contact Detail page will display.
Fill in the fields. The fields marked with a * are required fields.
4. Click Save to save the changes.
5. To edit an existing contact, click on the Edit button next to his/her name. Repeat steps 5
and 6, above.
To change your primary emergency contact:
1. Ensure your new primary contact has been added to your emergency contact list by following steps 1-5, above.
2. Click on the button under the contact list.
3. Select the correct primary contact from the drop down menu.
4. Click Save.
To delete an emergency contact:
1. Click on the delete button next to the contact’s name.
2. Click to confirm the deletion.
Changing Marital Status
To update your marital status:
1. Under Personal Information Summary, click the Marital Status Change link.
2. The Request Marital Status Change page appears. Your current status will display. To change your marital status, enter the date the change will take effect and select the correct marital status from the drop down menu.
3. Click Save.
4. On the Save Confirmation Page, click OK.
The Request Marital Status Change Page opens displaying your marital status changes.
Review the page to verify the information is accurate.
Last Updated: August 26, 2015 e-People User Guide
6
Benefits Information
Benefits Enrolment:
The process below is for unionized employees only. Out of scope employees will receive an email from Alberta Blue Cross with a link to access benefit enrolment.
•
If you have eligible dependents, enrolment in family
Medical and Dental coverage must be selected; you may opt out of these plans if proof of coverage under a spouse or other employer plan is provided
•
Use e-People to enrol in your benefits as a new employee or upon transfer to a benefits-eligible position. Consult the benefits information posted on Insite via the path below:
Home>OurTeams/Departments>HumanResources>Total
Rewards>Benefits
•
After you enrol in your benefits, there may be a waiting period before your benefits take effect
•
You must complete this Benefits enrolment process within
31 days of your employment start date or official transfer date
* If you do not enrol in benefits within the 31 day window, your benefits will default to Single Coverage and the addition of dependents to your coverage will be restricted by certain terms and/or events; you may contact the HR Contact Centre for assistance.
* Evidence of Insurability is not required if you enrol in
Additional Basic Life within 31 days of your date of eligibility; coverage after 31 days is subject to Evidence of Insurability.
Please refer to Insite for more information.
After this initial enrolment, the only times you may change your benefit choices are:
• when you acquire a dependent (spouse or child)
• your spouses or other employer plan coverage ends and you wish to opt into coverage (application must be received within 31 days of the loss)
• when you have a marital status change that alters your dependents (divorce/separation) and this results in a change in coverage (family to single)
• when you want to remove a dependent that is no longer eligible for coverage and this results in a change in coverage (family to single)
Use the Designation of Beneficiary form to add beneficiaries to your insurance benefits (i.e. Life Insurance, Voluntary AD&D). A printed and signed form is required by law when you are adding or removing your beneficiaries.
This form can be found on Insite on the Benefits Forms Page via the path below:
Home>OurTeams/Departments>HumanResources>TotalRewards>
Benefits>BenefitsForms
Below is the Benefits Home page view for
Unionized positions
Below is the Benefits Home page view for
Non-Unionized and Management positions.
Last Updated: August 26, 2015 e-People User Guide
7
Payroll and Compensation Information
The Payroll and Compensation Home Page
•
Use the View Pay Advice link to view current and previous AHS pay statements.
•
Use the Direct Deposit link to view current direct deposit banking information and to update it, if necessary. New employees use this feature to initially enter their direct deposit banking information into the e-People system.
•
Use the Voluntary Deductions link to view your voluntary deductions.
•
The Request Bank Payout link allows you to view or submit your bank payout request.
•
Use the Compensation History link to view your annual salary or hourly wage.
•
Use the Retro Pay link to view any retro pay details.
•
Use the T4/T4A Consent link to request or withdraw consent to receive electronic year end slips.
•
Use the T4/T4A Viewing link to view your electronic year-end slips.
•
Use the T2200 Request/Review link for viewing
T2200 information.
Pay Advices
•
All current and previous Pay Advices (pay statements) are saved in e-People.
•
There are two versions of each Pay Advice: the online version and a PDF copy. The same information is displayed on both.
•
The PDF copy of a Pay Advice can be easily printed or saved. It is important to keep any printed copy of a
Pay Advice confidential.
•
The Pay Advice will be available on the Friday before the Wednesday pay date.
•
Bank balances for vacation, stats, etc. can be viewed with the Pay Advice information.
Last Updated: August 26, 2015 e-People User Guide
8
T4/T4A and Direct Deposit Information
Viewing and Printing Your T4/T4A
Step by Step Instructions
Providing T4/T4A Consent
This consent means you agree to NOT receive a paper
T4/T4A and will instead print off your own T4/T4A frm e-
People when you need it.
1. From the Employee Home page, click the
Payroll and Compensation Home Link.
2. Click the T4/T4A Consent link.
3. The T4/T4A Consent page will display. Click the check box and click submit.
You will receive an automatic email indicating your intended consent.
When you click on the T4/T4A Consent link, your current status will display as “Consent Received”.
You can change your Consent Status at any time. Each time your Status is changed, you will receive a confirmation email.
Adding and Editing Your
Direct Deposit Information
Step by Step instructions
Adding and Editing Your Direct Deposit
1. From the Employee Home page, click the
Payroll and Compensation Home link.
2. Click the Direct Deposit link.
3. Click Edit and add your banking information in the fields provided.
4. When all information has been entered click
Save.
Viewing and Printing Your T4/T4A
1. From the Employee Home page, click the
Payroll and Compensation Home Link.
2. Click the T4/T4A Viewing link.
3. The T4/T4A Viewing page will display. Click
“Year End Slip” for the desired Tax Year to view the corresponding T4/T4A.
From this screen, you are able to print or save your
T4/T4A.
Additional Support and Resources
HR Contact Centre
Phone: 1-877-511-4455
Email: [email protected]
Insite via the path: Home>OurTeams/Departments>HumanResources>e-People>Resources>EmployeeResources
e-People: Employee Home > HR Contact Centre >Ask a Question
Last Updated: August 26, 2015 e-People User Guide
9
Quick References
The following e-People Quick Reference guides provide information on specific e-People functions and transactions in a detailed and easy to follow manner. These guides are available as PDF documents on
Insite via the path below:
Home>OurTeams/Departments>HumanResources>e-People>Resources>EmployeeResources
Employee Self Service
•
Accessing e-People
•
How to Access Self Service Documents
• e-People Employee Handbook
Personal and Job Information
Home
•
Updating Your Personal Information in
Employee Self Service
Benefits Home
•
Benefits Summary & Dependents
•
Beneficiaries Enrol in Benefits-New Hire or
Transfer to a Benefit Eligible Position
•
Life-Event: Divorce/Separation/Widowed
•
Life Event: Birth/Adoption
•
Life Event: Marriage/Common Law
•
Life Event: Benefit Coverage Loss-Opting into Coverage
•
Life Event: Remove Dependent
Overage/Deceased
Payroll and Compensation
Home
•
Adding or Editing Direct Deposit Banking
Information
•
Employee Requests Bank Payout
•
How to Complete a Shift Redistribution
Form
•
Viewing Your Pay Advice
•
Viewing Your Salary and Compensation
History
•
Viewing Your Salary and Compensation
History - Management and Out of Scope
•
Giving Consent to View and Print Your
T4/T4A
•
Explaining Your Pay Advice
•
How to Read Your Pay Advice
•
How to Print Your Pay Advice
•
Saving a Copy of Your Pay Advice
Job Opportunities
•
Viewing and Applying for Job Opportunities
Last Updated: August 26, 2015 e-People User Guide
10
Learning and Support
Learning Opportunities
Connect to the e-People training that is right for you and your role.
Please visit MyLearningLink
to register for all online or instructor led courses for e-People Employee Training.
Access the following web pages on Insite for available resources via these paths:
•
Home>OurTeams/Departments>HumanResources>e-People>Training>e-PeopleEmployeeTraining
•
Home>OurTeams/Departments>HumanResources>e-People>Training>e-PeopleManagerTraining
•
Home>OurTeams/Departments>HumanResources>Payroll>Training
•
Home>OurTeams/Departments>HumanResources>e-People>Training>e-PeopleTrainingforHR
It is recommended you take the online Employee Self Service course as soon as possible.
Learning and Development
Courses and resource material are offered in a variety of delivery methods, each tailored to the content delivered and employee requirements, including:
•
Instructor-led Training
•
Online Training
•
•
•
Self-study/Quick Reference Guides
Employee Handbook
Manager Handbook
For all e-People Training Inquiries access Insite via the path below:
Home>OurTeams/Departments>HumanResources>e-People>Training
Additional Help and Support Using e-People
For questions related to your personal human resource information and e-People system, please contact the HR
Contact Centre:
Phone: 1-877-511-4455
Email: HRContactCentre@albertahealthservices.ca
e-People: Employee Home>HR Contact Centre>Recruitment>Ask a question
Last Updated: August 26, 2015 e-People User Guide
11
advertisement
* Your assessment is very important for improving the workof artificial intelligence, which forms the content of this project