


Try these fixes
Here are some solutions that have helped people resolve the error “Destiny 2 servers are not available”. You don’t need to try them all; just work your way down the list until everything’s working again.- Connect to the Destiny 2 server in another time
- Disable DHCP for your connection
- Use the Ethernet connection
- Update your network card driver
Note: the screenshots below come from Windows 10, and fixes apply to Windows 8 and Windows 7.
Fix 1: Connect to the Destiny 2 server in another time
It’s possible that too many people connect to the Destiny servers during the time period, so the servers are overloading and you will fail to connect. So you can wait for a while and try playing the game in another time. This issue can be automatically fixed. If you still have the error “Destiny 2 servers are not available”, don’t worry. There’s something else to try.Fix 2: Disable DHCP for your connection
If you’re connecting via WiFi, you’re more likely to have the servers not available error in Destiny 2. So you can try disabling DHCP in your computer to fix your problem. To do so:- Right click on the network icon at the bottom right corner on your desktop, and click Open Network and Sharing Center.
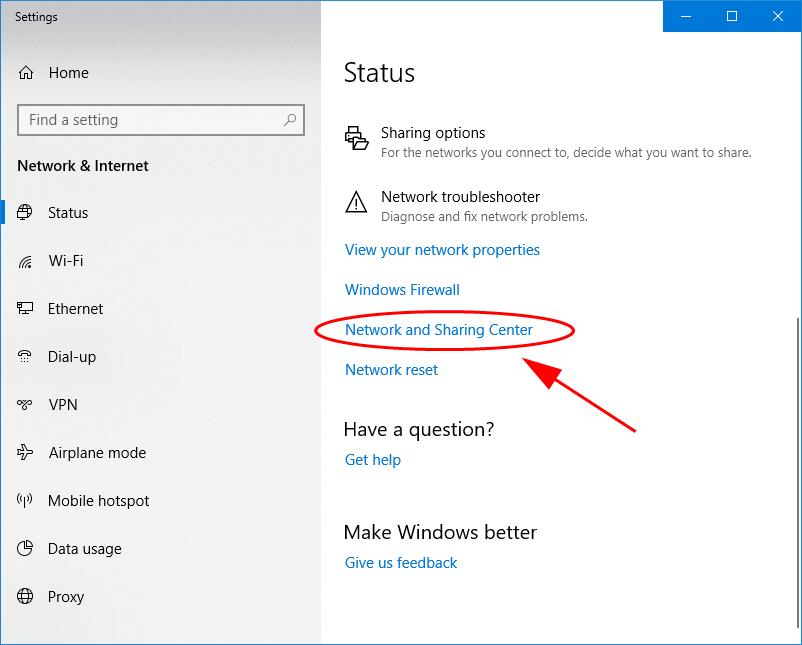
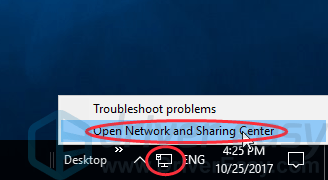 If you don’t see “Open Network and Sharing Center” there, you can click Open Network and Internet settings, then click Network and Sharing Center in Settings.
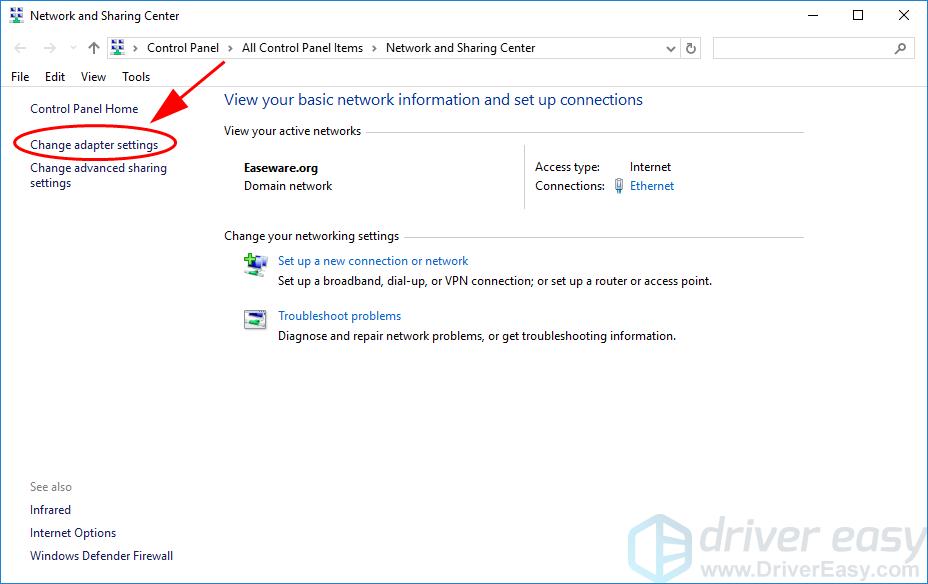
- Click Change adapter settings on the left.
- Right click on the connection you’re currently using, and click Properties.
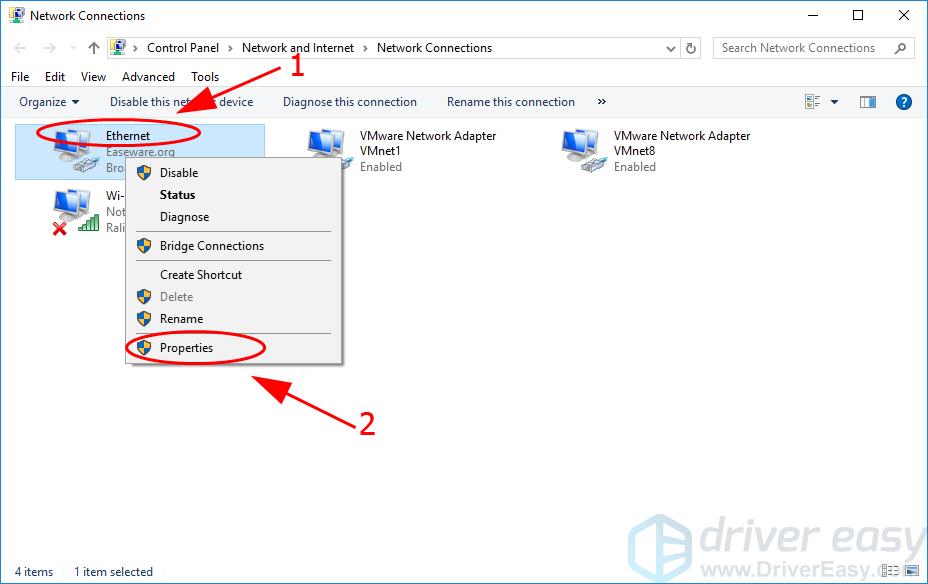
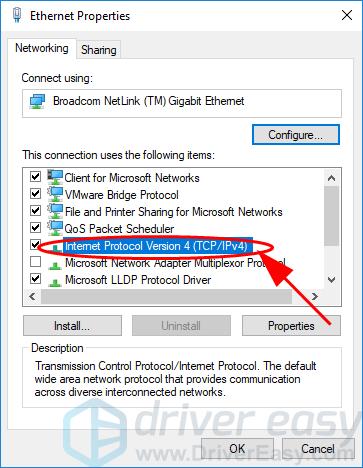
- Double click Internet Protocol Version 4 (TCP/IPv4).
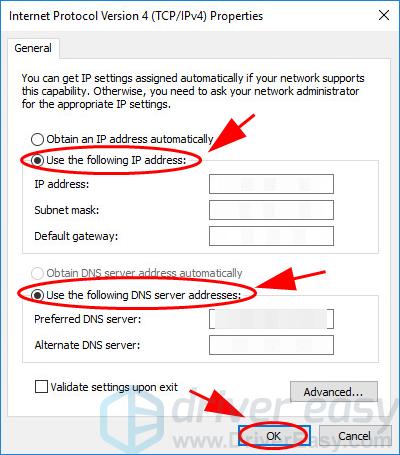
- In the new popup pane, select “Use the following IP address” and “Use the following DNS server addresses“. Then enter the IP address and DNS server addresses manually. Click OK to save.
- Restart your computer and open Destiny 2 to see if it works.
Fix 3: Use the Ethernet connection
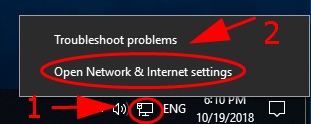
It’s recommended to use the Ethernet connection, since playing games like Destiny 2 requires a more stable and faster Internet connection. So you can switch to the Ethernet connection on your computer to see if it works. If you want to use the WiFi connection, or there’s no Ethernet connection available, try these steps to force your computer (and Destiny 2 included) to connect via WiFi.- Right click on the network icon at the bottom right corner on your desktop, and click Open Network and Sharing Center.
If you don’t see “Open Network and Sharing Center” there, you can click Open Network and Internet settings, then click Network and Sharing Center in Settings.
- Click Change adapter settings on the left.
- Right click on the connections that you’re not using, and select Disable.
You’ll need to repeat this step for any other connections that you’re not using.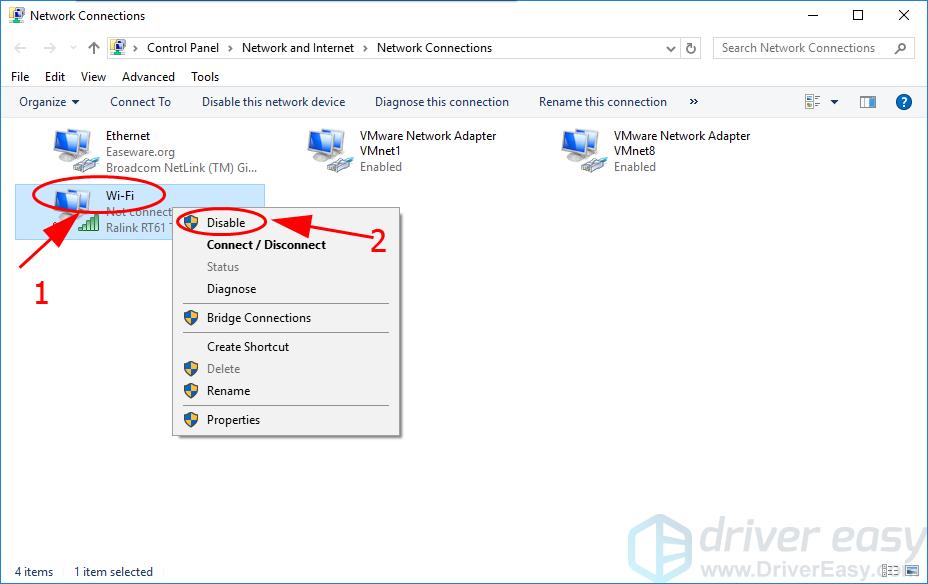
- Now your computer will only use the connection via WiFi. Restart the game and see if it works.
Fix 4: Update your network card driver
A missing or outdated network card driver will cause connection issues in your computer, so you should keep the network card driver up to date. There are two ways to update the network card driver: manually and automatically. Manually update the driver – You can go to the manufacturer’s website of your network card, then download and install the latest correct driver into your computer. Be sure to download the one that is compatible with the Windows OS running in your computer. This requires time and computer skills. Automatically update the driver – If you don’t have time or patience, you can do it automatically with Driver Easy. Driver Easy will automatically recognize your system and find the correct drivers for it. You don’t need to know exactly what system your computer is running, you don’t need to risk downloading and installing the wrong driver, and you don’t need to worry about making a mistake when installing. You can update your drivers automatically with either the FREE or the Pro version of Driver Easy. But with the Pro version it takes just 2 clicks (and you get full support and a 30-day money back guarantee):- Download and install Driver Easy.
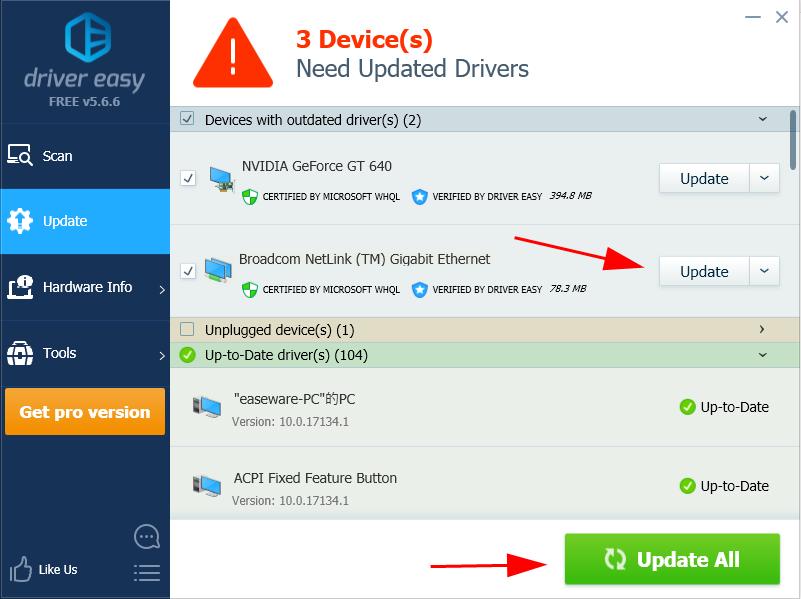
- Run Driver Easy and click the Scan Now button. Driver Easy will then scan your problem drivers.

- Click the Update button next to the flagged network adapter to automatically download the correct version of this driver (you can do this with the FREE version), then install the driver.Or click Update All to automatically download and install all the drivers that are missing or outdated (this requires the Pro version – you’ll be prompted to upgrade when you click Update All).
- Restart your computer to take effect.
So there you have it – the four effective ways to fix “Destiny 2 servers are not available” in your computer. Feel free to leave a comment below if you have any questions.
4
4 people found this helpful
0 Comments