
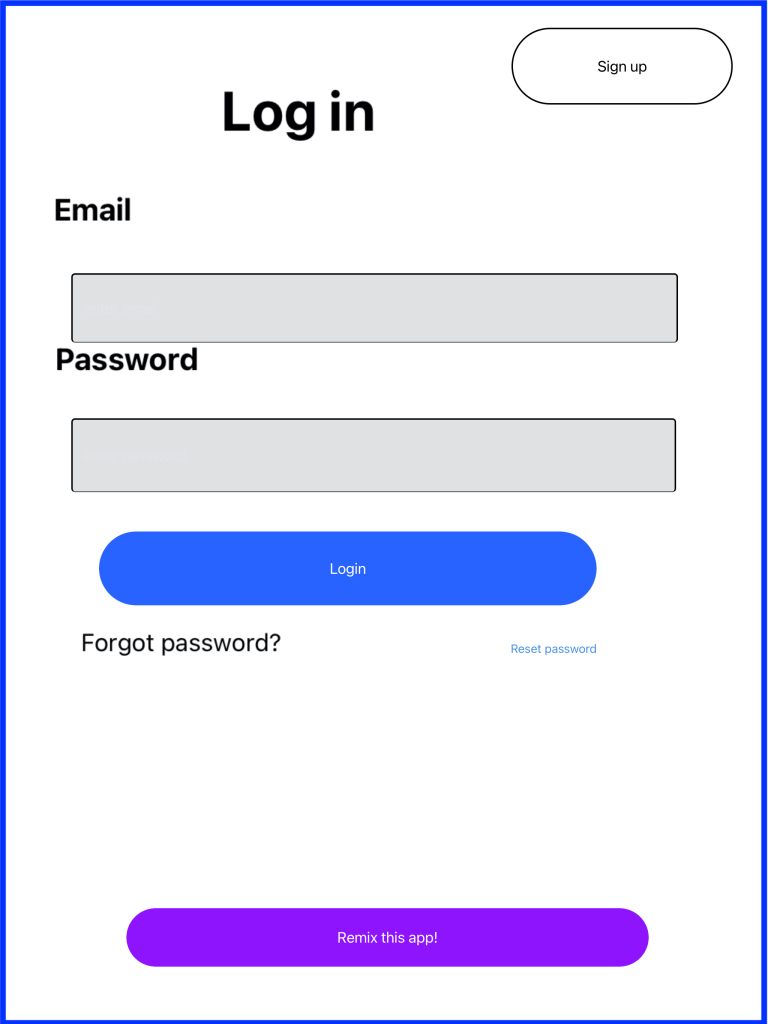
This tutorial steps you through creating a Thunkable app with basic login and profile capabilities. You’ll begin with a template, tweak a few things, and within minutes have an app with user login capabilities in which users can edit profile information. You can then customize it and add your own screens and behavior.
A version of this app is up at the app store, check it out!
Video version of the login-profile tutorial (drag and drop)
Note: This tutorial is based on Thunkable’s drag and drop interface. If you’d rather use the classic interface, check out this tutorial.
Sneak peak at the tutorial in the upcoming book on Thunkable:
old version of the tutorial:
Make a copy of the login-only template
- You’ll perform these steps on your computer (not device)
- If you don’t have one, signup for a free account at Thunkable.com.
- Open the template app in Thunkable.
- Try the template app ON YOUR PHONE: register and log in. You’ll need to install Thunkable Live on your phone, and choose “Preview on a Device” from the template app page. The app doesn’t work within the web previewer– it must be tested on a device!
When you register for the template app, You’ll need to provide a real email that you can verify to register. - From the template app detail page, click on “See Inside” to view/remix the code
- Make a copy of the app. Your copy will not work immediately. You need to tweak it by creating your own Firebase account and project for login, your own Cloudinary account for saving files, and your own Google sheet. You’ll also need to tweak some blocks so that your Google sheet is used instead of the original. All the tools you need are free and you can complete the work in 30 minutes following the instructions below.
Connect to Firebase for reg/login
- Follow the instructions below or use this video tutorial
- If you don’t have one, sign up for a free account at Firebase.com
- Create a new Firebase project, you’ll be prompted for a name.
- Disable the Google Analytics for the time being.
- Firebase provisioning will take a few seconds, just wait.
- Connect your Firebase project to your app
— provide Firebase with a nickname for your app (can be same as project name)
— do not choose “hosting” option
— click “register app”
— continue to console. - Set up user authentication
— click “Authentication” and “get started”
— In “sign-in method” tab, enable “Email/password” but not “email link”
Connect your app to Cloudinary to store profile images
- Register for a free account at cloudinary.com. That site will store the images your users post.
- On your dashboard at cloudinary, you’ll see three settings that need to be input into your Thunkable app.

- At Thunkable, choose your project settings in the left panel and scroll down to find the Cloudinary settings. Copy the information from your cloudinary dashboard into these settings
Create your spreadsheet to store profile info
The template app uses a spreadsheet, UserProfileDD, owned by the template app’s creator, yours truly David Wolber. The spreadsheet stores username, email, description, and pic for each user. You have to create your own Google sheet and change the app to use your sheet.
- Create a Google sheet with a single row with the column headings “username”, “email”, “description” and “pic”. Your column names must be exact. Name your sheet UserProfiles.

- At Thunkable, add a new data source and select the spreadsheet you just created. Don’t delete the existing data source yet (and leave the one called RecentProfilesFirst
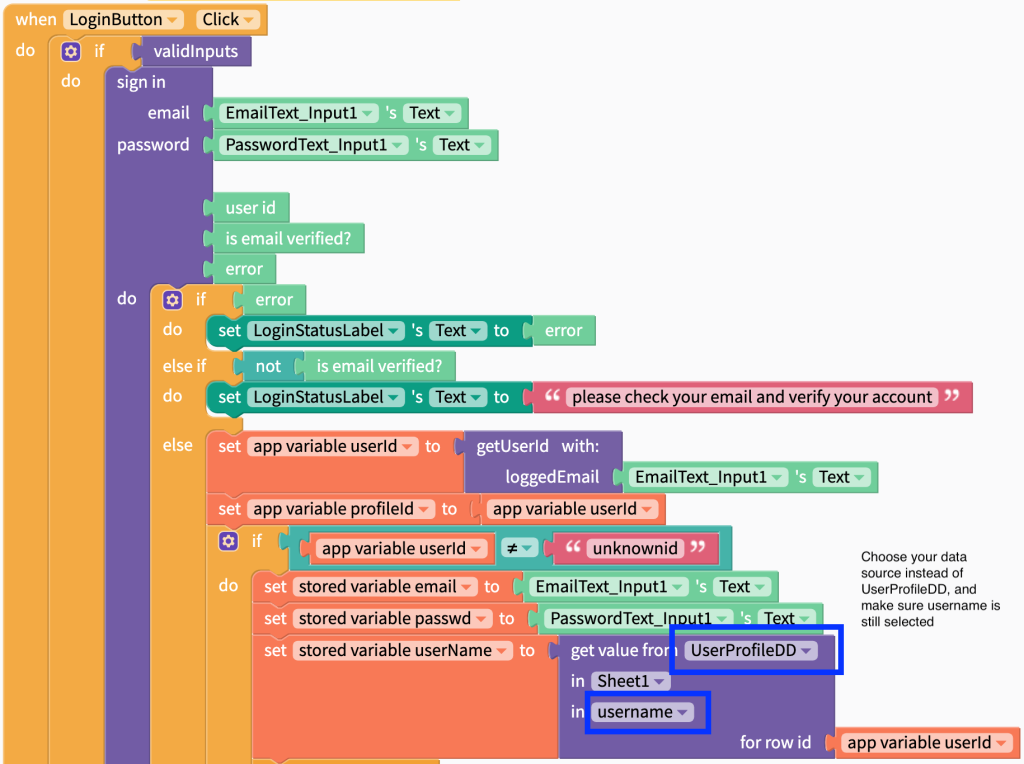
- Click on the “Blocks” tab, then visit the Login, Registration, Profile, and AllUsers screens. For all blocks that refer to UserProfileDD, change the data source to point at the new one you just created. Be careful, this is the super important tricky part-– you want all of the column settings and other blocks to remain unchanged, and when you change the source, they get modified.
The sections below provide details on how to modify the blocks in each screen. Go through these carefully to make sure your blocks are changed to look exactly like this, except for naming your data source (UserProfiles) instead of the original (UserProfilesDD).
Modify LoginScreen Blocks

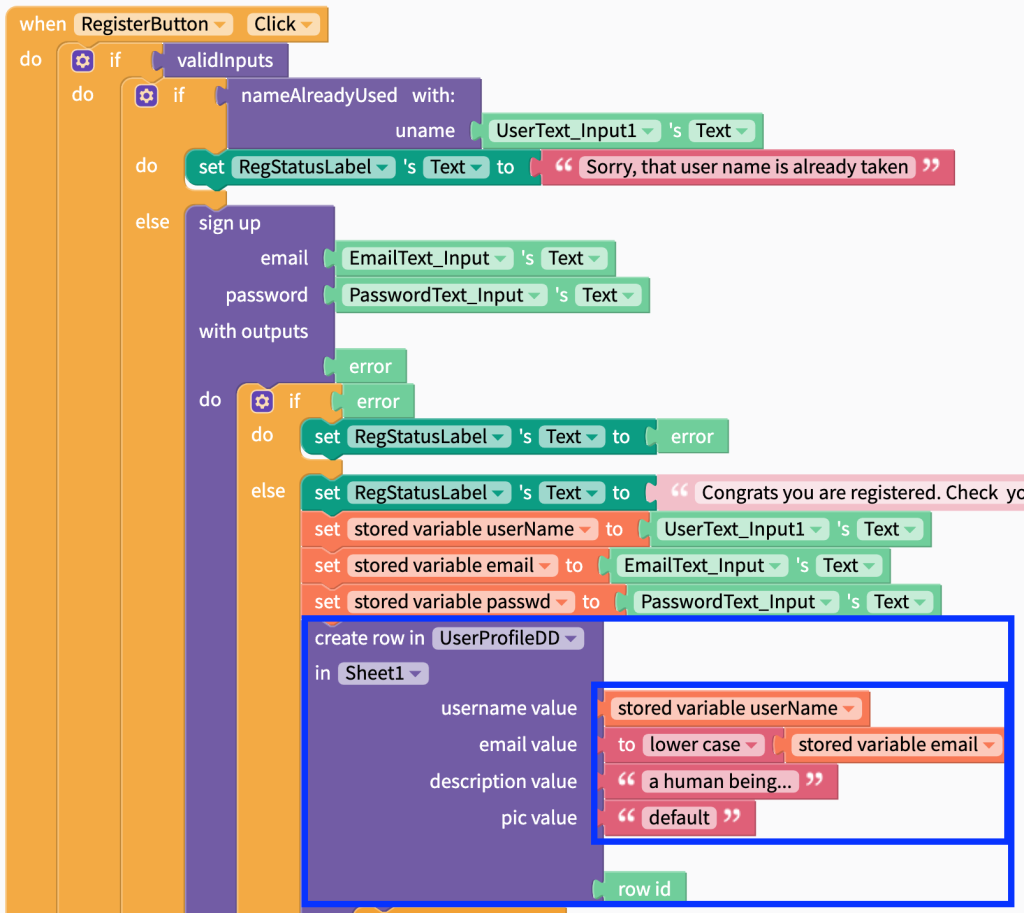
Modify RegScreen Blocks
Modify ProfileScreen Blocks


Test the App and Troubleshooting
Test your version of the app within Thunkable by choosing the “live test on device” icon in the top-right of the Designer. Try to register. If things work, you (the test user) should receive an email to verify. Open the email sent to you, click the link to verify, and then you should be able to login.
If you don’t receive a verification email and can’t login, go to your Firebase console and see if a new user has been added. If not, check the Firebase settings in your Thunkable app.
You should also have a corresponding row in your Google sheet (UserProfiles) recording the email, user name, description, and pic. If a row hasn’t been added to your spreadsheet, check that all the blocks in the app refer to your new data source and have the proper column settings as shown in the images above.
Once you can register/login, test the user profile screen. If you have trouble setting an image for the profile, check your Cloudinary settings within Thunkable.

You must be logged in to post a comment.