Congratulations! You have just completed your first SolarEdge project! This is a big moment for an installer. The optimizers are on the rooftop and you remembered to grab the serial number stickers. The inverter is mounted and you remembered to load in the SD card. You checked SafeDC at the inverter and confirmed the same number of volts on the ground as you have panels and optimizers on the rooftop. You even wired up the communications or connected a wireless home gateway device. It’s a good thing you watched the videos on YouTube.
Now it is time to register your first system…
To do that, you will need to create an account. Once the account is created, every new site you install will be connected to that account giving you a bird’s eye view of your entire fleet’s performance.
New Installer Accounts
When opening an account, make sure you have the SolarEdge inverter serial number and the name of the Distributor from whom it was purchased (us of course).
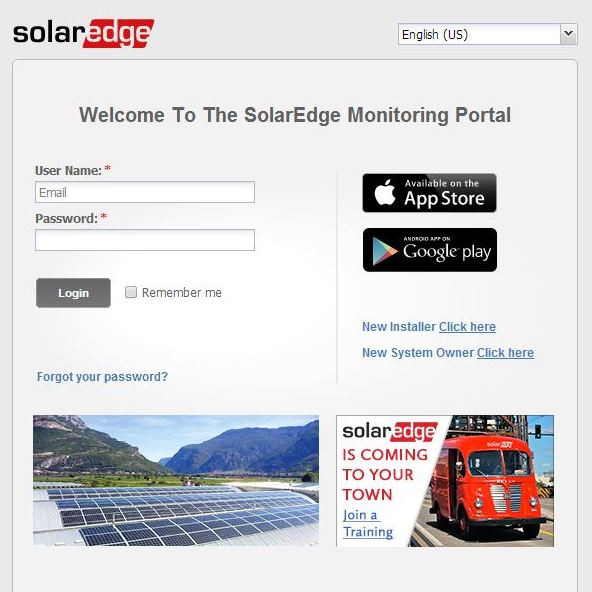
Access the SolarEdge Monitoring Portal at http://monitoring.solaredge.com/ alternatively click the Monitoring Portal Login on any SolarEdge website.
You will now see the login page. Choose New Installer click here:
Fill out the registration form (mandatory data is marked with a red asterisk).
TIP: If you want to see temperature in Fahrenheit, choose Imperial from the System Units drop down.
If you want to receive alerts for system issues, please enter your email in the Email for Alert Notifications box. NB: You will be able to add additional email addresses in the admin window later.
Here is where you will need your SolarEdge inverter serial number (SN) and distributor information.
Enter the last 10 digits of the inverter SN. For example, if the product serial number is SF0112A-07F123456-1B you should enter: 7F123456-1B. Also enter your distributor name.
After submitting the form you will receive an email with a link. By clicking the link you will confirm your email address and following a short validation process by SolarEdge Support you will receive your username and password confirmation. You can now log-in to the monitoring portal and manage your account.
Logging-in to the Monitoring Portal
The first time you log in, there will be no sites in your site list. As you create sites, you will see all of them when you log in on the site’s Dashboard.
To create your new site, click on + Create New Site in the top right of your dashboard.
During site creation, you will need the basic information for your site such as name and address.
TIP: When entering your street (Address 1:) add a full-stop or comma at the end, otherwise the system may not be able to find the correct location.
You will also be asked for nearest weather station. Typically, this is the same city where you have installed the array. However, in some cases, you may need to select a nearby city. Currency is for your locality.
TIP: Peak power is in kilowatts so be careful not to write 5,000 for a 5kWp system. This is also a DC number (not AC power).
TIP: We often get asked about Feed in Tariff. A feed in tariff is used to calculate the £ value created by your PV array. For residential systems, this is the average price for electricity that will be offset by the array. If you have a Time of Use (TOU) schedule, you will need to make an approximation of the amount taking into consideration the seasonal and hourly rate changes.
You also have the option to upload an image to the site which can make it more attractive for owners and can help you remember the details of the installation.
If you scanned a map on your iPhone with the SolarEdge iPhone app, you will upload the file into the System Physical Mapping window. Mapping the physical location of each optimizer in the site is not mandatory. It will, however, make future diagnostics easier and more informative. To generate a physical map you can either use the iPhone Site Mapper app or use the Physical Layout template which should be filled out using the detachable 2D bar-code stickers on each optimizer. The iPhone app will generate an XML file with the physical mapping addresses. The total size of all uploaded files in the form should not exceed 4 MBs.
Managing your Account
Many features to manage your account are located by the Welcome drop-down arrow. Click on your name to see them. In the My Account section, you will be able to:
- Manage your company details such as company name, location, email alert distribution lists
- Upload your company logo
- Manage and add account users
- Manage or add all of the module brands and models that you use with SolarEdge
- Manage or add all SolarEdge inverter models that you use
… and don’t forget, for every installation you create, you earn Alliance transaction points towards earning fun gifts (like TAG Heuer watches, Apple computers, Dewalt tools) and marketing supplies!
If you have any other questions regarding site set-up, refer to the new ‘SolarEdge – Create and Manage Your Monitoring Portal Account’ PDF from the link shown below.
This article first appeared on the SolarEdge Blog August 2014.
