


![]()
Want to change the background wallpaper or just set another color for Ubuntu Gnome login screen? Here’s how to do the trick in Ubuntu 22.04 and Ubuntu 24.04!
As you may know, the GDM background is not easy to modify since GNOME hard-coded the CSS into a .gresource file. Thankfully, there’s now a graphical configuration tool can do the job for Ubuntu 22.04 and higher.
It’s GDM Settings, a free open-source tool not only for changing the background for GNOME login screen, but also supports for configuring login screen for following things:
- Change the Fonts.
- Tweak top-bar color, background.
- Configure sound, mouse and touchpad.
- Disable User list.
Step 1: Install GDM Settings
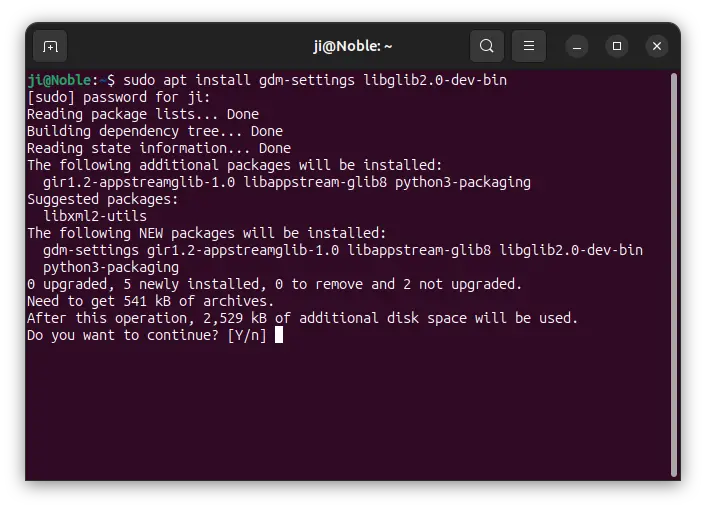
For Ubuntu 24.04, the graphical configuration tool is already made into system repository.
Simply, press Ctrl+Alt+T on keyboard to open terminal. When it opens, run command to install it:
sudo apt install gdm-settings libglib2.0-dev-bin
If package not found, run sudo apt update to refresh package cache.
For Ubuntu 22.04, the package is not available in system repository. For choice, I’ve uploaded it into this unofficial PPA.
Just press Ctrl+Alt+T to open up a terminal window, and run the commands below one by one to add PPA and install the tool:
- Add the PPA:
sudo add-apt-repository ppa:ubuntuhandbook1/gdm-settings
- Refresh system package cache, though it should be done automatically while adding PPA:
sudo apt update
- Finally, install the configuration tool:
sudo apt install gdm-settings libglib2.0-dev-bin
Step 2: Use GDM Settings to change login screen background
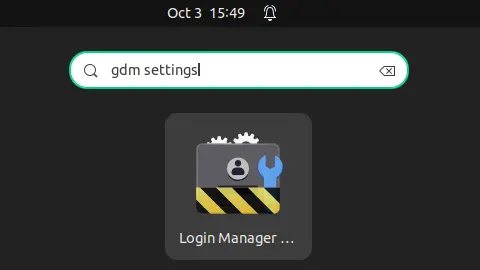
After installed the tool, press Super (Windows logo) key to trigger overview, search for and launch “GDM Settings”.
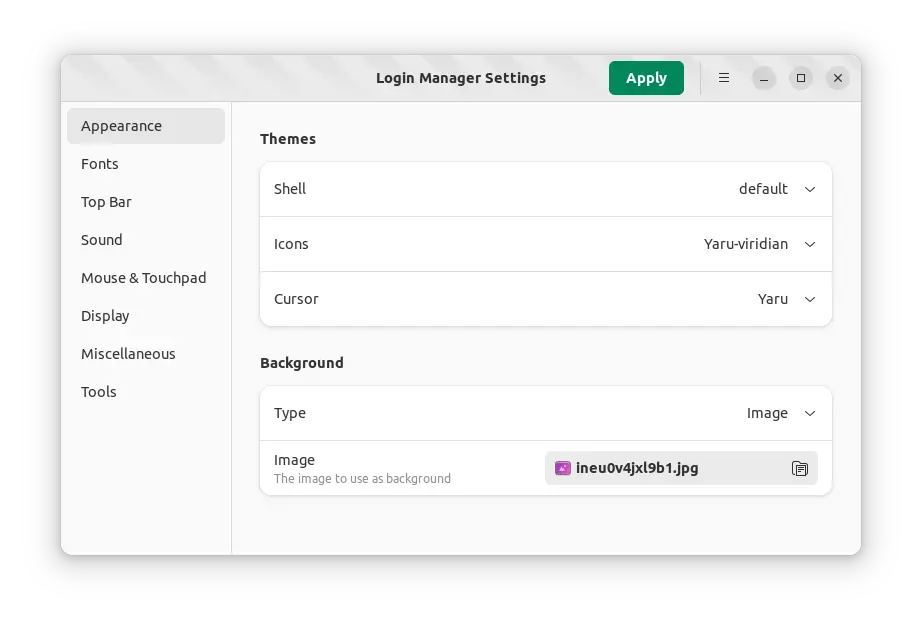
In the first “Appearance” tab, set background type to either “Image” or “Color“, then choose an image file or set a color value for login background. Finally click “Apply“. Though, you need sudo permission to apply the change.
Uninstall GDM Settings
If you don’t need the app anymore, simply open terminal (Ctrl+Alt+T) and run command to uninstall it:
sudo apt remove --autoremove gdm-settings
For Ubuntu 22.04, also remove the PPA repository by either running command in terminal:
sudo add-apt-repository --remove ppa:ubuntuhandbook1/gdm-settings
or using “Software & Updates” utility to remove the corresponding source line under “Other Software” tab.


I used to run this and use an image file of /Pictures/current_wallpaper. This was a symlink to an image. On logout I’d run a script that picked another image from a list of login images and reset the symlink. This used to work in that every time I logged out I’d get a new background image. This no longer works. Not sure why. Perhaps it’s not following the symlink anymore. Maybe it makes a copy of the image file somewhere.
Also, any way to get this to be essentially the lock screen?
Hi all
i made the things that are written and it proceeded well.But the picture on the lock-screen is far to big,about 4 times bigger than if it would fit the Monitor.The original picturesize on my compurer is about a sixth of the monitorscreen.How is it to calibrate ? Will it make sense to expand the original image to fit size and change then ? Or is it possble to shrink that
picture that is used for lockscreen? sorry about my humble english
Try resizing your image:
1. open “Files” and navigate to the folder that contains your image file.
2. right-click on blank area in that folder and select “Open in terminal”.
3. In pop-up terminal window, run command to install imagemagick tool:
4. Finally, resize your image to fit screen size:
In last command, you may drag & drop the original image file into terminal instead of typing “file_name.png”. And, change 1920×1080 depends on your screen resolution (see it in ‘Displays’ setting page).
i get this error bash: src/pre-23.sh: No such file or directory
In 2024, try GDM Settings (see the link in post), the graphical tool makes the thing much easier!