We've gotten used to using our computers daily for the most mundane tasks: checking e-mails, checking the news or the weather, playing games, listening to music or watching movies. Sometimes we may experience our computer to abruptly shut off while performing any of these tasks and it can be frustrating if it's happening repeatedly.
This guide will take you through some troubleshooting steps that may help fix this issue. The steps are listed in order, so start with the first one, see if that helps, and then continue with the next one if it doesn't.
What You'll Need:
No extra tools or supplies are needed.
-->
Before You Begin:
Extra instructions.
hyperlink
-->
2. Check the PC's Power Connection
Make sure the PC is powered up properly by checking the electrical connections.
Make sure you are using a working electrical outlet. You can test another electric device, such as a lamp, with the same outlet. Bypass any power strips for troubleshooting purposes.
Make sure the power connections to and from the PC are proper. Choose the type of PC you have below.
Laptop PC
A laptop PC has an external power supply and connects like below:
One connector (1) plugs into the computer
The other connector (2) plugs into an electrical outlet
And sometimes, a third (3) connector plugs into the power supply itself
Examine all cables and connectors for visible damage. If they are damaged, they may need to be replaced.
Make sure all connectors are firmly plugged in.
Desktop PC
A desktop PC has an internal power supply included in the case.
The power cable looks like below. Examine the cable and connectors for visible damage. If you find any damage, the cable may need to be replaced.
Make sure one end of the cable is firmly plugged into an electrical outlet.
Make sure the other end is firmly plugged into the power socket on the rear side of the PC case.
Some power supplies have an I/O switch. Ensure this is set to the on position. If the I (1) is pressed in, it means the power supply is turned on. If the O (2) is pressed in, the power supply is turned off.
All-In-One PC
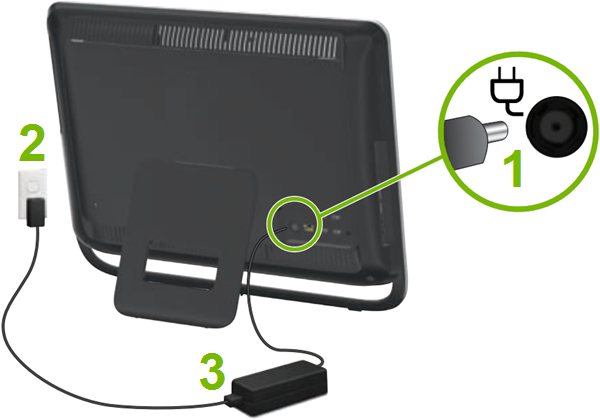
An All-In-One PC has an external power supply just like a laptop PC has:
One connector (1) plugs into the computer
The other connector (2) plugs into an electrical outlet
And sometimes, a third (3) connector plugs into the power supply itself
Examine all cables and connectors for visible damage. If they are damaged, they may need to be replaced.
Make sure all connectors are firmly plugged in.
3. Check the Computer's Ventilation
Computers heat up while they're running and their internal parts need to be cooled down and kept at a certain temperature to perform optimally. If the computer overheats it may result in it shutting down to prevent damage to its components. In worst cases, the components may also melt or get fried if the computer is kept running at a high temperature. To check whether your computer still has working fans, try the following:
Look for any vents your computer may have: in the back, on the side or bottom.
With the computer turned on, place your hand in front of the vents and feel if there is any air blowing.The longer the computer is turned on and the more complex the tasks it needs to perform, the warmer and stronger the air flow should be.
Depending on your results, you will have three options:
There is no air blowing – This could mean the fans are not working and the computer has no cooling.
The air flow feels weak – The computer's fans may have dirt built up on and inside them which is causing them to slow down and not blow enough air to properly cool down the internal components. This can be fixed by cleaning up the outside and inside of the computer, and oiling up the fans.
The air flow feels normal – This could mean the issue the computer is having is software related. There are a few different software fixes that may be attempted to resolve the issue.
4. Clean & Oil the PC's Fans
If you had a computer for more then a few months, it is likely to have accumulated some dirt inside and out. Dust, grime, hair and other debris can build up on fans, heat sinks and other parts. Components can also come loose or become unseated over time. All these can affect a computers performance in a negative way.
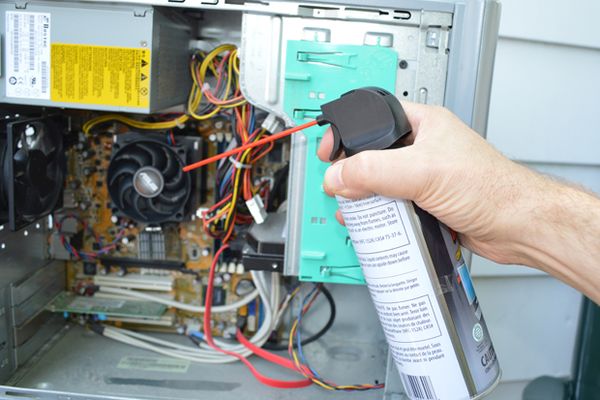
Using a compressed air duster is the best and most recommended way of cleaning inside a computer.
When blowing compressed air, keep the can upright at all times and never shake it to prevent the liquid refrigerant from leaking onto your electronics. Use short bursts of two or three seconds. When the can gets too cold to hold, set it down for a few minutes until it warms up again.
For a desktop computer
Turn the computer off and unplug its power cable.
Open the computer case and remove the side panel.Only open the computer if its warranty has expired. If it's still in warranty, only clean it from the outside.
Blow compressed air to clean up the inside of the computer. Pay special attention to the fans. Also remove any wires or objects that may be touching the fan blades.
Blow some air through the vents as well, from the inside and the outside.
Locate any fans and peel back their sticker partially to see the bearing. If there is a protective cap underneath, remove that as well. Add one or two drops at most of oil. Only use lightweight mechanical oil. Do not use cooking oil or spray lubricant.
Once done, put the side panel back in place, reconnect the power cable and turn the computer on to test it out.
For a laptop or all-in-one computer
Turn the computer off and unplug its power cable.
Locate the air vents or other openings.
Blow compressed air to clean up the vents or other openings.
Once done, reconnect the power cable and turn the computer on to test it out.
If the PC is Still Overheating
5. Revert Windows to an Earlier System Restore Point
Windows has a great utility called System Restore that allows you to revert your system to an earlier state called a restore point. Restore points are created automatically when you install a new app, driver, update, or when you create one manually. Restoring your PC to an earlier point in time will not affect your personal files, it will only revert system changes and remove anything installed after the restore point was created.
Do not turn off or power down your computer during a System Restore to avoid data loss or corruption. If you are using a laptop, make sure it is plugged into power so the battery does not run out during this process.
Access the System Restore utility. Depending on the issue your PC is having, there are different ways to do this:
From the Start Menu
Type "rstrui" in the search field next to the Windows logo then select the result from the list.
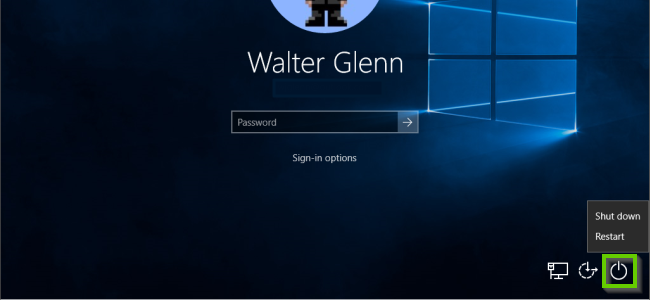
From the Sign-in Screen
From the Sign-in screen click the Power icon.
Press the Shift key on your keyboard and keep holding it.
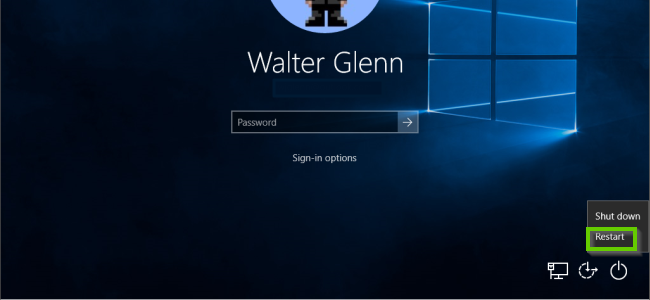
With the Shift key still held down, click on Restart.
Release the shift key on your keyboard and wait for the PC to restart.
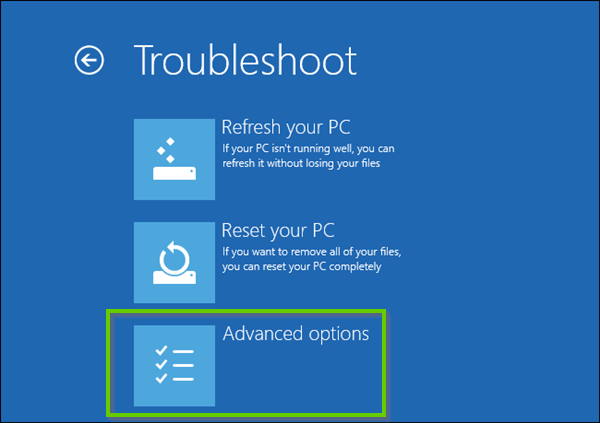
On the choose an option screen, select Troubleshoot.
Select Advanced Options.
Select System Restore.
From a Non-operable State
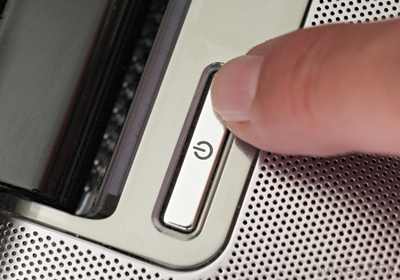
Locate the power button on your PC. Hold it down until you hear the PC turn off and any lights go out.
Turn the system back on.
Repeat this process (about three times) until you reach the Choose An Option menu.If your PC has restarted abruptly several times, it will bring up this screen automatically.
Select Troubleshoot.
Select Advanced Options.
Select System Restore.
Select Next in the System Restore utility.
Select a date before the issue started, you may see more than 1 restore point. Select Next afterwards.
Confirm your restore point by selecting Finish.
A message warning you that once started, the system restore can't be stopped or undone. Select Yes to proceed.
Your system will take a few moments to ready the system restore.
Your screen will turn blue, and the system restore will begin.It can take a long time, over an hour in some cases, for System Restore to complete.
Your computer will reboot on its own when complete.
After returning to your Desktop, a message letting you know the System Restore was successful is displayed. Select Close.
6. Check for Updates
Select the Start menu.
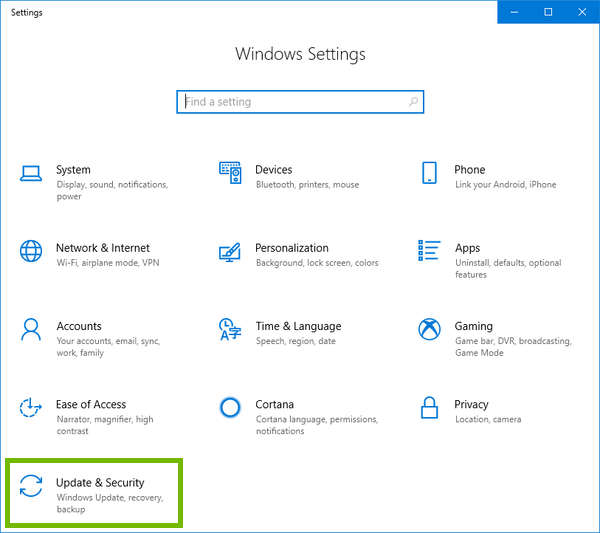
Select the Settings button on the left side of the start menu.
Select Update and Security.
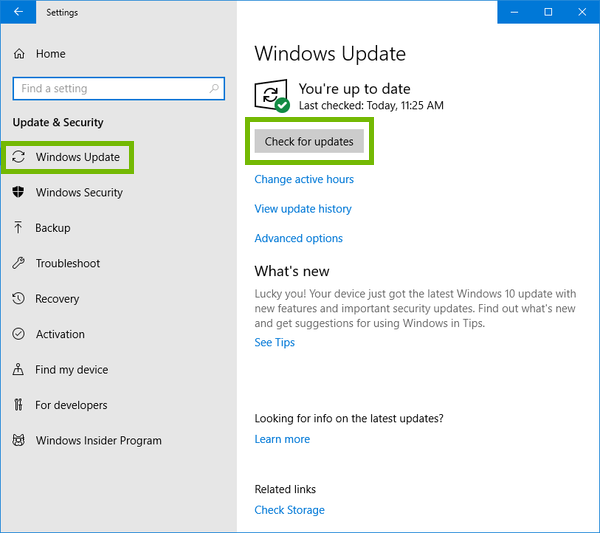
Select Windows Update on the left, then select Check for updates.
Once the system has finished checking for updates, it will automatically download and install the latest applicable updates.
The system also may prompt you to restart, if it does, please do so at your earliest convenience, otherwise the update process will not complete.If you system was already recently updated, chances are that no further updates are available and your Update status will indicate: Your device is up to date.
7. Reset Windows to its Original State
When you've exhausted all options in trying to fix a major issue with Windows, you may be left with resetting Windows to its original state your PC had right out of the box.
Depending on the reset method you choose, the process may delete all personal data and apps you have saved on the PC. If you need to back up all your personal data make sure you do so before proceeding.
Click the Start button then select Settings from the menu.
Click Update & Security.
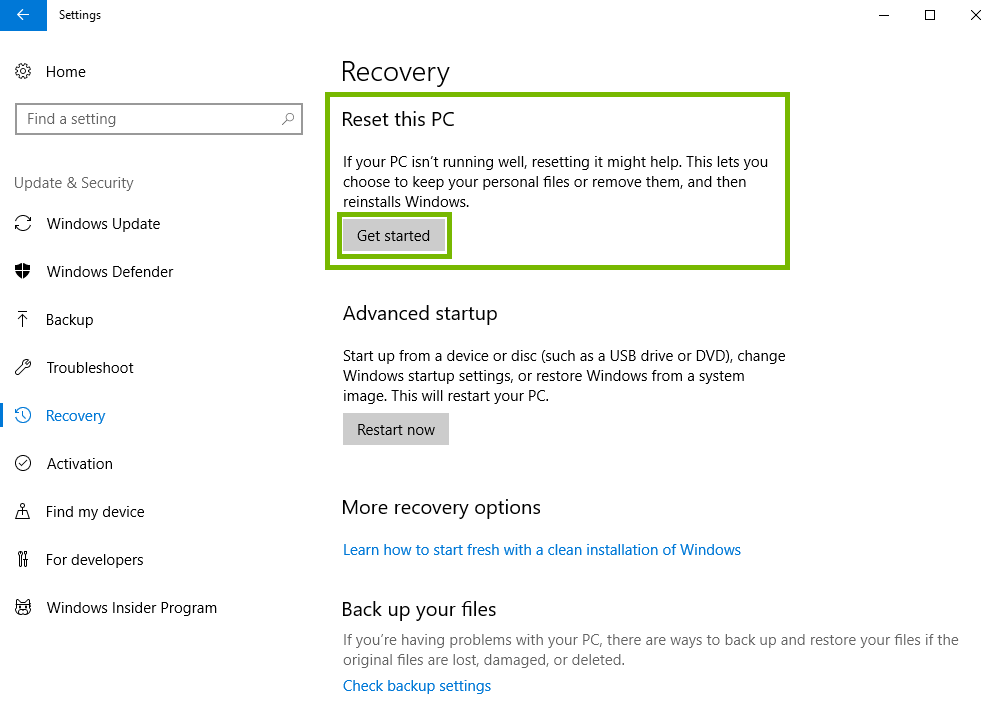
Choose Recovery on the left.
On the top right, click Get started under Reset this PC.
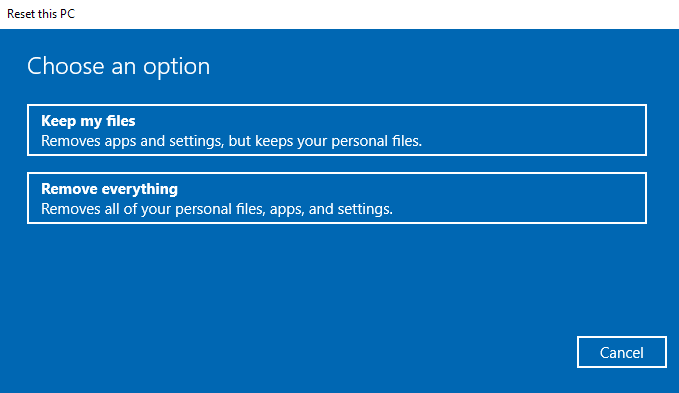
In the new window that opens, choose if you want to keep your files, or remove everything.
Keep my files should not delete any personal files you have stored on your computer, but will remove all applications you've installed, as well as all settings you've changed.
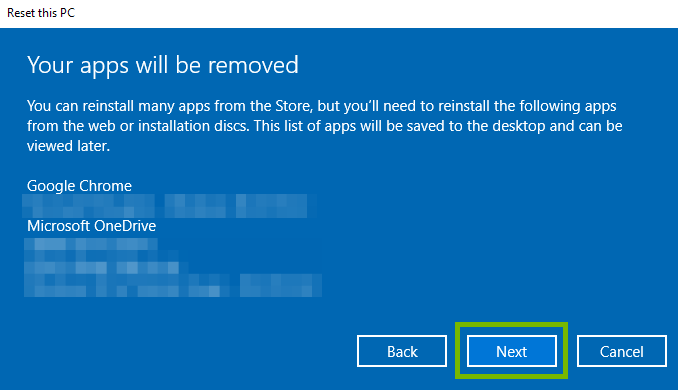
You will be given a short list of programs Windows can find that will be removed, reminding you that you'll need to re-install them after the reset if you want to use those programs. Click Next when you are ready to begin.
Remove everything will delete your personal files, applications you've installed, and all settings will be set to their default values.
You'll be presented with options to just remove files, or clean the drive.
If you're keeping the computer and are not worried about someone attempting to retrieve data from the drive, select Just remove my files.
If you are selling or giving away the computer, choosing Remove files and clean the drive will make it much harder to retrieve anything. This process will take a very long time to complete.
Once you make your choice, you will be given a final list of what will be done. Click Reset when you are ready.There is no going back, and no chance to retrieve anything removed during the reset process. Please make absolutely sure your backups are up to date before pressing Reset.
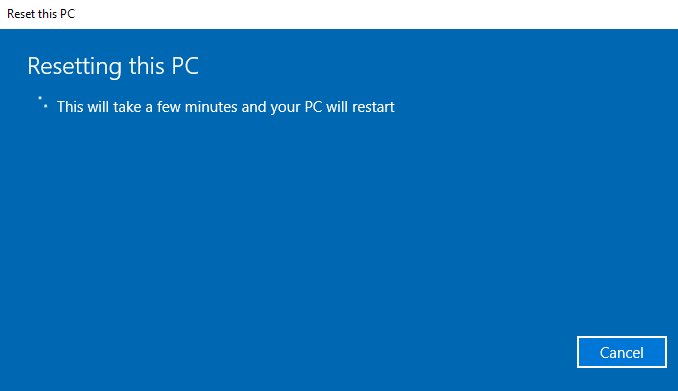
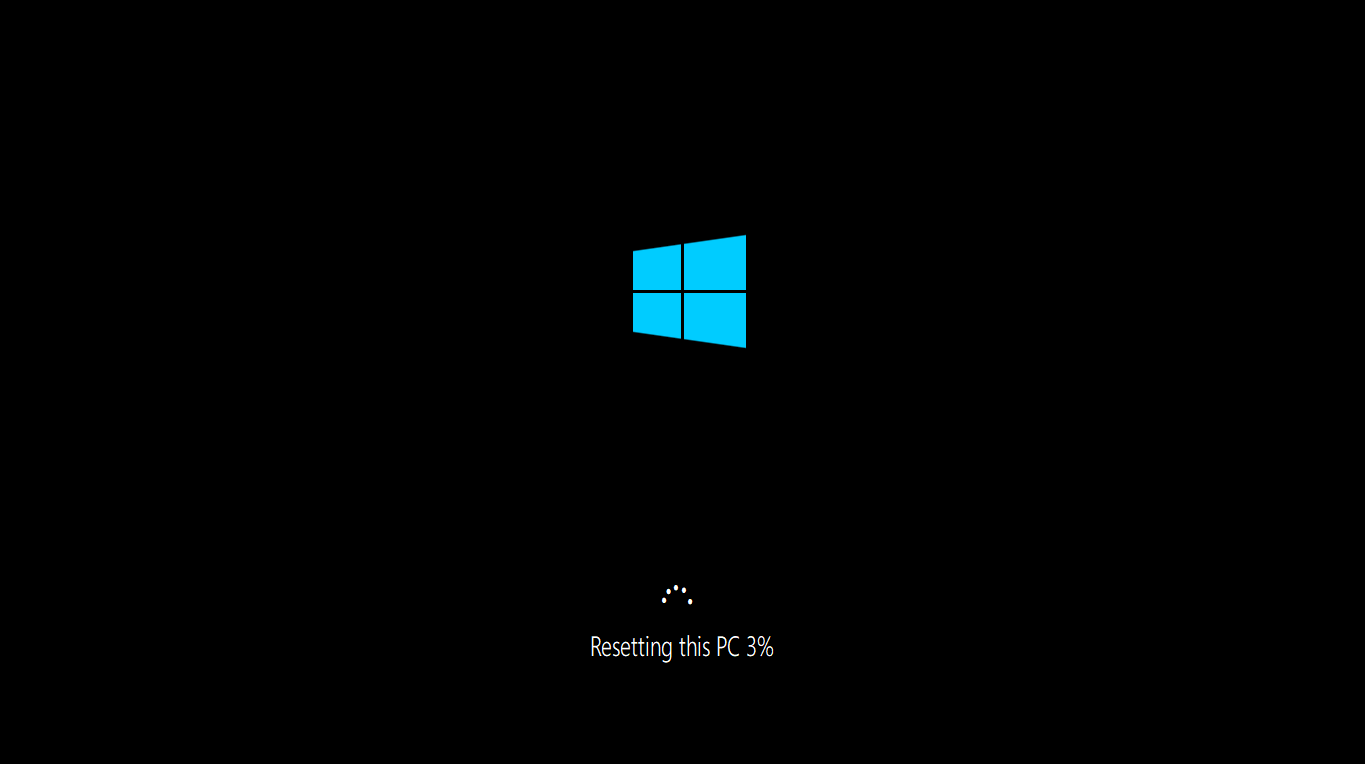
Once you click Reset, the process will start.
Your computer will reboot, and give you the progress of the reset at the bottom.
Windows will guide you through setting it up with your username, password and other basic settings, just like when you first purchased your computer.
.png)