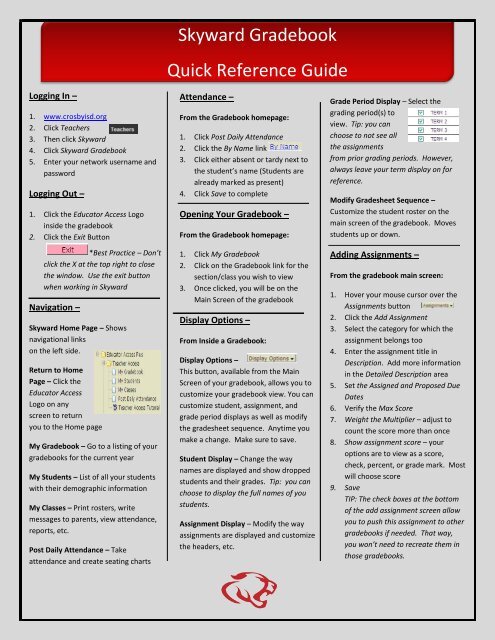
Skyward Gradebook Quick Reference Guide - Crosby ISD
Skyward Gradebook Quick Reference Guide - Crosby ISD
Skyward Gradebook Quick Reference Guide - Crosby ISD

You also want an ePaper? Increase the reach of your titles
YUMPU automatically turns print PDFs into web optimized ePapers that Google loves.
<strong>Skyward</strong> <strong>Gradebook</strong><br />
<strong>Quick</strong> <strong>Reference</strong> <strong>Guide</strong><br />
Logging In –<br />
1. www.crosbyisd.org<br />
2. Click Teachers<br />
3. Then click <strong>Skyward</strong><br />
4. Click <strong>Skyward</strong> <strong>Gradebook</strong><br />
5. Enter your network username and<br />
password<br />
Logging Out –<br />
1. Click the Educator Access Logo<br />
inside the gradebook<br />
2. Click the Exit Button<br />
*Best Practice – Don’t<br />
click the X at the top right to close<br />
the window. Use the exit button<br />
when working in <strong>Skyward</strong><br />
Navigation –<br />
<strong>Skyward</strong> Home Page – Shows<br />
navigational links<br />
on the left side.<br />
Return to Home<br />
Page – Click the<br />
Educator Access<br />
Logo on any<br />
screen to return<br />
you to the Home page<br />
My <strong>Gradebook</strong> – Go to a listing of your<br />
gradebooks for the current year<br />
My Students – List of all your students<br />
with their demographic information<br />
My Classes – Print rosters, write<br />
messages to parents, view attendance,<br />
reports, etc.<br />
Post Daily Attendance – Take<br />
attendance and create seating charts<br />
Attendance –<br />
From the <strong>Gradebook</strong> homepage:<br />
1. Click Post Daily Attendance<br />
2. Click the By Name link<br />
3. Click either absent or tardy next to<br />
the student’s name (Students are<br />
already marked as present)<br />
4. Click Save to complete<br />
Opening Your <strong>Gradebook</strong> –<br />
From the <strong>Gradebook</strong> homepage:<br />
1. Click My <strong>Gradebook</strong><br />
2. Click on the <strong>Gradebook</strong> link for the<br />
section/class you wish to view<br />
3. Once clicked, you will be on the<br />
Main Screen of the gradebook<br />
Display Options –<br />
From Inside a <strong>Gradebook</strong>:<br />
Display Options –<br />
This button, available from the Main<br />
Screen of your gradebook, allows you to<br />
customize your gradebook view. You can<br />
customize student, assignment, and<br />
grade period displays as well as modify<br />
the gradesheet sequence. Anytime you<br />
make a change. Make sure to save.<br />
Student Display – Change the way<br />
names are displayed and show dropped<br />
students and their grades. Tip: you can<br />
choose to display the full names of you<br />
students.<br />
Assignment Display – Modify the way<br />
assignments are displayed and customize<br />
the headers, etc.<br />
Grade Period Display – Select the<br />
grading period(s) to<br />
view. Tip: you can<br />
choose to not see all<br />
the assignments<br />
from prior grading periods. However,<br />
always leave your term display on for<br />
reference.<br />
Modify Gradesheet Sequence –<br />
Customize the student roster on the<br />
main screen of the gradebook. Moves<br />
students up or down.<br />
Adding Assignments –<br />
From the gradebook main screen:<br />
1. Hover your mouse cursor over the<br />
Assignments button<br />
2. Click the Add Assignment<br />
3. Select the category for which the<br />
assignment belongs too<br />
4. Enter the assignment title in<br />
Description. Add more information<br />
in the Detailed Description area<br />
5. Set the Assigned and Proposed Due<br />
Dates<br />
6. Verify the Max Score<br />
7. Weight the Multiplier – adjust to<br />
count the score more than once<br />
8. Show assignment score – your<br />
options are to view as a score,<br />
check, percent, or grade mark. Most<br />
will choose score<br />
9. Save<br />
TIP: The check boxes at the bottom<br />
of the add assignment screen allow<br />
you to push this assignment to other<br />
gradebooks if needed. That way,<br />
you won’t need to recreate them in<br />
those gradebooks.
<strong>Skyward</strong> <strong>Gradebook</strong><br />
<strong>Quick</strong> <strong>Reference</strong> <strong>Guide</strong><br />
Entering Scores –<br />
From the gradebook main screen:<br />
1. Under the assignment<br />
header, click on an<br />
asterisk and enter scores.<br />
2. Add comments if necessary<br />
3. Save<br />
Mass Assign Scores –<br />
From the gradebook main screen:<br />
1. Click on the Assignments tab. Tip:<br />
Don’t hover the mouse. Actually click<br />
the assignments link.<br />
2. Choose an assignment by double<br />
clicking on the one you want.<br />
3. Click the Mass Assign<br />
Score tab<br />
4. In the Mass Assign Options area,<br />
enter the score you want for all<br />
students<br />
5. Click Apply<br />
6. Change individual student scores as<br />
needed<br />
<strong>Quick</strong> Scoring –<br />
<strong>Quick</strong> Scoring is a fast way to score<br />
multiple assignments at once<br />
From the gradebook main screen:<br />
1. Click on the <strong>Quick</strong> Scoring tab<br />
Changing / Editing Grades –<br />
From the gradebook main screen:<br />
1. Under the assignment<br />
header, click on a score<br />
to go to an edit screen<br />
2. Edit<br />
3. Save<br />
Deleting an Assignment –<br />
From the gradebook main screen:<br />
1. Click the assignment header<br />
2. Click the Delete button on the right<br />
3. Click OK to proceed<br />
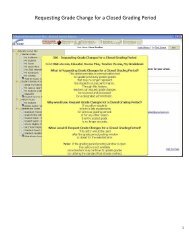
Grade Changes for Closed Period<br />
1. Click My <strong>Gradebook</strong><br />
2. Select the appropriate gradebook.<br />
3. Select Options under the grading<br />
period which needs a grade change.<br />
4. Select the Grade Posting Status for<br />
Term X that needs a grade changed<br />
5. Click the Request<br />
Grade Changes<br />
button<br />
6. Enter a reason for the requested<br />
grade change<br />
7. Click Yes to proceed<br />
8. Select Options under the grading<br />
period<br />
which<br />
needs to be<br />
changed<br />
and select<br />
Enter Term X Grade Adjustment<br />
9. Enter the grades as needed.<br />
10. Go back to Options under the<br />
grading period and select Grade<br />
Postin Status for Term X.<br />
11. Click the Complete Grade Changes<br />
button<br />
12. Click Yes to finish<br />
2. All of your assignments<br />
will appear in an<br />
editable spreadsheet<br />
3. Edit the appropriate<br />
cells<br />
4. Any changes will appear in green