
By Ondiek Elijah Ochieng
When you're developing applications for the general public, it's important to protect your users' credentials and information. This means you need to know about code structure and how to implement various security measures.
In this article, we'll walk through the steps to create a user authentication web app with Flask, a micro web framework. For authentication, we'll use the Python library flask_login.
This app includes features such as form validations, account creation, and login/logout functionality for authenticated users.
Application Setup and Installation
You can find a comprehensive guide on setting up and installing the project on my GitHub repository.
Basic Application Structure
For this application, we'll have a virtual environment in its own directory, as well as a folder containing the main application files. Here's an overview of the app's structure:
.
├── auth-app
│ ├── app.py
│ ├── database.db
│ ├── forms.py
│ ├── manage.py
│ ├── migrations
│ ├── models.py
│ ├── requirements.txt
│ ├── routes.py
│ ├── run
│ ├── static
│ └── templates
│ ├── auth.html
│ ├── base.html
│ └── index.html
└── venv
Application Factory
To kick it off, we'll create an application factory function inside the app.py file and call it create_app. This is vital for any Flask app.
Also, we need to make some libraries available for use within our project, so we'll import the following:
app.py
from flask import Flask
from flask_sqlalchemy import SQLAlchemy
from flask_bcrypt import Bcrypt
from flask_migrate import Migrate

from flask_login import (
    UserMixin,
    login_user,
    LoginManager,
    current_user,
    logout_user,
    login_required,
)
We imported Flask, SQLAlchemy to help our Python application communicate with a database, Bcrypt for password hashing, Migrate for database migrations, and several other methods from Flask-Login for session management.
login_manager = LoginManager()
login_manager.session_protection = "strong"
login_manager.login_view = "login"
login_manager.login_message_category = "info"
To use flask_login, we'll create an instance as shown above. We'll do the same for SQLAlchemy, Migrate, and Bcrypt.
db = SQLAlchemy()
migrate = Migrate()
bcrypt = Bcrypt()
Instead of creating our Flask instance globally, we'll do so within a function because doing so globally becomes difficult as the project grows.
The benefit of doing this within a function is that it allows for multiple application instances (also during testing). (Source: flask.palletsprojects.com)
def create_app():
    app = Flask(__name__)

    app.secret_key = 'secret-key'
    app.config['SQLALCHEMY_DATABASE_URI'] = "sqlite:///database.db"
    app.config['SQLALCHEMY_TRACK_MODIFICATIONS'] = True

    login_manager.init_app(app)
    db.init_app(app)
    migrate.init_app(app, db)
    bcrypt.init_app(app)

    return app
Flask-Login also requires that we set a secret key in order to function. Also, you'll notice that we have our initializations inside the application factory. We do this to avoid the extensions initially binding themselves to the application, as explained here.
Now that we've completed our basic application factory, it's time to declare our User model. In the user table, we only need email, username, and password columns for this application.
models.py
from app import db
from flask_login import UserMixin

class User(UserMixin, db.Model):
    __tablename__ = "user"

    id = db.Column(db.Integer, primary_key=True)
    username = db.Column(db.String(80), unique=True, nullable=False)
    email = db.Column(db.String(120), unique=True, nullable=False)
    pwd = db.Column(db.String(300), nullable=False, unique=True)

    def __repr__(self):
        return '<User %r>' % self.username
We import db, an instance of SQLAlchemy, and a UserMixin subclass from Flask-Login in the above code snippet. Our work is simplified by using the UserMixin, which allows us to use methods such as is_authenticated(), is_active(), is_anonymous(), and get_id ().
If we don't include the UserMixin in our User model, we'll get errors like 'User' object has no attribute 'is_active'.
We currently have a User model, but we haven't yet created the table. To do this, run python manage.py on your terminal inside your project directory—assuming you got the setup right, installed the packages in the requirements.txt file, and have an active virtual environment.
manage.py
def deploy():
    """Run deployment tasks."""
    from app import create_app,db
    from flask_migrate import upgrade,migrate,init,stamp
    from models import User

    app = create_app()
    app.app_context().push()
    db.create_all()

    # migrate database to latest revision
    init()
    stamp()
    migrate()
    upgrade()

deploy()
The deploy function imports the create_app function from the app.py file, Flask-Migrate migration methods, and the User model. We then ensure that we are working within an application context, from which we can now call db.create all(), which will take care of our table creation.
We still need to set up the login and registration forms. First, we need to prepare the two Flask forms before rendering them on the template. The configuration for the forms is shown below. To keep this article neat and precise, I'll omit the import lines. For the excluded import lines, see the GitHub repository.
forms.py
a). Registration form
class register_form(FlaskForm):
    username = StringField(
        validators=[
            InputRequired(),
            Length(3, 20, message="Please provide a valid name"),
            Regexp(
                "^[A-Za-z][A-Za-z0-9_.]*$",
                0,
                "Usernames must have only letters, " "numbers, dots or underscores",
            ),
        ]
    )
    email = StringField(validators=[InputRequired(), Email(), Length(1, 64)])
    pwd = PasswordField(validators=[InputRequired(), Length(8, 72)])
    cpwd = PasswordField(
        validators=[
            InputRequired(),
            Length(8, 72),
            EqualTo("pwd", message="Passwords must match !"),
        ]
    )
In the above code snippet, we're simply applying validations to the required fields imported from wtforms and assigning them to the form field variable names.
    def validate_email(self, email):
        if User.query.filter_by(email=email.data).first():
            raise ValidationError("Email already registered!")

    def validate_uname(self, uname):
        if User.query.filter_by(username=username.data).first():
            raise ValidationError("Username already taken!")
To speed up the validation process, we need to reduce the load and time required for server-side validation. To accomplish this, we add the above lines of code—email and username validation to our registration form class so that it is handled on the client side.
b). Login form
class login_form(FlaskForm):
    email = StringField(validators=[InputRequired(), Email(), Length(1, 64)])
    pwd = PasswordField(validators=[InputRequired(), Length(min=8, max=72)])
    # Placeholder labels to enable form rendering
    username = StringField(
        validators=[Optional()]
    )
To make the form fields visible on the template, we must pass the form object to it via the route rendering that template. Now it's time to define our application's various routes. I'll also leave out the import lines for this section.
routes.py
It is important to provide a user loader callback when using Flask-Login. This keeps the current user object loaded in that current session based on the stored id.
@login_manager.user_loader
def load_user(user_id):
    return User.query.get(int(user_id))
In the lines of code that follow, we simply define three routes for this application: home, login, and register. Notice how we create Flask form instances and then pass them along with the function return statement? We'll modify these routes later to handle our login and registration needs. We'll also add a logout route.
app = create_app()

# Home route
@app.route("/", methods=("GET", "POST"), strict_slashes=False)
def index():
    return render_template("index.html",title="Home")

# Login route
@app.route("/login/", methods=("GET", "POST"), strict_slashes=False)
def login():
    form = login_form()

    return render_template("auth.html",form=form)

# Register route
@app.route("/register/", methods=("GET", "POST"), strict_slashes=False)
def register():
    form = register_form()

    return render_template("auth.html",form=form)

if __name__ == "__main__":
    app.run(debug=True)
It's time to write some HTML code. At this point, all we need is forms in the browser. NB: I'll still leave out some lines of code to keep this article concise. The complete files are available on GitHub, but for the time being, let's concentrate on the main areas of interest.
auth.html
<form action="{{ request.path }}" method="POST" class="...">

{{ form.csrf_token }}

{% with messages = get_flashed_messages(with_categories=true) %}
<!-- Categories: success (green), info (blue), warning (yellow), danger (red) -->
{% if messages %}
{% for category, message in messages %}
<div class="alert alert-{{category}} alert-dismissible fade show" role="alert">
{{ message }}
<button type="button" class="btn-close" data-bs-dismiss="alert" aria-label="Close"></button>
</div>
{% endfor %}
{% endif %}
{% endwith %}

{% if request.path == '/register/' %}
{{ form.username(class_="form-control",placeholder="Username")}}

{% for error in form.username.errors %}
{{ error }}
{% endfor%}

{% endif%}

{{ form.email(class_="form-control",placeholder="Email")}}

{% for error in form.email.errors %}
{{ error }}
{% endfor%}

{{ form.pwd(class_="form-control",placeholder="Password")}}

{% for error in form.pwd.errors %}
{{ error }}
{% endfor%}

{% if request.path == '/register/' %}
{{ form.cpwd(class_="form-control",placeholder="Confirm Password")}}

{% for error in form.cpwd.errors %}
{{ error }}
{% endfor%}

{% endif%}

<button type="submit" class="btn btn-block btn-primary mb-3">
{{ btn_action }}
</button>

<p>
{% if request.path != '/register/' %}
New here?
<a href="{{url_for('register')}}">Create account</a>
{% else %}
Already have an account?
<a href="{{url_for('login')}}">Login</a>
{% endif %}
</p>
The HTML template shown above serves as both our login and registration form. And I just used a few jinja templating tricks.
As you can see above, the form action is set to action="{{request.path}}", where request.path retrieves the path from which the request originated and assigns it as the value for the form action. This eliminates the need to hard code the specific paths.
We also set a csrf token variable which allows the form validation to proceed while preventing session riding attacks.
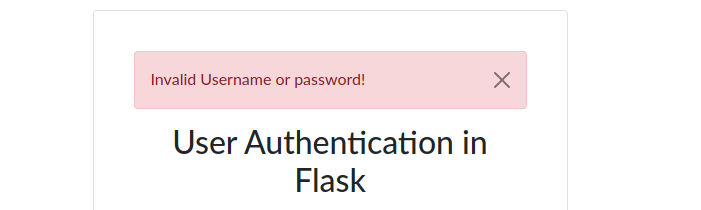
It also handles flashed messages. Bootstrap 5 alerts make it simple to flash different messages based on their category. The following is an example of what that does.
We simply print out the individual variable names from the form object to display the form fields. Here's an example from the above snippet:
{{ form.username(class_="form-control",placeholder="Username")}}
Another thing to consider is the use of if...else statements, such as in the following line of code:
{% if request.path == '/register/' %}
By hiding some fields based on the request path, we can easily switch between the login and registration forms.
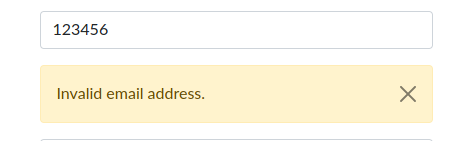
Remember the validation checks that we applied to the form fields? Also, we'd like to notify the user if they fail to provide the required input – so we'll include some code for this. An example from the HTML form above is shown below.
The lines of code below will display the appropriate message to the user if any of the checks against the username are violated.
{% for error in form.username.errors %}
{{ error }}
{% endfor%}
Here's an example of what that would look like:
How to modify routes.py
In Flask, adding new users to the database is simple. To complete today's tutorial, we need to register, login, and logout users — that is, manage sessions.
a). Registration route
First and foremost, taking a closer look at the code snippet below for registering new users, we confirm that the form sending the data has passed all validation checks. So, if form.validate_on_submit():
    ...

    if form.validate_on_submit():
        try:
            email = form.email.data
            pwd = form.pwd.data
            username = form.username.data

            newuser = User(
                username=username,
                email=email,
                pwd=bcrypt.generate_password_hash(pwd),
            )

            db.session.add(newuser)
            db.session.commit()
            flash(f"Account Succesfully created", "success")
            return redirect(url_for("login"))

        except Exception as e:
            flash(e, "danger")

      ...
If all of the checks pass, we get the values from the form fields, which are then passed to the User object, added to the database, and all of the changes are saved.
When the database is successfully updated with the new values, the user sees a success message. After that, the application redirects the user to the login page.
Any exceptions that may occur are caught and displayed to the user. This improves the user experience by displaying nicer alerts (and you can also modify the messages based on the exceptions).
It is not safe to store passwords in plain text because this increases the risk that user credentials will be compromised in the event of a breach.
The user password is hashed before being saved, and what is stored in the database is a highly encrypted combination of characters. We handled this with the help of Bcrypt. The hash is generated like this:
pwd=bcrypt.generate_password_hash(pwd)
b). Login route
    if form.validate_on_submit():
        try:
            user = User.query.filter_by(email=form.email.data).first()
            if check_password_hash(user.pwd, form.pwd.data):
                login_user(user)
                return redirect(url_for('index'))
            else:
                flash("Invalid Username or password!", "danger")
        except Exception as e:
            flash(e, "danger")
After passing validation, the User model is queried to see if a user exists with the email provided. If this fails it displays an error message. But if it's validated, the second move is to compare the password issued with the hashed version of it. And if both match, access is granted and the user is redirected to the home page.
c). Logout route
@app.route("/logout")
@login_required
def logout():
    logout_user()
    return redirect(url_for('login'))
The above route, which redirects to the login page, handles the termination of active sessions.
And that's it! We've built our application with user authentication.
Thank you for reading. I hope you found this article useful. Continue to read, build, and best wishes. Don't forget to follow me on Twitter as well @dev_elie.