How to manage personal, work and school accounts in Windows 10
![]() 3 min. read
3 min. read
![]() Published on
Published on
Share this article

Improve this guide
Read our disclosure page to find out how can you help Windows Report sustain the editorial team Read more

head to the “Access work or school” pageWindows 10 includes simplified options for staying connected to your work or school account on your personal device. Unlike previous Windows versions, you can use files and resources provided by your organisation without having to switch user accounts. The operating system lets you link external accounts to your main sign-in address.
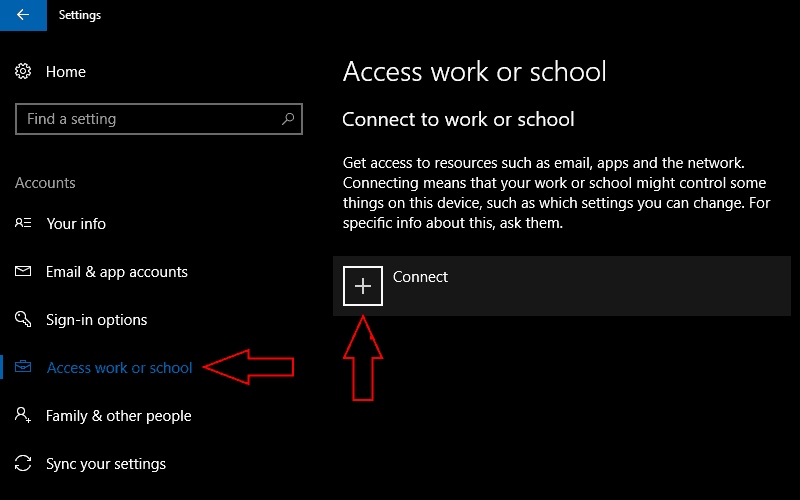
To get started, head to the “Accounts” section of the Settings app. Microsoft changed the arrangement of the work access settings with the Windows 10 Creators Update so the next stage depends on your Windows version.
If you have the Creators Update installed, head to the “Access work or school” page and click the “Connect” button. On older editions of Windows 10, the option is called “Work access.” Click the “Add a work or school account” link to start the sign-in procedure.
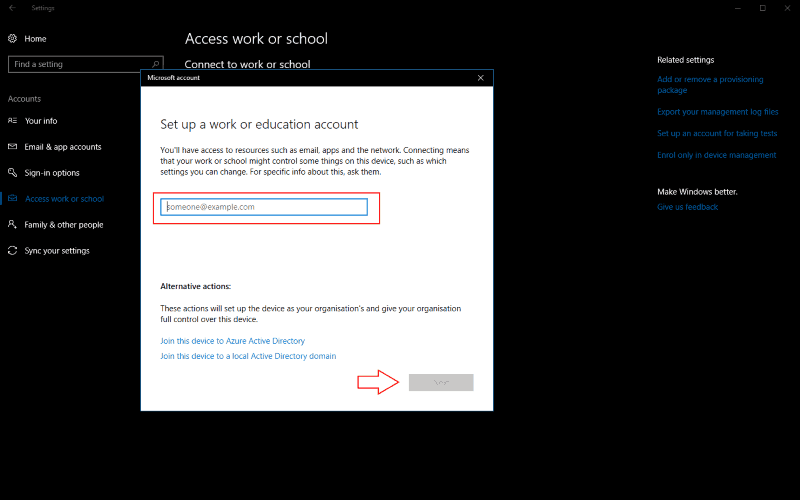
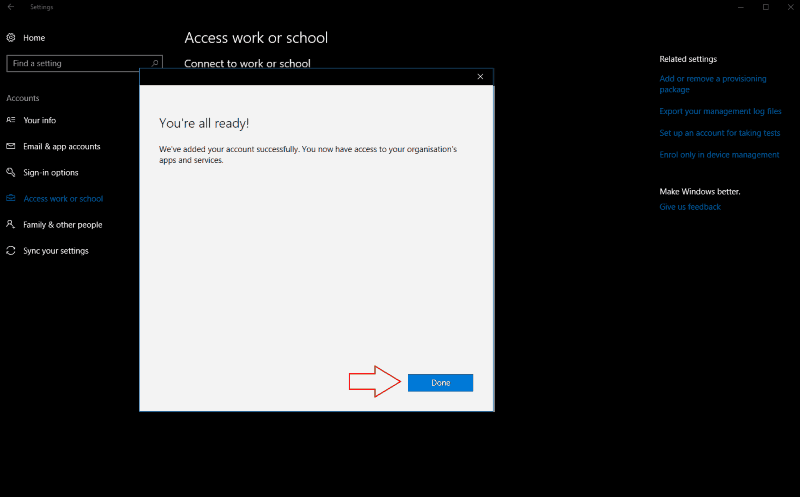
In the “Set up a work or education account” prompt that appears, enter your organisation email address to connect your account. Click the “Next” button and Windows will configure your new account and add it to the system. When the process completes, you’ll be able to access your work or school email, apps and networking utilities on your personal PC. The account will be accessible in the Mail app and corporate apps can be downloaded from the Windows Store.
In many instances, this will be all you need to access your work or school account in Windows 10. In some instances, you may need to go a step further. Organisations might require you to register your device with their Azure Active Directory server. This gives them more control over your device, including the ability to retrieve files and remotely lock it down.
To connect to an Azure Active Directory, click the “Join this device to Azure Active Directory” link in the “Set up a work or education” account window. Enter your organisation-provided Office 365 email address and follow the prompts to add the account. If you’re on the same network as your organisation’s Active Directory, use the “Join this device to a local Active Directory domain” link and provide the domain name of the Azure server to connect to.
In either case, you’ll be prompted to review and accept your organisation’s new controls over your device. Once you confirm the Azure Active Directory policies, your device will be connected to your work or school. It’ll effectively be registered as one of their devices, giving them complete control over its operation. You’ll be able to access your email, company files and Windows Store for Business apps once the account is linked.
Linking a work or school account to Windows 10 lets you use your company’s resources without being confined to the Office 365 web apps. If you aren’t sure of the settings to use, you can refer to Microsoft’s online documentation. When you’re connecting to an Azure Active Directory, your organisation’s IT administrator should be able to assist you to get your device configured with the correct policies.
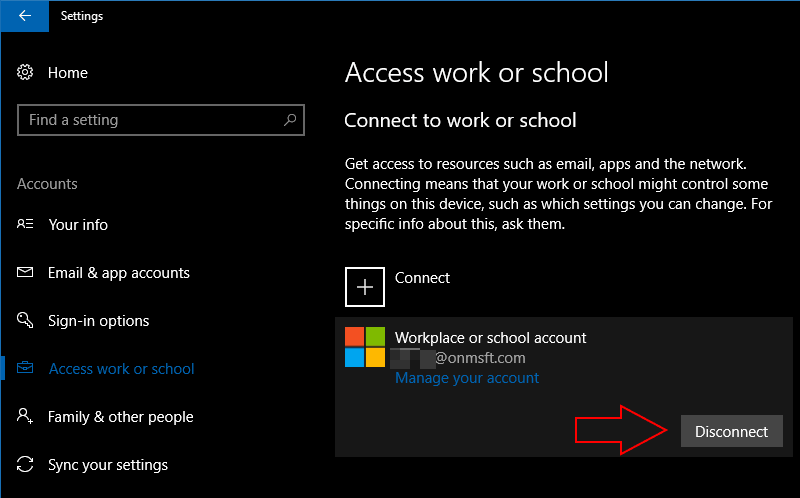
If you need to remove a work or school account, return to the “Accounts” section of the Settings app and navigate back to the “Access work or school” page. Click the account you want to unlink and press the “Disconnect” button. Follow the prompts to complete the account removal process.