
I had to work with Expo's Google Authentication this week and I found a lot of outdated information while integrating it into my React Native app. So I thought I'd make an updated tutorial for anyone looking to use this Expo feature on future projects.
The Expo documentation is mostly good. I'll get into that in a bit, but first, the important stuff.
Sadly, Expo cannot handle the permissions with Google, so we'll need to do that ourselves. Head over to Google developers and create a new project. Give your project a name and click "create". Now we can get some credentials. From here, click Credentials on the side bar and then, at the top of the screen, Create Credentials. 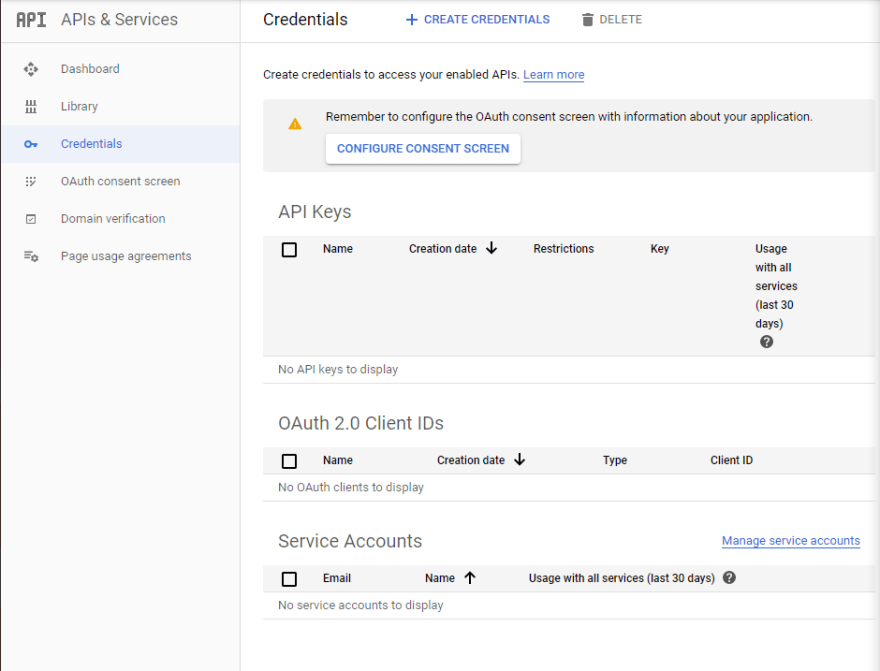 You'll want to select OAuth client ID, but when you do, you'll notice you won't be able to select your application type until you configure consent screen.
  Go ahead and click that. It'll bring you to the OAuth consent screen (duh) where you can choose user type. It feels like they try to scare you with these options, but I still chose External. Give the application a name, skip everything else (even that application logo. I know, it's so tempting), and hit Save.
Okay, now that we got that out of the way, back to credentials. You'll be able to select your application type now. For the purpose of this tutorial, I'll be using iOS, though the other types only require a few different steps. Google provides you with a name for the client ID which is fine to keep. For Bundle ID, make sure you put host.exp.exponent since we're using Expo. Once that's done you should get your client ID.  Copy and paste it somewhere for safe keeping, we'll need this.
Time to code! And now I can touch on one small annoyance. You'll want to install expo-google-app-auth and import it like this:
import * as Google from 'expo-google-app-auth';
This is also in their docs, however, after we've got this authentication actually set up, you WILL get a warning telling you to
import * as Expo from 'expo';
instead. When I tried switching, the authentication did not work. So, I have a fix for this annoying yellow box. Simply add:
console.ignoredYellowBox = ['Warning:'];
anywhere in your code (preferably the root of the app, like App.js or index.js) to hide the warning. Make sure to import react as well as View, StyleSheet, and Button from react-native.
To implement the Google Sign In, you can copy straight from the docs. Now is the time to add your iOS client ID (or whatever one you chose) to your code via .env or some way to keep it private. Your code should look something like this:
import 'react-native-gesture-handler';
import React from 'react';
import { View, StyleSheet, Button } from 'react-native';
import * as Google from 'expo-google-app-auth'
import { IOS_CLIENT_ID, AND_CLIENT_ID } from 'react-native-dotenv';


export default function LoginScreen () {

  async function signInWithGoogleAsync() {
    try {
      const result = await Google.logInAsync({
        behavior: 'web',
        iosClientId: IOS_CLIENT_ID,
        //androidClientId: AND_CLIENT_ID,
        scopes: ['profile', 'email'],
      });

      if (result.type === 'success') {
        return result.accessToken;
      } else {
        return { cancelled: true };
      }
    } catch (e) {
      return { error: true };
    }
  }
Next annoyance: You may have noticed that this function is a promise, and therefore won't be able to be passed to a button just yet. Alter it for that purpose or, for a lazy fix, pass it to another function to then pass to a button.
    const signInWithGoogle = () => {
    signInWithGoogleAsync()
    }

    return (
      <View style={styles.container}>
        <Button onPress={() => signInWithGoogle()} title="Sign in with Google" />
      </View>
    )
}
And we're done! All that's left is to add a little style and your app has functioning Google Authentication. Hope this helps and thanks for reading!


Top comments (13)
Firebase often makes this process much easier!
Is that so?? I'll look into that, thank you!
For your case scenario, you used iOS as the device the app will be running on. If one chooses android, they do ask for fingerprint certificate and package name which I don't know where to get that from Expo. Any help on this?
See docs.expo.io/versions/latest/sdk/g...
For android run openssl rand -base64 32 | openssl sha1 -c in your terminal, it will output a fingerprint certificate.
dude thank you so much i have been pulling my hair for hours looking for this and couldn't find it anywhere, thank you so much again for such updated and helpful guide
Did you have to configure anything in your app.json file?
I'm using firebase. Do I still need to go into the google developer console to grab the client-id? Because I have that in my GoogleService-Info.plist file and google-services.json file
Thanks!!! you really saved a lot of time for me <3
It worked perfectly!! Thank you so much!
If anyone coming across Expo SDK 34, property ** behavior: 'web' ** has been deprecated. No need to pass it anymore. The API automatically defaults to 'web' now.
Quando eu gero o apk, ele funciona normalmente no android ou é só no modo de teste no emulador?
incredible. Congratulations
It worked here :)
Have you tried it on android emulator ?