📅 July 18, 2017
 Linux Mint offers some of the best-looking wallpapers of any Linux distribution or operating system, but there are times when you might want to add your own images for display at the login screen.
Whether it be a matching theme or your favorite vacation pictures, you can share the joy and ensure every user will see your images during local login.
It’s easy!

Linux Mint 18.1 Cinnamon default login screen. The built-in wallpapers cycle every 15 seconds.
Step 1. Collect the images you want to use at the login screen.

Here are four wallpapers we want to cycle through at the login screen. Notice that three are .jpg and one is .png. You can mix and match various image formats.
Step 2. Create a custom directory.
This is not required, but I prefer a custom “theme” directory to hold specific wallpapers. This makes it easy to use the search and replace feature in gedit. The choice is yours for organization.
sudo mkdir /usr/share/backgrounds/mario
For consistency, store the new wallpapers somewhere in /usr/share/backgrounds/, which is where the wallpapers are located. Keep the wallpapers outside of any user’s home directory. This avoids any potential issues with encrypted home directories. If the wallpapers are available at the system level, then they will appear whether or not any users have encrypted their homes.
Step 3. Copy the images to the new directory.
sudo cp mario* /usr/share/backgrounds/mario
Step 4. Edit /usr/share/mdm/html-themes/Mint-X/slideshow.conf
This is a file that specifies which images appear at the default login screen along with a few display options.
sudo gedit /usr/share/mdm/html-themes/Mint-X/slideshow.conf
or
sudo xed /usr/share/mdm/html-themes/Mint-X/slideshow.conf
You should see a file that looks something like this:
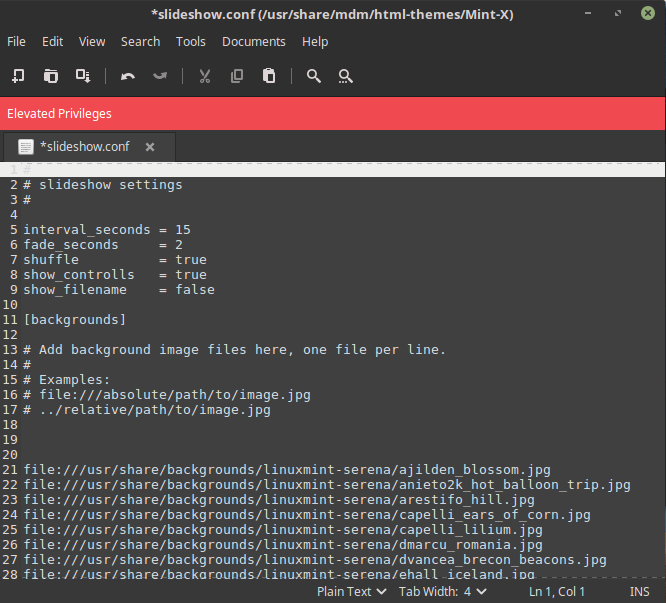
slideshow.conf specifies the paths of all image to show on the login screen.
Add absolute paths to the files just copied.
file:///usr/share/backgrounds/mario/mario1.jpg
file:///usr/share/backgrounds/mario/mario2.png
file:///usr/share/backgrounds/mario/mario3.jpg
file:///usr/share/backgrounds/mario/mario4.jpg
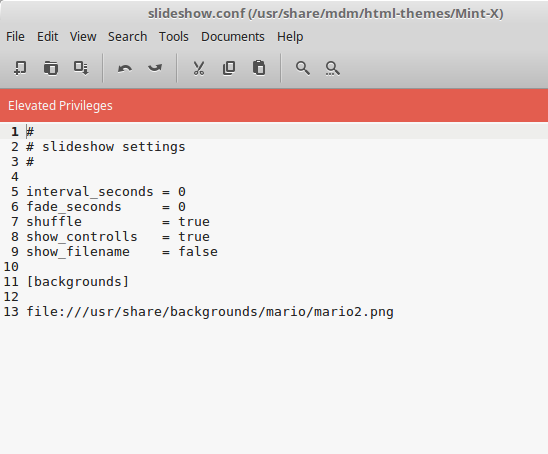
Take note to use the correct case and filename extensions. Each line specifies one image. Comment out any unneeded images by adding a hash (#) to the beginning of a line. I commented out all of the default images so only the four new images would appear.

slideshow.conf with the four new images. Using absolute paths. The other images were commented out instead of deleted in case I wanted to use them again.
Step 5. Log out and test.
Save the changes and logout. At the login screen, you should see Linux Mint 18.1 shuffle through the new images every 15 seconds.
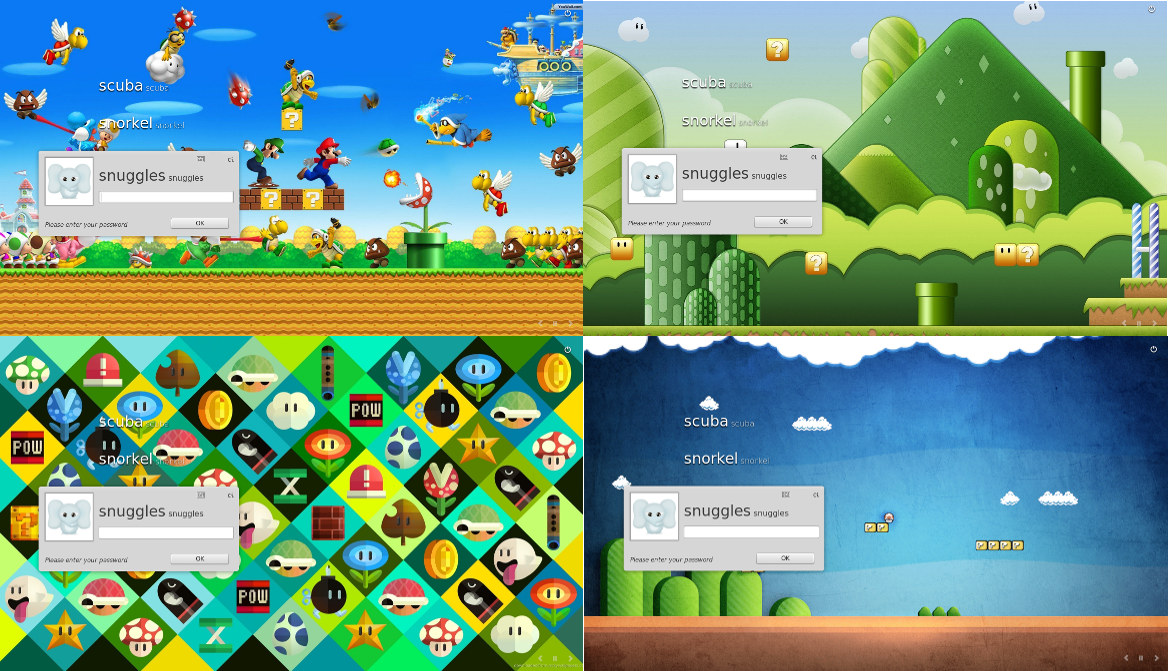
The new login images shuffle every 15 seconds.
“Will this work with Linux Mint 18.2 Cinnamon?”
By default, no. Linux Mint 18.2 has revamped its login windows settings, which looks quite good and adds a number of features.
However, this has altered how the usual login theme works. Linux Mint 18.1 used MDM (MDM Display Manager according to Synaptic). When we modify the slideshow.conf file, we are actually modifying the Mint-X theme, so you will need to have the Mint-X theme (Default Linux Mint Theme) enabled under Login Windows Preferences in Linux Mint 18.1
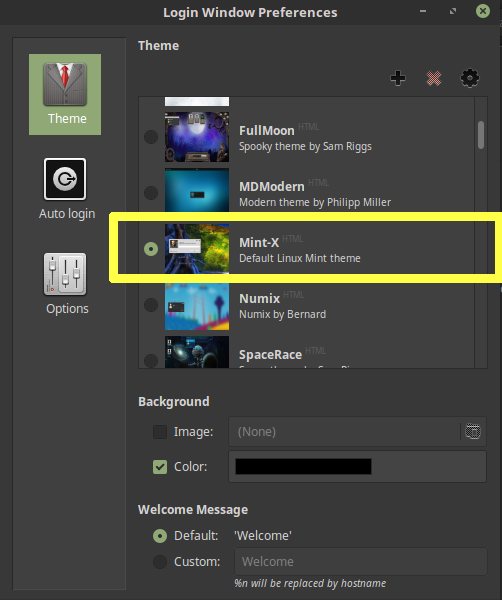
Login Windows Preferences in Linux Mint 18.1. The Mint-X HTML theme is enabled by default, and this is the theme we modify when we edit slideshow.conf. Changing the theme to something else will no longer show the new images just added. It is possible to customize other themes with custom images, but the details will depend upon the theme.
Since Linux Mint 18.2 lacks this system, the HTML theme edits involving Mint-X and slideshow.conf will not work. In fact, if you try to locate /usr/share/mdm/ in Linux Mint 18.2, you will find that it is missing.
“How can I enable the themed login slideshow in Linux Mint 18.2?”
Install MDM and then make the same edits to slideshow.conf.
Step 1. Install mdm and the mdm themes using Synaptic. The command line will work, but Synaptic will let you see all available packages. Search for mdm in Synaptic.
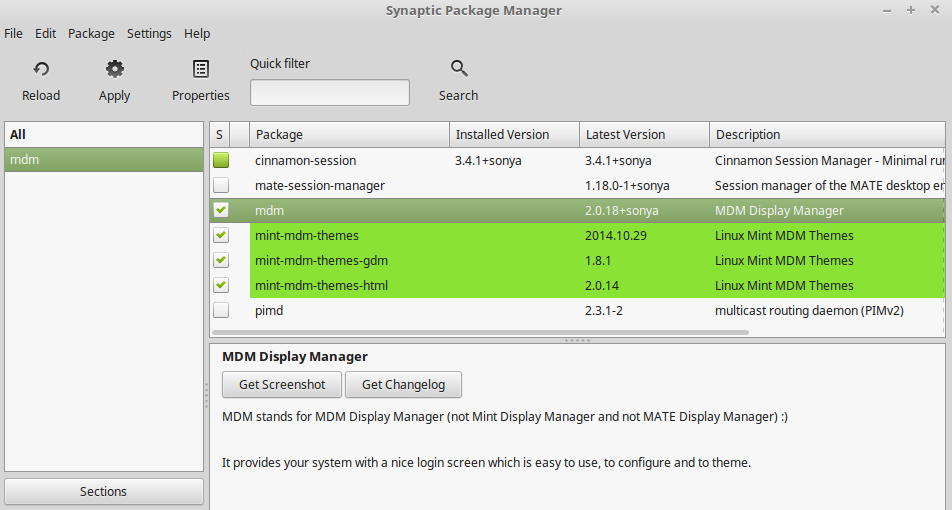
Synaptic in Linux Mint 18.2 Cinnamon. Install at least mdm and mint-mdm-themes-html. Mint-X is an HTML theme. Here, all themes are installed for greater variety.

During MDM installation you will be given the choice of which display manager to use: LightDM or MDM. Choose MDM.
Step 2. Restart.
You must restart Linux Mint 18.2 after installing MDM. Upon the next boot, you should see the default login with the slideshow wallpapers.

MDM Mint-X HTML theme running in Linux Mint 18.2 Cinnamon. The wallpapers cycle as a slideshow the same as in Linux Mint 18.1.
Step 3. Edit the the Mint-X HTML theme in the same way.
Follow the steps already described to add new images and modify slideshow.conf to your liking. Logout to test your changes. Remember, you are editing a specific theme, Mint-X, not the entire login system of Linux Mint.

Linux Mint 18.2 login screen using MDM.
This time, /usr/share/mdm/html-themes/Mint-X/slideshow.conf was modified to show the same image at login. No fading or slideshow. Changing the options in slideshow.conf allows you to customize your login screen.
Have fun!
