How to upload material to your rohan account - SDSU
How to upload material to your rohan account - SDSU
How to upload material to your rohan account - SDSU

Create successful ePaper yourself
Turn your PDF publications into a flip-book with our unique Google optimized e-Paper software.
<strong>How</strong> <strong>to</strong> <strong>upload</strong> <strong>material</strong> <strong>to</strong> <strong>your</strong> <strong>rohan</strong> <strong>account</strong><br />
*<strong>material</strong> in this job aid taken from Dr. Bob Hoffman’s Presence tu<strong>to</strong>rial,<br />
specifically, the Template lesson<br />
What's my <strong>rohan</strong> web <strong>account</strong> password<br />
When you sign up for a <strong>rohan</strong> email <strong>account</strong>, you are also given a web <strong>account</strong> au<strong>to</strong>matically. The web <strong>account</strong><br />
password is the same as <strong>your</strong> <strong>rohan</strong> email password. (Your <strong>rohan</strong> <strong>account</strong> is different than <strong>your</strong> <strong>SDSU</strong> webportal or<br />
EDTEC department username and password.) If you've forgotten it, you can go <strong>to</strong> the webportal and reset <strong>your</strong><br />
<strong>rohan</strong> password. Here's how:<br />
If you are a student and wish <strong>to</strong> change <strong>your</strong> ROHAN password, login <strong>to</strong> the WebPortal and click on the but<strong>to</strong>n titled<br />
Get a ROHAN/Email <strong>account</strong> (Graduate students might have <strong>to</strong> click the Undergraduate tab in Webportal <strong>to</strong> see the<br />
Rohan options). The Create <strong>your</strong> free <strong>SDSU</strong> e-mail <strong>account</strong> page will be displayed. Click the Continue but<strong>to</strong>n at the<br />
bot<strong>to</strong>m of the page.<br />
Your E-Mail address and username will be displayed, followed by the link Click here <strong>to</strong> change <strong>your</strong> Rohan <strong>account</strong><br />
password. Click the link <strong>to</strong> change <strong>your</strong> password.<br />
After you change <strong>your</strong> password, the new password will be displayed on the screen, and will be emailed <strong>to</strong> <strong>your</strong><br />
email address on file with the WebPortal.<br />
Passwords will not be accepted that:<br />
• Are less than 6 characters long.<br />
• Matches <strong>your</strong> last name or <strong>account</strong> name<br />
• Are found in the system's spelling dictionary - unless it has some uppercase letters other than the first<br />
character. For example, "Explain" would be rejected but "exPlain" would be accepted.<br />
• Have more than 3 repeated characters - thus "aaa" would be rejected.
<strong>How</strong> <strong>to</strong> <strong>upload</strong> <strong>material</strong> <strong>to</strong> <strong>your</strong> <strong>rohan</strong> <strong>account</strong><br />
Step #1<br />
Create a local site definition:<br />
a. Open Dreamweaver<br />
b. Use the Sites menu <strong>to</strong><br />
define the local site,<br />
using <strong>your</strong> myweb<br />
folder as the local root<br />
folder.<br />
What local site definition looks like in Dreamweaver CS4<br />
What local site definition looks like in in Dreamweaver<br />
CS5-CS6
Step #2<br />
2. Create a remote site definition:<br />
. Be sure you have <strong>your</strong> web<br />
server <strong>account</strong> username and<br />
password, and any FTP (File<br />
Transfer Pro<strong>to</strong>col) instructions<br />
you may need. We recommend<br />
and support using <strong>SDSU</strong>'s <strong>rohan</strong><br />
server.<br />
a. Still in Dreamweaver,<br />
set the root folder of the<br />
remote site definition <strong>to</strong><br />
the public_html folder<br />
on <strong>rohan</strong>.<br />
What remote site definition looks like in Dreamweaver CS4<br />
What remote site definition looks like in Dreamweaver CS5<br />
Step #3: Use check-in/check-out for up- and down-loading.
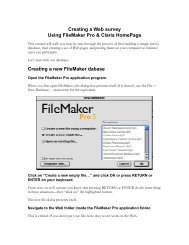
<strong>How</strong> <strong>to</strong> host a website using Google Drive<br />
*<strong>material</strong> in this job aid taken information provided by EDTEC student and<br />
Google employee, Phil Wagner<br />
Original Announcement<br />
Step 1: Create a folder in Drive<br />
Step 2: Make the folder public<br />
Step 3: Create a text/HTML file named index.html in that folder<br />
Step 4: Put whatever content you would like in the file<br />
Step 5: Open the index.html page in Drive and click Preview on the menu or View --> Preview<br />
Your files are now hosted via Drive. Use the URL of <strong>your</strong> index.html page for the URL <strong>to</strong> <strong>your</strong> website.<br />
Note: you can use css, js, etc files in <strong>your</strong> webpage. Just create those files as well (steps 3-4) and link <strong>to</strong><br />
them in <strong>your</strong> index.html file just as you would in a regular webpage.<br />
e.g.<br />
<br />
<br />
<br />