Hello again, another post that is not related to my fuzzer since I am kinda busy with other stuff these days.
Disclaimer : This post assumes you have a machine on the cloud like a VPS or dedicated server, unfortenatly without that you can't follow the steps below, if you don't have a server you can try using the free tier of amazon or you can use free service like 'codeanywhere', however I don't know if using 'codeanywhere' comply with thier service terms, another option whould be using a cheap VPS service like contabo (low as 6 Euros per Month), also you can use a trial from https://shadow.tunnelz.online/ which is free for 12 hours and will spare you the trouble of setting up the server (Step 1).
This post is to help people who need to use openvpn for solving challenges, taking certificates or whatever while inside Egypt or other countries that block OpenVpn connections.
While this might be a well known method which uses shadowsocks proxy I decided to publish the steps here to help you find a quick reference to setup your server and your client using easy steps.
Shadow socks have a server and a client the server commonly listens in port 8388 and the client connects to that port and then opens a local socks5 proxy that listens on the loopback device 127.0.0.1 typically at port 1080.
Step 1 : Setting Up the Server
- First need to install shadowsocks, please note that it must be the
libevversion if you need to use UDP otherwise the steps migh not work, if you're using ubuntu simply run the following command:
sudo apt install shadowsocks-libev
- Next, you will need to configure shadowsocks, it comes pre-configured but you need to do some changes in order for this to work, first is the IP shadowsocks listens on since the default is 127.0.0.1, also, I needed to increase the timeout, the following is a sample of the configuration file located at
cat /etc/shadowsocks-libev/config.json
{
    "server":"EXTERNAL_IP_OF_YOUR_SERVER",
    "server_port":8388,
    "local_port":1080,
    "password":"YourComplexPasswordHere",
    "timeout":5000,
    "method":"chacha20-ietf-poly1305"
}
- The next thing you need to do is to configure your firewall to make things easier you can use GUFW which is a gui for ufw, once you install it you need to enable traffic on port
8388both forTCPandUDP.
Now, we are done with server configuration.
Step 2 : Setting Up the Client
- A good thing about shadow socks is that it has a GUI client, also they have an AppImage version which works out of the box and can be downloaded from Here
- Once downloaded change the permissions on the
appimageto allow execution using the following command (version might be different based on which time you're reading this article).
chmod +x ./Shadowsocks-Qt5-3.0.1-x86_64.AppImage
- Now run the shadowsocks client.
./Shadowsocks-Qt5-3.0.1-x86_64.AppImage
-
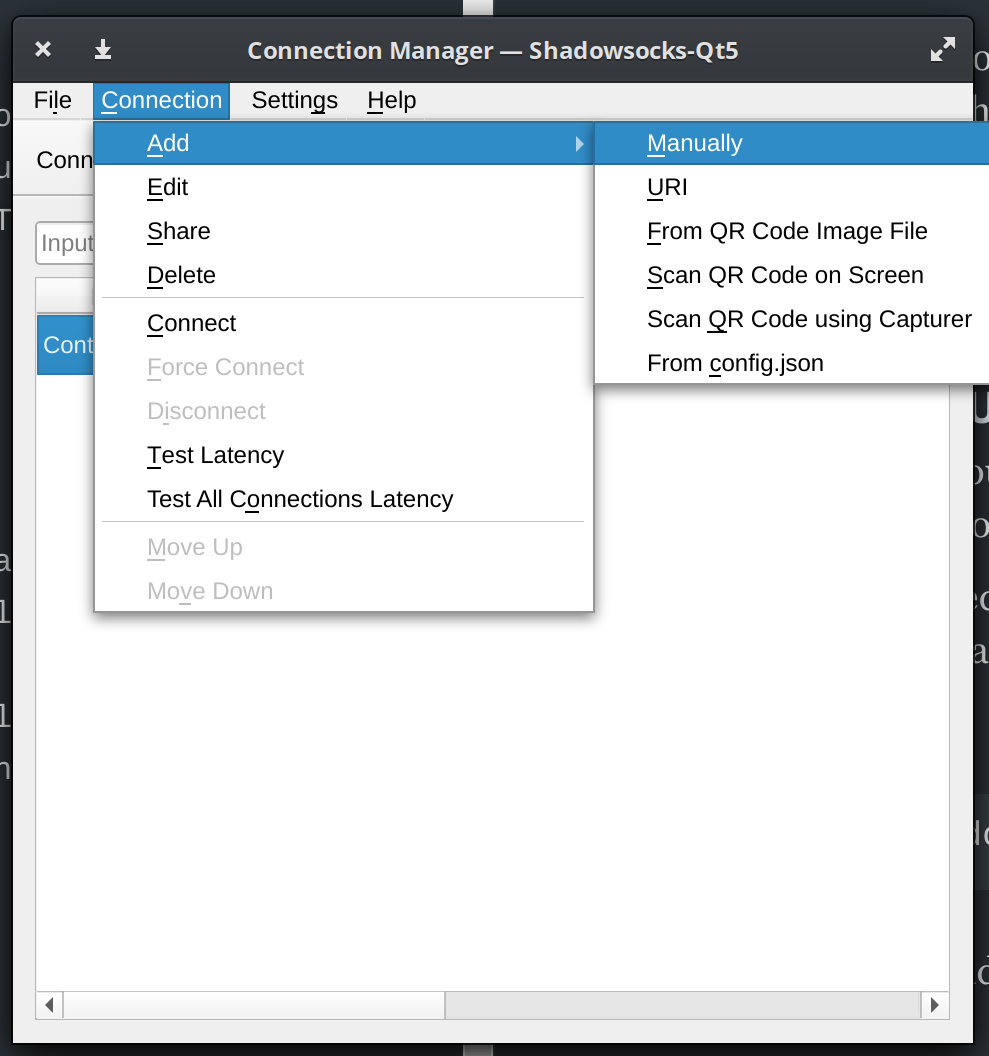
Once opened go to Connection->Add->Manually as seen in the screenshot below.
-
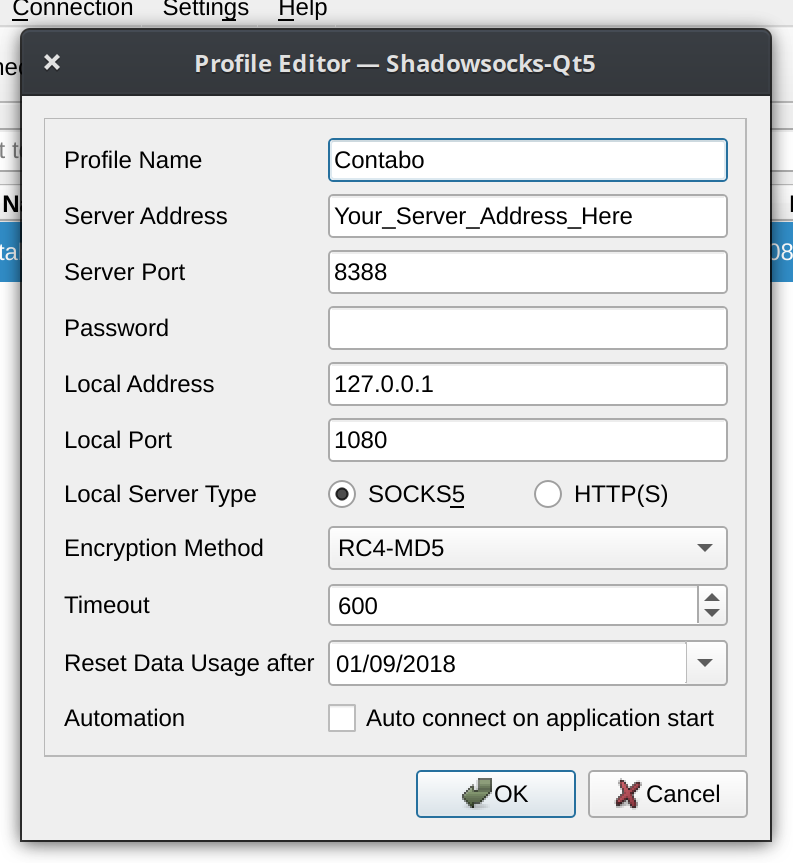
A dialog will open and what you need is to enter the server IP and the Password for the server.
-
You can choose to auto connect when opening the application to make things easier.
-
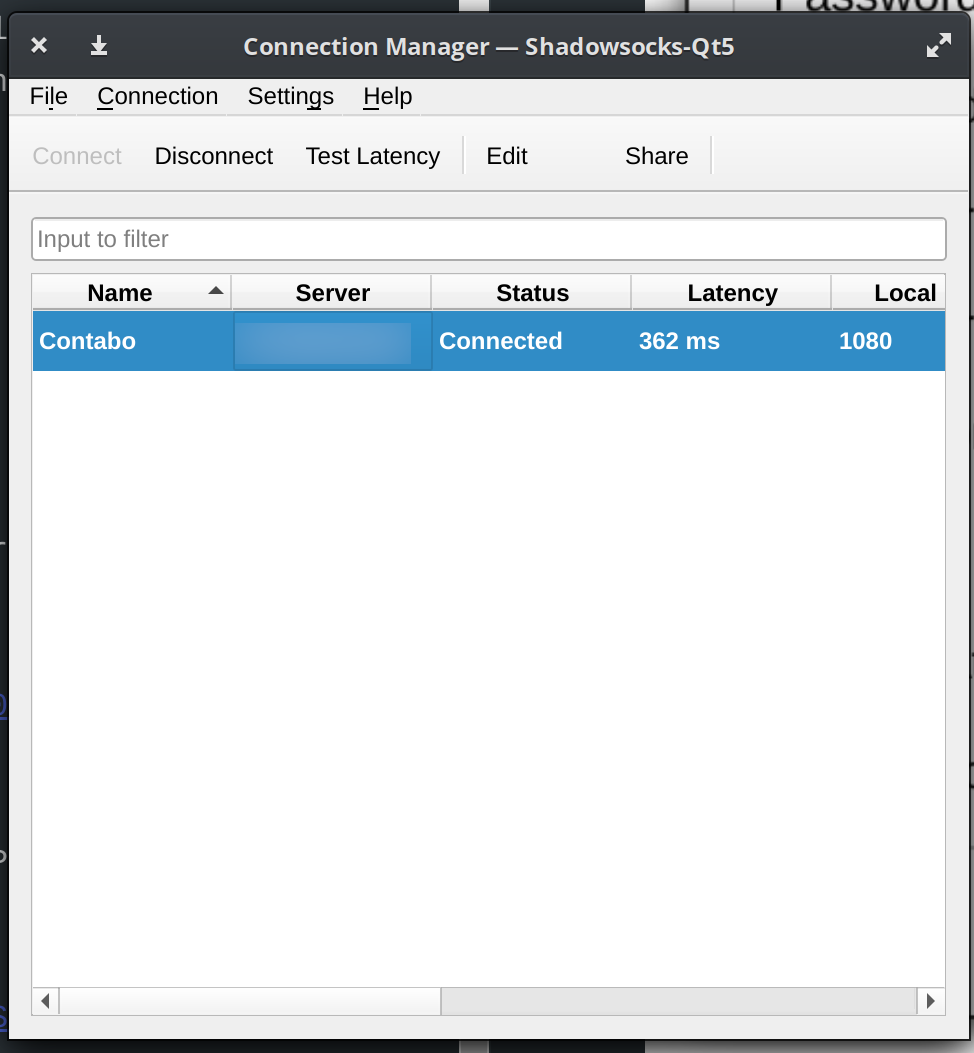
To connect to the server now all what you need is to choose the profile name and click the connect button.
-
Once connected you now have a working socks proxy running at
127.0.0.1on port1080. -
You can use this proxy in your browser, just make sure to set the type to
socks5, this will allow you to visit blocked sites.
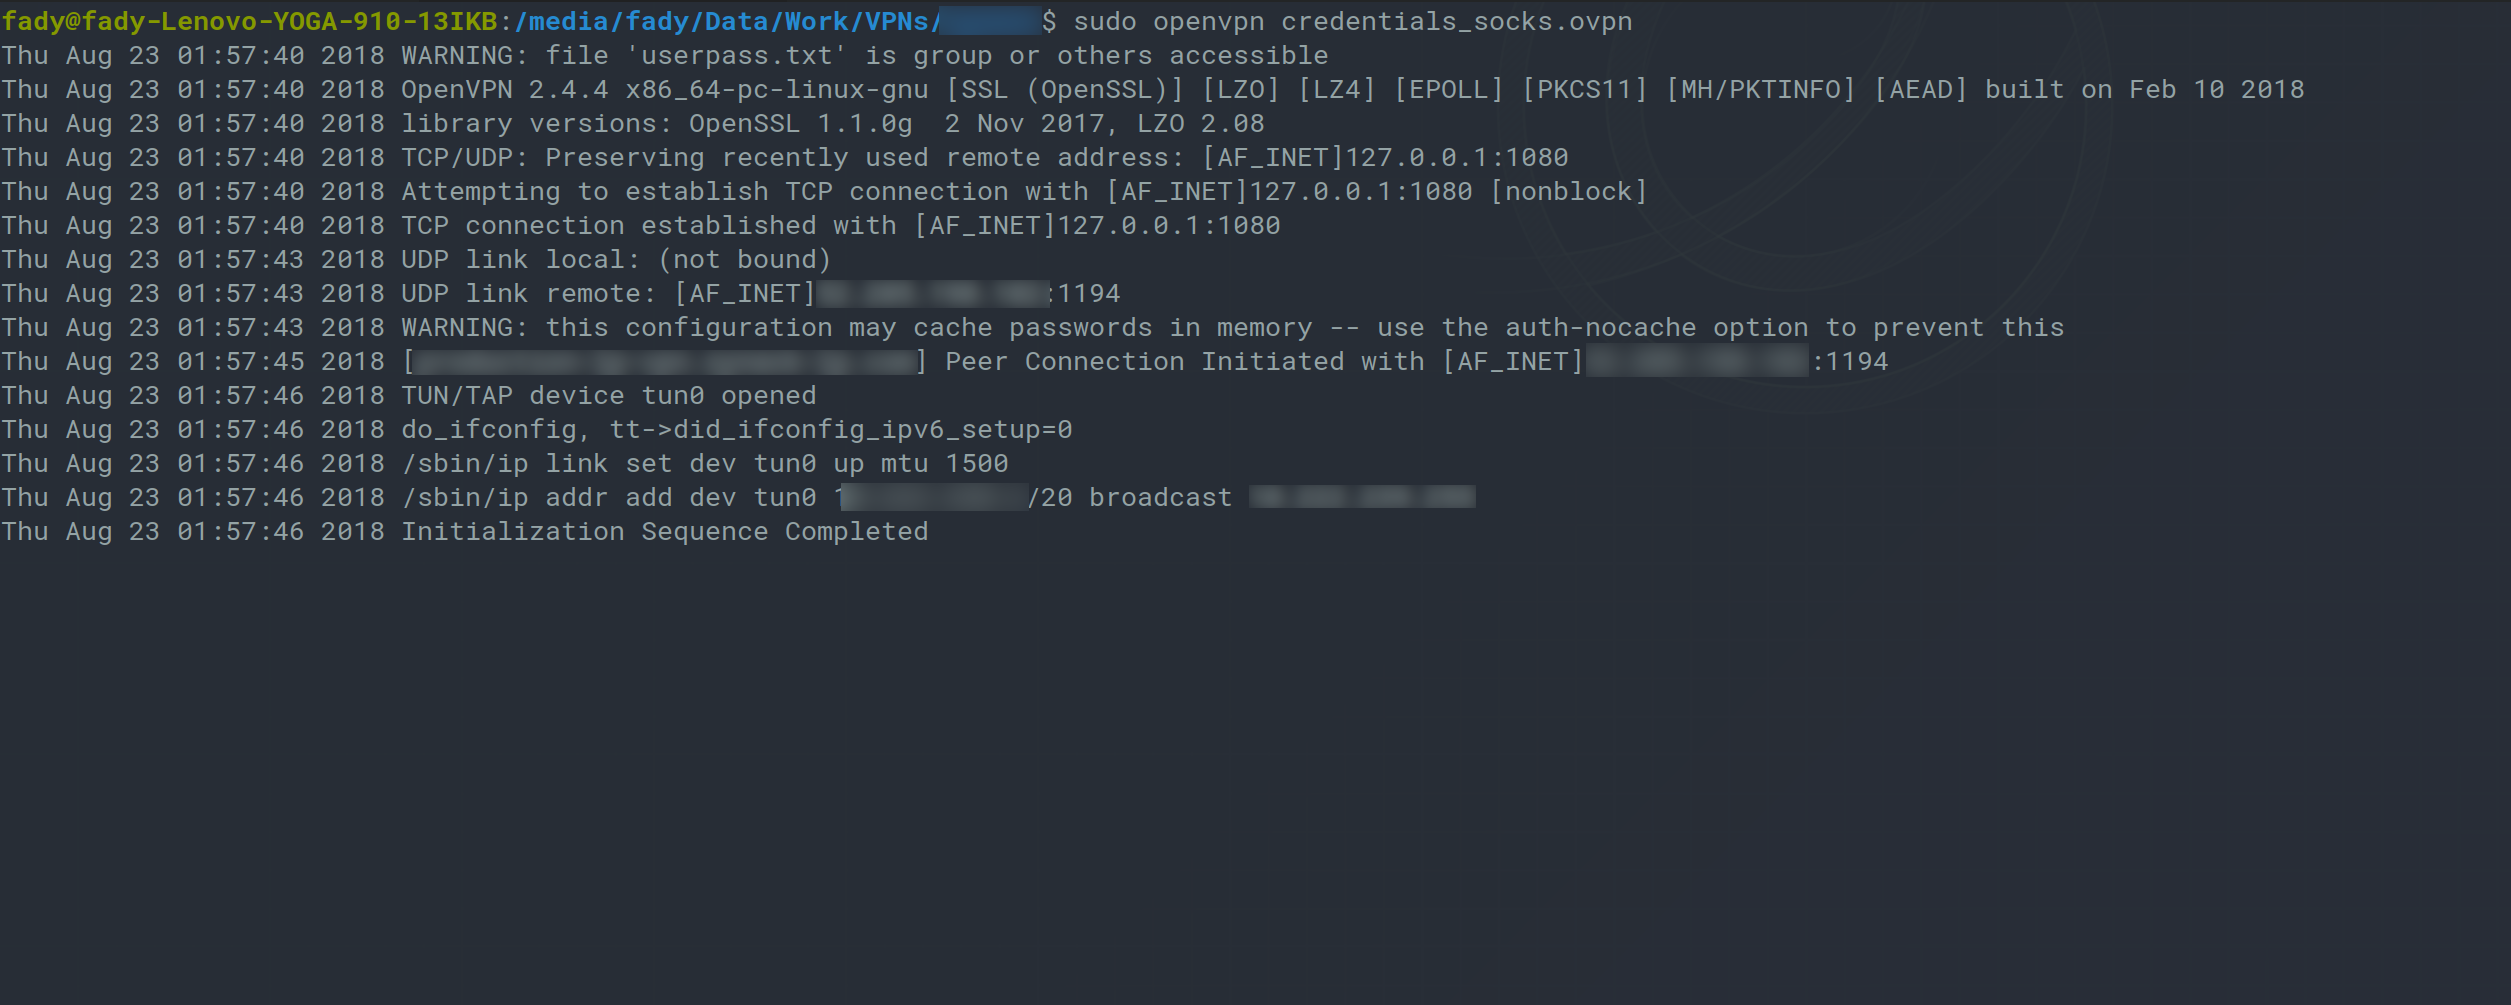
Step 3: Editing OpenVpn Connection File
- Now we need to change the openvpn client configuration file to use our local socks proxy, to do so we add the following two lines to your openvpn configuration file (replace EXTERNAL_SERVER_IP with your server IP and leave everything else without any changes).
socks-proxy 127.0.0.1 1080
route EXTERNAL_SERVER_IP 255.255.255.255 net_gateway
- Now connect using
openvpnclient as usual, for example:
sudo openvpn credentials.ovpn
- Works like a charm, and the connection should be established with out problems